Having a clean fridge is important for a number of reasons, and you will find that getting it clean is actually a rather easy part of our domestic cleaning. Whilst it is more commonly thought of as a part of your deep cleaning process, you should certainly attend to the fridge at least once a month, as otherwise it can get out of hand. If you feel like this is too often, then it may be worth having a contract cleaner, or a professional cleaning service round once a month, perhaps to do that and any oven cleaning, or even upholstery cleaning that you need to get sorted. Have a look over the following fridge cleaning tips and tricks to see if there is anything that you could be doing to improve on your technique when it comes to the house cleaning.
1. First off, you need to empty the fridge. For this reason, it makes sense to do your kitchen cleaning at a point when you have less in the fridge to need to remove. The process of cleaning the kitchen will only take ten to twenty minutes, but the part where you take out and replace the food from inside will be a little longer. You should look during this process for any jars or food packets that are not needed any more, as left overs can be left untouched in there for ages, and get smelly and disgusting. You will find that there are probably more stains and things to get cleaned up when you have emptied the fridge than you may have thought there would be.
2. Take out the shelves. These are usually removable, and will be made of glass, wire or plastic. Whatever the case, you should be able to fit them in a sink full of water and a bit of washing up liquid. Leave them to soak for a while as you attend to the other steps in the fridge cleaning process, and then when you get a chance, wash them up as if they were plates. Having soaked them, the dried on mess should have softened, and you won’t usually need much more than a rough sponge to get rid of the worst of the dirt.
3. Take your sponge with some surface cleaning spray on it, or some washing up liquid, and run it around the inside of the fridge. You will find that it takes a minute or two to cover the whole of the inside, but once you have gotten a bit of a lather up, you can leave it to soak into the dried dirt. Once you have left it for a minute or two, you can get to scrubbing away the dirt with the rough side of a sponge. If the dirt is particularly dried on, don’t resort to wire wool, as get insides of most fridges are made from plastic, and this will scratch very easily if attacked with metal cleaning implements.
4. You can clean the outside of the fridge if you feel like it is necessary. Do make sure that you pull it out from under the counter if you have a half sized one, to give it a proper clean, as it can get really dusty down there!
5. At this point, all there is to do is replace the shelves and the food that you took out! Be sure that you clean off the containers, so that you are not putting dirty things back in to your newly cleaned fridge, and be sure to keep good care of it!
Before diving into deep scrubbing, take 5–10 minutes to walk through your space and make note of:
High‑traffic floor areas (carpet traffic lanes, dirt buildup)
Bathrooms and restrooms (fixtures, grout, sinks, mirrors)
Break rooms or kitchens (leftover grease, fingerprints, appliances)
Entryways (mud, pine needles, moisture)
Office desks or home workspaces (clutter, dust, cables)
Windows and tracks (condensation, dust, fog residue)
A simple audit keeps you focused and prevents overwhelm.
2. Deep Clean the Areas You Avoided During the Holidays
Even the most organized homes and businesses get behind in December. January is ideal for tackling:
✔ Carpet & Upholstery
Holiday gatherings, winter weather, and pet traffic can grind dirt deep into fabrics. A professional carpet or upholstery cleaning:
Removes allergens
Improves air quality
Restores freshness to your living or office space
✔ Kitchens & Break Rooms
This is one of the most used areas in any setting. Degreasing, sanitizing, and wiping down appliances makes a huge difference.
The CDC recommends regular disinfection of high‑touch surfaces to reduce the spread of viruses — making January the perfect time to reset kitchens and bathrooms.
Winter humidity + heavy traffic = grime. A proper reset includes:
Scrubbing grout
Polishing fixtures
Sanitizing high‑touch surfaces
Removing soap scum and calcium build‑up
✔ Bedrooms & Office Spaces
Fresh linens, dusted blinds, decluttered surfaces — small steps that improve sleep and productivity.
3. Businesses: Perform a January Janitorial Reset
January is the best time to reorganize your cleaning plan for the year. A clean office helps reduce sick days, improve morale, and impress clients.
“OSHA notes that good workplace housekeeping improves productivity, reduces hazards, and boosts employee morale — all ideal goals as your team enters 2026.”
Reviewing your cleaning frequency (1x/week, 2x/week, nightly)
If you’re juggling staff schedules, customers, and deadlines — outsourcing your janitorial routine eliminates stress instantly.
4. Simplify Your Life With a 20‑Minute Declutter Routine
January is declutter season. If you don’t know where to begin, use this easy strategy:
Pick one area per day. Spend 20 minutes. Stop when the timer ends.
Great spots to start:
Entryway drop zone
Kitchen pantry or fridge
Home office desk
Vehicle interior
Supply closets
Laundry room
Office file cabinets
Small steps, done consistently, create massive momentum.
5. Improve Your Indoor Air This Winter
Closed windows and damp weather can make your indoor air stale — especially in coastal areas like Eureka, Arcata, and McKinleyville.
Winter months can reduce ventilation and trap allergens indoors. According to the EPA’s indoor air quality guidelines, improving airflow and reducing pollutants can significantly improve comfort during colder seasons.
With over 30+ years of award‑winning service, certified staff, and proven systems, A‑1 Cleaning Service handles the jobs that take your time and energy — so you can focus on what matters most.
Start Your New Year Fresh With A‑1 Cleaning Service
Kick off 2026 with a cleaner, brighter, healthier home or workplace.
📍 Serving all of Humboldt County: Eureka, Arcata, McKinleyville, Trinidad, Fortuna, and beyond
🧽 Book online in under 1 minute: A1Clean.com 📞 Text or Call: (707) 442‑3229
Renting a storage unit Christiansburg is an ideal option to have extra space to store your belongings temporarily. It’s an asset that’s practical to have if you only have limited space at home or your workplace. However, it’s also a responsibility that you have to deal with.
Paying to rent a self-storage space from someone like Jim’s Self Storage Melbourne is like renting an apartment; you have to maintain it yourself. You can’t have the provider do it for you because your stuff is in it, and you’re spending good money for it. An important part of maintaining is ensuring its cleanliness, particularly if you’ll use it for the long run.
Occasional cleaning of your storage units Lynchburg is essential to keep your belongings in good condition. Though you won’t be using most of what’s in it, it still makes sense to keep them clean when the time comes that you’ll need them. In this article, you’ll find some ways to keep your self-storage unit clean.
Declutter and take everything out
Regardless of if you only have a few items stored in your unit, you still have to declutter. This is all the more necessary for those whose units are full. You should also do this even if you’re cleaning yours for the first time.
Proper decluttering is done by removing every content of your self-storage. Most storage facilities are left closed and are only opened a few times annually, which causes dust and dirt to accumulate. So before you start cleaning, you should take all your stuff out first.
Remove all the items in every container or box it’s packed in. You can then group them so you can sort them in preparation for individual cleaning and return. As for the boxes and cartons that you think you won’t be needing, you could contact services similar to Rubbish Removals Clayton in your area to get those whisked away for your home and yard to look spick and span!
Dustproof your things
You can avoid dust accumulation by replacing the packing material of your belongings. Instead of using traditional boxes for packing, use plastic containers. After you’ve decluttered, removed each item, and cleaned them, put them in plastic containers before returning them inside.
Plastic containers are more durable and easier to clean. They’re also less susceptible to pests like termites, so they’re safer for books, files, and documents. Just don’t stuff them with too many heavy items, or they’ll break after a short time due to the weight it carries.
Another way of dust proofing your things inside your self-storage unit is to elevate them. The ground is normally where dust accumulates, so keeping them off is a wise thing to do. You can bring in shelves or pallets to provide elevation for your items in order to keep enough air circulation inside your storage unit.
As for larger items like furniture or hefty appliances, you should cover them with plastic wraps. In case you don’t have those, you can use old blankets as a good alternative.
Stick to a regular cleaning schedule
Lastly, you have to check and clean your storage unit regularly. Regularly means on schedule, and you should follow it religiously. It’s recommended that you should do it at least once or twice every year.
Remember that even though you’ve done everything to keep it clean the last time, it’s not a guarantee that it’ll remain that way. Maintaining it is the key for it to stay clean. It’s also beneficial to check to see if there are items that you may not need or damaged ones to decide whether to repair or sell them.
Final words
The best way to go about having a self-storage unit is to keep it clean. Do everything you can to maintain cleanliness inside for the sake of your belongings. Keep in mind that you stored them there because they still have value, so keep your self-storage dirt-free to protect them.
Author’s Bio: William Ross worked for a storage and logistics company before he finally decided he wanted to pursue his writing career. Today, he writes about the importance of storage facilities and organization, and how this will be the future of the storehouse industry.
Buckingham Palace is big. Try to imagine a single residence with 775 bedrooms, 78 bathrooms, 92 offices, 19 different staterooms, 760 windows, 350 clocks, and a cash machine, and you’ll soon have an idea of how big the Queen’s home actually is.
Nowadays the Queen — and the Royal Family at large — is more of a diplomat than a sovereign. The result is that Buckingham Palace entertains more guests now than at any other time in its history — about fifty thousand people a year, it is reckoned. Piers Morgan once asked the Queen if she liked hosting so many guests. The Queen replied: “[Well Mr Morgan] how would you like 12,000 complete strangers trampling over your lawns?”
And that’s just guests and doesn’t include actual footfalls from tourists. The Queen’s comment is amusing because it begs the question: How does the Queen keep the Palace clean? At what cost? Here’s how, in five ways, Her Majesty pulls it off.
With a ‘Royal Army’ of cleaners
Things sound less daunting when you realise the Queen employs over 800 cleaners to look after the Palace. Most of them are paid a surprisingly low amount — about £17,000 a year. But they do get free accommodation and free meals in the Palace in addition to their duties, along with a pension scheme and 33 days’ holiday.
The cleaners must work hard: as the Palace has a reputation for being remarkably free of dust. Despite its titanic size, the Royal Army of cleaners quickly removes any dust before it is allowed to settle in the historic home.
The Palace’s garden also has a Royal Army, but a different kind: a legion of eco-gardeners. This Army tends to the 42-acre grounds of the palace. They recycle all the green waste and, using their advanced horticultural skills, take the droppings and straw from the Queen’s stables, start the process of rotting them, and then use them to prepare new flower beds.
A third kind of Army is drafted for one of the Queen’s legendary garden parties, but not to repair the trampled flower beds. This army of 400 staff uses all of its military capability on the grinding out of 20,000 sandwiches, over 20,000 slices of cake, and in the brewing of over 27,000 cups of tea.
With super-sized telescopic window-cleaning poles
The Queen requires her window cleaners to use 100-foot long telescopic poles to clean the near-thousand windows of Buckingham Palace. The Queen requires them because she — like any other person — has the right to a private life. In the few rooms that are off-limits to the forever curious public, these 100-foot poles rule out any possibility that anyone from the outside can effectively peer into those private quarters.
By having ‘unique’ job roles
Perhaps the greatest threat to the maintenance of Buckingham Palace is that so many roles it requires are threatened with extinction. Twice a year, to correspond with the turning of the clocks forwards and backwards, the Queen employs a ‘horologist’. But horology is studied by precious few people. The British Horological Institute only has 2,400 members, and in 2013 only 86 people in the entire country had the qualifications necessary to adequately tweak the Queen’s clocks.
Other jobs the Queen requires include the role of cleaning “historic vases and irreplaceable paintings” (a scantily paid 20 hour a week job, with a salary of under £10,000 a year); a “frames conservator” who looks after the picture frames of said irreplaceable paintings (the salary for this is a modest £27,800 a year); and a “senior art handler”. The latter role is tasked with handling over 8,000 paintings and 3,000 miniatures and is paid £30,000 a year.
The Queen even has her own in-house pot washers. With there being so many garden parties and guests each year, a handful of kitchen staffers are paid to non-stop wash pots all year round.
The most glamorous job role of all (in both stature and pay) however, is perhaps the “Master of the Household” position. At a handsome £122,000 a year, the Master has the job of ordering all of the domestic staff about in the Royal kitchens, along with any pages, footmen, the Housekeeper, and the Housekeeper’s staff.
By having a “110 percent” culture
Unsurprisingly, the Queen requires her staff members to give their all and cut no corners. For example, staffers in the dining room employ what is known as a ‘Butler’s Ruler’ to make sure each plate is exactly an inch from the edge of the table.
Folding is also important to get right. The Queen once remarked to a staffer, named Barbara Allred, that “one could cut one’s lip” on the stiff napkins that she had set out improperly. The “110 percent” culture is perhaps no better noted than in the schemes that the Palace runs for the public. Anyone can train to be a royal-standard butler if they can find £7,000 and a place to stay near the training grounds of Blenheim Palace in Oxfordshire (etiquette lessons are also included). The course may take four weeks to complete but then, and only then, can one properly eliminate the fear of having one’s Queen cut her lip on the napkins.
— This article was written by Neil Wright on behalf of Thomas Cleaning.
Cleaning the house is one of those things that most people just don’t like to do. Getting out the rubber gloves, smelling all of the chemicals and spot cleaning with a toothbrush isn’t exactly the most appealing activity.
However, different areas in your house can be a breeding ground for bacteria, mold and fungus. Places you didn’t know were hazardous like your kitchen and bathroom sinks can become some of the most disgusting places.
So how often, exactly, should you clean each area of the home? We’ve got your answers!
Living Rooms
Your living rooms are naturally some of the cleanest parts of the home. However, we can track dirt in or kids and pets can make spills, so it’s best to keep up with this area fairly often. Here’s how often you should clean things in your living room.
Carpet
Once a week: Your carpet is a place where dust, dirt and allergens tend to hide. Giving your floors a weekly clean with a good-quality vacuum cleaner is super important. In places with constant foot traffic, you may want to vacuum more than once a week.
Protip: If you need to spot clean a stain, you can mix a teaspoon of liquid dish detergent with a quart of warm water and teaspoon of white vinegar. Apply this mixture on the spot and then rinse and blot dry!
Couch
Once every two weeks: Most people don’t realize how much dirt, dust, fur and oils your furniture absorbs. It can host allergens and other nasty things if left unattended. Regular cleaning can help extend the life of your furniture, which means a surface cleaning every couple of weeks using the upholstery attachment on your vacuum.
Protip: You should also plan to have a professional clean the upholstery about once a year, depending on how much you use the piece of furniture. If you develop a stain in between cleanings, put your iron on the “steam” setting and wave it back and forth over the problem spot.
Windows and Blinds
Once a month: The windows and blinds in your house can accumulate dust and dirt. To keep the mess at bay, you should try to wipe down your windows and blinds at least once a month.
Protip: When cleaning your blinds, you can use an old sock dipped in a 50/50 solution of vinegar and water. Stick your hand inside the sock and swipe it over each blind for a quick and easy clean.
Ceiling Fans
Once a month: Have you ever had dust accumulate on the blades of your ceiling fan? Since it’s so high up, many people forget that it’s up there until the dust bunnies have already taken over and interfered with the function of the fan. To prevent dust buildup, clean the top of your fan once a week.
Protip: You can prevent the dust from falling everywhere if you slide each fan blade into a pillowcase, enclose the case around it, then slide it off.
Furthermore, make sure you have a ladder that lets you reach high enough to comfortably reach the fan without pulling on it. Otherwise you may potentially break the wire fixtures, requiring emergency electrician options to fix or replace it.
Baseboards
Once a month: Your baseboards can collect dust and dirt, but most homeowners don’t see cleaning the baseboards as a priority. If you keep up with cleaning them once a month the task won’t be too time-consuming.
Protip: Use the brush attachment on your vacuum to swipe the top edge where the dust settles. If there are scuffs or spills, wipe them away with an erasing sponge.
Fireplace
Once or twice a year: If you own a fireplace, it is most likely that you would use it mainly in the winters. Cleaning it once a year, preferably just before or after the entire timespan of you using it, can be ideal. The same goes with the chimneys.
Protip: Do not try to clean your fireplace by yourself. There can be a high chance of you getting the dust and soot everywhere and not really getting anything cleaned. Instead, you can hire professionals for Milwaukee chimney sweeping services (or based on your location), and let the experts handle the job.
Bedrooms
Your bedroom may accumulate more germs than you realize. Since you spend a good amount of time here (approximately one-third of your life), it tends to accumulate germs. How often exactly should you clean your sleeping quarters? We explain here.
Bed Linens
Once a week: Bed sheets can accumulate a serious collection of sweat, body oils, dirt from outside, and more. When they get too dirty they can become a breeding ground for bacteria and fungi. Those are not things you want sharing a bed with you! While most people wash their sheets only every four weeks, experts recommend washing them once a week.
Protip: If you have white sheets, toss a squeeze of lemon juice in the washer. It’s a natural brightener without the chemicals in bleach products.
Duvet Cover
Once a month: If you use a top sheet you can get away with washing your duvet cover once a month. If you don’t, you may want to wash it every two weeks just to be safe. Like pillows and bed linens, duvet covers can be a breeding ground for bacteria, fungus and dust mites.
Protip: Changing a duvet cover is on most people’s list of top annoying things, but did you know there is a simple hack to make the job easier? Use the burrito method for an easy switcharoo. Turn your duvet cover inside out and place comforter on top. Roll it up, tuck it in, and unroll it-it’s magically on!
Mattress
Every three months: Your mattress is another thing that can accumulate sweat, dust, dust mites and allergens quite easily. To keep the bacteria and fungi at bay, clean your mattress with the seasons. You can use the upholstery attachment to vacuum the mattress, and clean its cover (if it has one).
Protip: Spot clean oil stains or food spills with a mix of baking soda, salt and water. Cover the stain, let it sit for 30 minutes then wipe it away with a damp cloth.
This might not always be the best way forward, you have to know when your mattress has had enough and you need to upgrade. There are plenty of places to find a new mattress online. Perhaps it is a better bet to find some reviews of styles and materials so you know what might be best for you. Everyone has their own unique desire of comfort. Start with this interesting aldi mattress as an example of a good all rounder mattress.
Closets
Twice a year: It’s usually a best practice to do a full-closet cleaning and purge twice a year. While it can seem like a daunting task, having a clean closet full of clothes you actually wear can be a game changer for your morning routine.
Protip: When purging, keep basic, classic items and toss anything trendy you haven’t worn in over a year. You can also ditch duplicate items or things you don’t feel comfortable in. Your closet should be full of only things that make you happy!
Bathrooms
We all know the bathrooms can get pretty gross, but most people probably still don’t clean them as often as they should. Things like bath towels and bath mats can accumulate mold, while your toilet and sink can be a bacteria breeding ground. Here’s how often you should clean the things in your bathroom.
Toilet
Every day: Toilets have a reputation for being the dirtiest place in the house, but the average toilet is cleaner than you think. To make sure your toilet stays sanitary, it’s best to give it a light clean every day, then give it a deep clean once a week.
Protip: Want to keep toilet stains at bay? Pour vinegar in the top of your toilet and let that sit while you spray vinegar around the seat and clean. If you are continuing to get excessively nasty smells from your toilet it might be a sign of a plumbing issue. The Summers Plumbing Heating & Cooling – plumber website might be able to help you if you suspect this to be the case.
Bathroom Sinks
Every day: Did you know that your bathroom sink is even dirtier than your toilet seat? The bacteria travel from your hands onto the sink every time you wash your hands, so it’s incredibly important to disinfect your bathroom sinks every day.
Protip: You can use disposable disinfecting wipes daily to make sure the area stays sanitized. It’s easy, and you can throw the whole mess away afterward!
Bath Towels
Every three or four uses: Towels are tricky, because the more you use them, the more often you will need to change them. If you take more than one shower a day, or if you have multiple family members using a towel, it may need to be cleaned once every couple of days.
Protip: On the other hand, if you’re the only one using it and you shower at the gym three times a week, you may be able to get away with washing it weekly. Be sure to wash your towels in water that is at least 140 degrees Fahrenheit (60 degrees Celsius) so that you kill all of the bacteria that’s inevitably breeding them.
Shower Grout
Once a week: Your grout can be one of the most annoying things to clean in your bathroom. However, it can also make the most impact on how clean your bathroom looks. Nobody likes a shower with dirty grout, so keep up with cleaning it weekly.
Protip: To clean, dip a toothbrush in bleach and scrub any discolored areas. Every once in a while you will need to seal your grout so that water and mold can’t seep in.
Bath Mats
Once a month: Bath mats that have rubber backing can wear out faster if they are washed more than once a month. However, mats that don’t have a rubber backing, or that are in a frequently used or extra-dirty space like the kids’ bathroom can be washed more often.
Protip: If a rug doesn’t have time to dry out it can harbor all kinds of mold and fungi. To kill all signs of life, wash the rug on high heat. Rugs with rubber backing should be air-dried.
Bedrooms
Your bedroom may accumulate more germs than you realize. Since you spend a good amount of time here (approximately one-third of your life), it tends to accumulate germs. How often exactly should you clean your sleeping quarters? We explain here.
Bed Linens
Once a week: Bed sheets can accumulate a serious collection of sweat, body oils, dirt from outside and more. When they get too dirty they can become a breeding ground for bacteria and fungi. Those are not things you want sharing a bed with you! While most people wash their sheets only every four weeks, experts recommend washing them once a week.
Protip: If you have white sheets, toss a squeeze of lemon juice in the washer. It’s a natural brightener without the chemicals in bleach products.
Duvet Cover
Once a month: If you use a top sheet you can get away with washing your duvet cover once a month. If you don’t, you may want to wash it every two weeks just to be safe. Like pillows and bed linens, duvet covers can be a breeding ground for bacteria, fungus and dust mites.
Protip: Changing a duvet cover is on most people’s list of top annoying things, but did you know there is a simple hack to make the job easier? Use the burrito method for an easy switcharoo. Turn your duvet cover inside out and place comforter on top. Roll it up, tuck it in, and unroll it-it’s magically on!
Bed Pillows
Every three months: While you should be washing your sheets (and pillowcases) once a week, you should be washing the pillows themselves once every three months. Pillows can play host to critters and debris like dirt, oil, skin cells and even dust mites.
Protip: Most down-alternative pillows can go in the washing machine, while feather pillows need to be dry cleaned. Buy down-alternative to ensure cleaning is easy and frequent.
Mattress
Every three months: Your mattress is another thing that can accumulate sweat, dust, dust mites and allergens quite easily. To keep the bacteria and fungi at bay, clean your mattress with the seasons. You can use the upholstery attachment to vacuum the mattress, and clean its cover (if it has one).
Protip: Spot clean oil stains or food spills with a mix of baking soda, salt and water. Cover the stain, let it sit for 30 minutes then wipe it away with a damp cloth.
Closets
Twice a year: It’s usually a best practice to do a full-closet cleaning and purge twice a year. While it can seem like a daunting task, having a clean closet full of clothes you actually wear can be a game changer for your morning routine.
Protip: When purging, keep basic, classic items and toss anything trendy you haven’t worn in over a year. You can also ditch duplicate items or things you don’t feel comfortable in. Your closet should be full of only things that make you happy!
Kitchens
Believe it or not, your kitchen is one of the dirtiest place in your house. This is pretty unsettling considering we cook our food here. But, that’s precisely why it’s so dirty! Germs like e.coli can stick on cutting boards, hide in your fridge and set up camp in your sink. Here’s how often you’ll need to clean to maintain a safe and sanitary cooking environment.
Kitchen Counters/Sink
Every day: The kitchen sink and counters can be another place that germs accumulate. Since you’re often cutting meat and dealing with food products, the kitchen sink can actually end up being one of the dirtiest places in the whole house. Also, while doing your dishes, make sure you don’t put food particles into the sink. Regular deposits of leftover food can end up clogging up the sink and you may have to call in a professional plumber from firms like AC Plumbing (https://www.acplumbing.com.au/plumber-brisbane/) or the ones like them in your vicinity who can fix the clogging issue. Additionally, a clogged sink can be the perfect place for bacteria and viruses to thrive. Therefore, it’s imperative that you disinfect your bathroom sinks every day.
Protip: To keep your eating area sanitary, use one tablespoon bleach in one quart of water and spray down the sink daily. You can also use disposable disinfecting wipes here.
Sponges
Every week: Unfortunately, the trend is to keep your kitchen sponges until they smell and fall apart. Letting them get this bad means that they’re teeming with bacteria, funguses and things that can potentially make you sick. You should be cleaning your sponge weekly, and replacing them every two to three weeks.
Protip: For their weekly cleanings, mix cups bleach in one gallon of water and let your sponges soak for several minutes. Then just rinse and you’re done!
Oven
Once a month: Many people think that cleaning their oven is something to save for a special occasion, but the longer you wait to clean it, the harder it will be. Keeping up with monthly cleanings is the best way to make sure your oven stays in good working order.
Protip: A trick to making the process easier is to put a bowl of water in the oven and turn it up to high for 20 minutes. This will help loosen some of the dried dirt and grease. Then, wait for the oven to cool before wiping it clean!
Dishwasher
Once a month: Most people don’t realize that their dishwasher can accumulate all sorts of gunk and grime. It cleans the dishes you eat off of so you will want to make sure you give it a routine cleaning once a month (and a deep cleaning once or twice a year).
Protip: Place a cup of vinegar inside the dishwasher and run it on a hot water cycle. This is a great way to routinely clean your dishwasher and keep it in tip-top shape.
Refrigerator
Four times a year: A clean fridge is a safe fridge, yet nobody likes to deep clean it. While it’s best to give it a wipe down daily, you should only need to give it a deep clean about four times a year.
Protip: When you’re getting ready to clean the fridge, purge it of any ingredients that are past their “use by” date. Remove and soak the drawers in warm water while you wipe down the rest of the fridge. It’s best to work in sections so that all of your food doesn’t get too warm!
Few things are more important than maintaining a clean home. Living in a clean, orderly environment does wonders for one’s mental state, but it also saves money down the road-a home left alone for too long might result in having to hire professionals to perform drastic measures such as power cleaning stubbornly stained windows or other cleaning services that cost a pretty penny.
While most agree that it’s necessary to clean their home regularly, many people, when sprucing up their home, prefer to use store-bought cleaning products. For cleaning the house in a better way, Refillable Cleaning Products can be considered as an alternative to those store-bought products. Refillable bottles could prevent you from losing out money due to the frequent purchase of new bottles. Instead, it could be much more cost-effective to buy refills. However, there might be (store-bought cleaning) products that are made with harmful chemicals and are usually sold at higher prices. Apart from costing money, these products can irritate not only the skin, but the eyes and throat as well. They can even cause headaches and other health problems.
They’re also wholly unnecessary. Using simple ingredients, you can make your own effective cleaner and disinfectant without going out to the store and without these potentially hazardous chemicals. According to Nathan Kiening, pests like roaches are most likely to be found in kitchens because they have easy access to scraps and crumbs that they can eat. If this seems to be the case, by using the contents you have lying around at home, you could create a pest control spray on your own. However, you should keep in mind that it might not always be effective, and you might need to hire a pest control company to help you get rid of them. That said, here are six simple homemade recipes for safe, environmentally friendly cleaning agents.
A Simple Homemade Glass Cleaner (h2)
This easy DIY glass cleaner utilizes ingredients you can easily find around the home. And it promises a streak-free shine!
Take the following ingredients and mix them in a spray bottle:
1 Tbsp. cornstarch
1/4 cup white vinegar
1/4 cup rubbing alcohol
2 cups water
8 drops of an essential oil of your choice for fragrance. (This could include lemon, lavender, orange, or any scent you’d like.)
You should have most of these ingredients handy, though you might need to pick up essential oils, which you can find easily online. They’re also available at many supermarkets and health stores such as Target and GNC.
The best news about this recipe? It costs only roughly 33 cents to make a batch. Your windows, and wallet, will thank you.
A 2-Ingredient Kitchen Cleaner and Deodorizer (h2)
An even more simple, and equally inexpensive, homemade cleaner needs only two simple ingredients. For a simple way to clean kitchen countertops, appliances, and the inside of your refrigerator, simply combine the following items:
4 tablespoons baking soda
1 quart warm water
You can use these ingredients in a variety of ways. A simple solution of baking soda and water can be used to deodorize surfaces and clean counters, but you can also remove spots from stainless steel by applying a paste of baking soda and water on the steel and gently scrubbing the affected area with a damp rag.
An Easy and Safe Brass Cleaner (h2)
If you have any brass items in your home, you know that they can tend to tarnish easily. But there’s no need to go to the store and pick up a chemical brass cleaner. You can polish your brass with just three simple ingredients:
1 teaspoon salt
cup vinegar
Flour (until mixture becomes a paste)
Once your vinegar, salt and flour has acquired a paste-like consistency, rub the cleaner into your brass and leave it for ten minutes. Once you rinse it off with warm water, you should find a tarnish-free finish!
A Safe and Affordable Marble and Granite Cleaner (h2)
When cleaning stone surfaces, it’s best to avoid chemical-laden cleaners. But even natural acidic liquids such as vinegar or lemon juice can cause permanent damage to these surfaces.
Thankfully, you don’t need much to create a mixture that’ll perfectly buff and clean marble and granite countertops. Simply combine:
2 cups warm water
2 drops liquid dishwashing soap
That’s it! A little bit of dishwashing soap in warm water will clean your countertops without damaging them. The key here is to not let the wet surface air-dry, once the solution has been applied, buff it off with a dry towel or soft cloth. If you have just had new custom countertops put in, you may want to speak with the company who provided them first to see how best to clean your own. If they agree with this type of cleaning, then carry on with what you were going to do.
An All-Purpose Cleaner for Everyday Use
This recipe is similar to the glass cleaner, but cuts out the rubbing alcohol and cornstarch added to avoid a streaky finish. What you’re left with is a simple, effective all-purpose cleaner that you can use on most surfaces. Take the three following ingredients and add them to a spray bottle:
2 cups warm water
cup distilled white vinegar
20 drops essential oil (of your choice)
Assuming you’ve already procured essential oil for your window cleaning recipe, you can find more use for the bottle to help give your all-purpose cleaner a nice, fresh scent. While we would not recommend using this cleaner on glass or stone countertops, it’s a perfect cleaner for wood, plastic, and everyday items around the home.
Which finally brings us to our last cleaner recipe.
A Natural and Effective Cleaner That’s Guaranteed to Break Up Grease
Arguably the most difficult part of cleaning is dealing with built up grease and gunk, especially in the kitchen around your stove and oven. Most cleaners that can effectively break up these greasy areas are filled with toxic chemicals and fumes that can impact your health with too much exposure.
This recipe, while requiring some ingredients you might have to go out of your way to purchase, helps knock out these grease stains without any nasty chemicals. It requires orange essential oil (though lemon works in a pinch) and castile soap, which you can find at most supermarkets and national chain pharmacies throughout the nation, or you can order it online.
Either way, castile soap is a vegetable-based soap that is environmentally friendly and will help give your degreaser some disinfectant qualities. Once you’ve acquired those two ingredients, you’re good to make your cleaner:
2 tablespoons castile soap (make sure you get a liquid soap version, as castile soap comes in both hard and liquid varieties)
1 and cups water (if you have distilled water, like those sold at Golyath, it will give your cleaner a longer lifespan)
20 drops orange essential oil
And that’s it! Put those three ingredients into a spray bottle, and you’ll be able to knock out grease stains in a heartbeat. And you’ll do so without filling your home with toxic fumes. In fact, this cleaner will smell downright refreshing.
With these six natural, safe, and homemade cleaning products at hand, you’ll find yourself saving money and saving yourself from exposure to harsh chemicals. It’s a win-win!
Because of these difficult times, you probably are spending a lot of time in your room. There are two types of people. The first one, those that during the lockdown developed a love for cleaning and have everything nice and tidy. And the second, people who suddenly have a mess around them as if it were magic.
If you feel like you belong to the second group, then you might be feeling kind of guilty, but at the same time, without energy for cleaning your room. The whole pandemic situation has been a challenge, making us abandon our routines and leaving us with feelings of uncertainty.
But if you really want to start changing things, you better start by cleaning your room, and I’m serious. Dr. Jordan Peterson, a Canadian psychologist, believes that if you want to make an impact or to jump into bigger challenges, you first need to take care of your immediate environment.
Start with the fundamentals:
Make Your Bed
This is the number one thing when cleaning your room. Yes, I know you’re going to sleep in a few hours again, but think of it that way. Your day begins and ends, and you need to have that same basic logic in mind. Be ready to start your day by waking up early and making your bed right away, so you know it’s time to do all the things you have planned for. Then, at the end of the day, you’ll be ready to rest in a neat, nice bed. Not only that, ensure that the bed of everyone in your home is kept clean and maintained. In case you have a person at home with limited mobility, keeping their bed clean is even more important. If a normal bed is posing challenges, you can consider switching it to a comfortable hospital bed for home use. This is important because keeping the bed clean is the first step in maintaining a healthy home and lifestyle.
Clean Up Your Clothes
You may have a mountain of clean clothes, and another pile that’s half-dirty. And honestly, I don’t know which one is worse. Make sure to grab all your dirty clothes and clean them thoroughly. However, before you wash all your clothes together, ensure that you do not put an elastane material with cupro. They are two different fabrics, and washing them together might just damage both of them. Instead, try and understand the needs of each of your fabrics. For instance, you can learn a bit about the fabric–cupro. See if machine washing is preferable. Search for detergents that can help retain the quality of the fabric. Once you are done with all these, then take up the task of washing clothes.
Also, do not ignore your recently-cleaned clothes. If possible, take your clean clothes and fold or hang them in your closet. When you finish, you’ll probably feel relieved and relaxed.
Clear The Clutter
Remember that by cleaning your room you’re also clearing your mind. Maybe you’ve been accumulating stuff without realizing it. If there are things that have been in the same place for ages, take them away or even move them to a storage unit for a specific time period (click here to learn more). Also, don’t forget to wipe the surfaces clean. In some cases, you might notice that you don’t even need much of the stuff that has been cluttering up your room for so long. You may not need to store these at all, which means you can either sell them, donate them, or if they are too old, throw them away. De-cluttering makes you realize how many things you have been hoarding, and that it’s finally time to get rid of a lot of those things. Consider getting in touch with a waste management service to come take what you don’t need.
Vacuum/Sweep and Mop
This is the final step. Once you’ve cleaned the mess around you, it’s time to really leave your room spotless. Reach as far under the bed as possible, don’t be lazy!
Get Motivated; Turn On Your Favorite Music
Make sure to have a good time while doing these chores. Music can inspire you and maybe you won’t just end with cleaning your room; perhaps you’ll start rearranging things from one place to another or have an easier time getting rid of things you don’t use anymore.
Keep It Beautiful
You need to be happy where you are. Your room is your starting point every day, so why not wake up in your perfect happy place? Use your creativity. Think about adding scented candles, placing flowers in your window, or putting houseplants around the room. You name it.
If you can learn the basics of how to keep your room in order, your mind will be clearer for new ideas, and then you can probably start making more significant changes in your life.
Is spending so much time inside making you go stir-crazy? Well with life outside seemingly on hold, this may be the perfect opportunity to make a few easy home improvements to transform your house into a nicer and more refreshed place to spend your days. From adding a pop of color to your front door to cleaning out your closet, here are 20 DIY home projects you can tackle to spruce up your space while you’re hunkered down.
Put leftover paint to use
Many of us probably have an extra can or two of paint lying around. So why not use it to add some pizzazz and depth to your rooms with these DIY home projects.
1. Give your cabinets a makeover
Painting kitchen cabinets a fresh new color is a fantastic way to completely transform your kitchen. If you tend to be more adventurous when it comes to color, your cabinets are a great place to have some fun. If you already have a lot of color in the room or if space doesn’t have much light, it’s best to go with white or neutral cabinets. Painting alone will not always suffice.
In such circumstances, cabinet refacing could be an option. This could be a fantastic way to give your kitchen a fresh, new look.
2. Make your mailbox the star of your front yard
Your mailbox is one of the first things people see when they pull into your driveway, so why not give your visitors a great first impression. Whether you live in a ranch-style house in Phoenix, AZ or you just bought a craftsman style home in Portland, OR, you can instantly boost your curb appeal by adding a fresh, vivid coat of paint to your mailbox.
3. Add a pop of color to your front door
Changing out your front door can be expensive, so painting your exterior door is an easy way to give the front of your home a makeover and also save some money in the process. Painting the inside of your front door is also a fun way to add a bold pop of color and some character into your home.
4. Give new life to old furniture
If the paint is chipped or wear and tear has gotten the best of some of your older furniture, a quick paint job can give it a new life. Transform a dated (but functional) dresser, nightstand, or bookshelf with this fun DIY project for a fraction of the cost it takes to replace it.
Clear the clutter
Getting organized can feel like a major undertaking, which is probably why a lot of us tend to put it off, and then put it off again and again. But since you can’t go anywhere, you might as well spend a morning or afternoon tackling the clutter you typically ignore.
5. Maximize the utility of unused corners with shelving
Running out of storage space? It’s time to finally make use of the corners in your rooms. Installing floating shelves is one of many DIY home projects you can try to create more space. You can get a melamine chipboard or whatever material you wish made to custom sizes and styles that fit the space and match the room. It’s a simple way to spruce up your wall decor while adding more storage in your home.
6. Clean closets
Chances are, you’ve opened up your closet and grabbed one of the same few items since spending most of your time indoors lately. Now’s the time to carefully clean out your closet and decide what you really need from those you haven’t touched in a few years. Start by taking every item out, setting aside the items you don’t need, and cleaning the inside of the closet. If you’re organizing a closet full of clothes, sort clothes into piles by season. Put clothes that you’re not currently using in the back of the closet, like that holiday sweater. Keep frequently used items in the front for easy access.
7. Organize photos
In a digital age, it’s likely that most of us have our photos stored online. But for those that still have hundreds of photos stored away in boxes, now’s the time to organize them. Start by grouping photos by date or event. Use leftover flashcards or cut up pieces of printer paper as an easy way to separate groups of photos in boxes. If you already keep your photos organized, think about digitizing them. You can use Google’s PhotoScan app to scan old prints and upload them. Organize your photos online into albums to better keep track of them and finally find that picture of your puppy when someone asks.
8. Rearrange bookshelves
Bookshelves may not initially come to mind when organizing, but they can easily make a space feel brand new. Think about taking some of the books you’ve got hiding away in a back closet and swap them with the current selection on your bookshelf. Wondering what to do with that collectible mug? Add it to your bookshelf for a fresh take on your decor. Best of all, it’s a free way to change up your space.
9. Tackle under-sink storage
The last place you probably think to organize is under your sink. From the bathroom to the kitchen, it’s likely filled with near-empty cleaners, dishwashing soap, or even makeup wipes. Set aside 10 minutes to toss out those old household supplies, instantly freeing up space to make way for all that hand-soap and disinfectant you just bought.
10. Organize your pantry
You may or may not have months’ worth of groceries in your kitchen right now. Before things get too cluttered, take this time to reorganize your pantry – move things around to maximize space, group like items together, and throw away expired items. You may want to break down the work into smaller parts to avoid being overwhelmed. For example, instead of cleaning out the entire pantry, just do one shelf or area at a time. It will be so refreshing to see the pantry all neat and tidy with everything in its place.
Transform your space with lighting
Nothing can change the look and feel of a room quite like choosing the right lighting. The perfect lighting can lift your spirits and make your home a more comfortable place to spend time.
11. Replace your lightbulbs
If you have a few extra light bulbs lying around, go from room-to-room and replace any that are burned out. You can also completely change the ambiance in your home simply by replacing any harsh white bulbs with calming yellow ones.
12. Switch up lamp shades
Lamps are commonly overlooked in the design of a home, but they add a lot of character and style to a room. So take a look at the shades on each of your lamps. If you have a similar size lamp in another room, swap the shades to give your space a new feel. You can also update a boring old lampshade with a few DIY home projects such as adding fun print or pattern, or a coat of paint.
Tackle those forgotten about cleaning projects
Since you’re spending so much time inside, you’re probably noticing all of the overlooked cleaning projects around the house. If you tackle them now, you’ll be rewarded with a living space that feels brighter and refreshed.
13. Restore rugs and carpets
By now, you’ve probably noticed that your carpets and rugs might not be in the same state they were when you moved in or had them replaced. Maybe you don’t even remember the last time they were properly cleaned. Even if you can’t hire a professional to clean your carpets, you can likely rent a carpet cleaner from your local hardware store or carpet cleaning company.
14. Clean under your bed
When was the last time you looked, let alone cleaned under your bed? This is one of those DIY home projects that everyone needs to tackle. The space under your bed is a breeding ground for everything from dust to forgotten items. If you use the space under your bed for storage, like seasonal clothes or extra bedding, make sure you’ve stored those items in vacuum-sealed bags to prevent moisture and mold buildup. Bed skirts also collect dust so throw those in the wash while you’re busy vacuuming underneath.
15. Refresh tile grout
Refresh your entire bathroom by cleaning and brightening your tile grout. Cleaning grout requires two things: a grout brush or sponge and a suitable cleaner. While there are plenty of store-bought grout cleaners available, it is just as easy to do this with ingredients you already have on hand, such as vinegar and baking soda.
16. Pressure wash your home’s exterior
Get some fresh air and restore your home to its former beauty by pressure washing the exterior of your house and hardscape areas. You can even bring back to life patio furniture and cushions. Plus, if areas like your Stamped concrete patio look great, you’ll be even more enthusiastic to welcome back people into your home when it’s safe to do so, knowing that it looks smart on the outside. If your exterior is looking a little worn, a pressure washer may not be the answer to restoring it to its former glory, it may be wise to look into having the outside re-done with stucco contractors in Colorado Springs (or wherever you are) taking a look at it and seeing how they can upgrade your exterior.
17. Deep clean the refrigerator
With the extra groceries you’ve probably bought lately, it’s time for a refrigerator clean. First things first, throw out any leftover takeout or expired items. When cleaning your refrigerator, use a surface-safe all-purpose cleaner for the exterior and warmer soapy water for the interior. Be sure to wipe down surfaces before putting your items back inside. Keeping similar items grouped together when refilling your fridge will make finding your favorite condiment or coffee creamer easier to find.
Rethink your wall design
Redoing your wall design is a fast way to transform the look of your living room, bedroom, or really any space in your house.
18. Rearrange or hang up a gallery wall
If you’ve always wanted to try to create the perfect gallery wall, this is the time to go for it. If you already have one, change it up to revive the space. Try pieces here and there: a new mix-up might surprise you and showcase your photos and art in an entirely new light.
19. Use empty frames
Go through the house, pull out any empty frames and put them to good use. Dust off those old photographs and display them proudly or find some printable art online. Hang your frames throughout your home or place them on tables, dressers, and desks.
20. Put old fabric swatches to use
When we think of fabric, we usually think of curtains, linens, or pillows, but there are plenty of DIY home projects you can do to turn a basic piece of fabric into a statement piece of wall art. So dig up any fabric swatches that you have laying around the house and put them to use. You can wrap the fabric around a canvas, hang it in a frame, and much more, letting your creativity soar.
We tend to think of our homes as islands cut off
from the rest of the world. Where nothing lives except ourselves and our loved
ones. But in reality we share our home with millions of little creatures – and
not just bacteria. Some of them even live on us and our pets.
And while some of these creatures are a normal and
natural presence in the house, others aren’t supposed to be there – instead,
bad cleaning habits (or not cleaning at all) can “invite” them to come in and
live in the house with us.
All of these creatures – normal or not normal – can
make us ill if we don’t clean properly enough. Because a dirty environment
gives them the chance to multiply, and in large numbers we begin to “feel”
their presence, such as through allergies or other means.
For example, dirty swimming pool water can cause a slew of issues. If the water in a pool isn’t sparkling and clear, don’t even think about diving in. Not only does this condition imply poor maintenance, but the lack of visibility itself is also dangerous. It could become a breeding ground for a variety of bacteria, including E. coli, which could be lurking below. Furthermore, if the dirt keeps reappearing at the bottom of your pool after you’ve vacuumed it, your pool’s filter may be malfunctioning. Pool filters and leaking pipes frequently fail to function properly because they need proper cleaning or remodeling. In order to have a perfectly remodeled swimming pool in your backyard, all you have to do is look for swimming pool remodeling companies around the locations where you live. The experts can also help turn your ideas into reality and ensure that the project disrupts your life as little as possible.
Let’s take a look at some of the creepy-crawlies
that call our home theirs, and what we can do to get rid of them.
Toxoplasma
This parasite lives in the stomach-lining of cats
and dogs, and its eggs drop out through feces. Litter-trays and dog poop is
therefore a hotbed for infection. The eggs can even “stick” to the paws of your
beloved pets, where they are transmitted easily throughout the house. The scary
thing about this parasite is, it is a mind-altering parasite. It can infect the
brain, where it subtlety influences our behaviour.
It is important that you regularly and thoroughly clean up after your pets’ mess, and that you also clean their feet. Try to limit where they go in the house, and certainly discourage them from jumping up on the worktop (in the case of cats) or the couch. Wash your hands after touching your pet.
Cryptosporidium
It’s a bit of a mystery, where this microscopic
spore comes from. But it has a nasty habit of infecting water – even
chlorinated water. Usually, you will instinctively know if a source of water is
infected with it, as it will generally be dirty or contaminated. A major source
of contamination is shower water, or swimming pool water.
Exposure can make you ill with stomach cramps and
fever. This isn’t so much of a cleaning tip as a general awareness tip. If you
have reason to suspect your water supply is contaminated with cryptosporidium,
notify your water supplier.
Face mites
Mites live on your face. Yes, you read that
correctly. At least two species, that aren’t even closely related to each
other.
And while it is normal to have thousands of
microscopic mites moving about, breeding, and eating around your hair
follicles, not cleaning properly can encourage a boom in their reproductive
cycles.
Too many face mites can cause acne and other skin
conditions like rosacea; itching and hair loss. To get rid of them, use creams
designed for oily skin in conjunction with tea tree oils and wipes, and try to
wash your face several times a day. This should get down their numbers.
Dust mites
Up to 10 million of these tiny, microscopic spiders
can inhabit an old mattress, where their excessive droppings can trigger
allergies. It is estimated that nearly 1 in 5 people are sensitive to excessive
dust mites.
You can get rid of them by regular damp dusting;
washing fabrics at 60 degrees Celsius, and swapping the feces-laden mattress
every seven years for a new one. If you are in the stages of picking a new one now, you can Click here as well as go into a local mattress shop to see what is available so you can finally get rid of your old mattress.
Mosquitoes
These tiny terrors need no introduction. In the
summertime, and particularly at dusk, they like to gather around light and
water sources, and feast on whatever sweet skin they can get their hands
on.
If you have rising damp in the walls of your house, then it would attract a lot of mosquitoes. These insects thrive on moisture and warmth, which is why it is important to give your house a rising damp treatment. Not only would this protect your walls from rain damage, but it would also keep the mosquitoes from festering in your home.
A lot of bites are avoidable and also stem from the
condition of the garden. A rundown garden, with refuse or rubbish, open sources
and long grass, can all encourage them to breed and hatch – and make their way
inside through an open window. Reduce their numbers by cleaning and cutting the
garden; clearing any debris away, and eliminating/covering any likely breeding
grounds.
Cockroaches
These beasts are attracted to offal; crumps,
leftover food and water, and live in cracks and crevices in old foundations.
When they don’t get what they want, they leave “smear marks” that not only
smell rotten but spread disease.
The best way to fight against cockroaches is to not
encourage them in, in the first place. Clean up after eating, and especially
check to see if there aren’t crumbs lying about. Once an infestation is
established, it may be time to call in an exterminator. Options such as roach control services from Expest or similar service providers should be considered immediately to prevent the cockroaches from multiplying and get rid of them altogether. Regular vacuuming will
work well to clear away the eggs.
Bedbugs
Actually bedbugs are a sign of a clean home, as
they love clean environments. They are actually common in affluent hotels and
esteemed apartments – so think of the infestation as a sort of compliment
(well, that’s one way to look at it anyway).
Bedbugs owe their success to their eggs’ ability to
survive in transportation for long periods of time. So if you’ve stayed in a
room that’s not your own – and especially if you’ve been to a hotel – isolate
your clothes and case and check for eggs. Vacuum them up if you see them. If
your home is already infested, call an exterminator.
Ticks
Most ticks cannot survive for long inside – they
are woodland creatures. Except for the Brown Dog Tick. If you’ve been on a long
walk with your dog, and especially in a grassy or leafy area, give it a check
for ticks. Like with mosquitoes, the garden is another culprit here. Keep your
garden tick-unfriendly by pruning back any bushes and trees, and by trimming
the grass short.
It is understandable if you don’t have the time to manage your front lawn or garden. In all such situations, getting in touch with landscaping experts can solve most if not all of your garden management problems. That said, HOA landscape management personnel or other similarly trained teams may prove to be a worthwhile solution.
Thus, a neat or well-maintained garden can prevent the tick population from getting out of hand, which means you and the pets can live a itch free life.
According to the Bureau of Labor Statistics, the average American usually spends at least one hour every day cleaning the house. Knowing how to keep your house clean between work, errands, parenting, and the other demands of everyday life can be one of the hardest lessons you learn in life. While it might be impossible to manage all the household chores and your office work, these easy and effective hacks shared by our friends from best vacuum expert will help you keep your house clean and your life in order.
1. Keep all your cleaning tools in the same spot
Keeping your collection of cleaning tools in one
place will make things easy for you. You won’t waste any time looking for your
tools when you want to clean, and you do not have to worry about assembling
them before your next cleaning routine. Whether it is a tote, bucket, or caddy,
having all your cleaning tools and products in one portable object will make it
pretty easy to get the job done.
2.
Sanitize your countertops and other surfaces
You can start by wiping down all the hard surface areas from appliances,
countertops, and cabinets to light switches, doorknobs, telephones, and TV
remotes. Remotes! The most important thing that you could lose easily, especially if you have lots of them for different appliances. A universal remote (like the ones available at VIZIO) seems to be a plausible option to consider in cases like this. This will not only save you from scourging your home for lost remotes, you will only have one remote to sanitize! Sanitizing some of these surfaces, especially the ones which
may deliver germs to the faces and fingers of people. You can make a nontoxic disinfection substance by mixing apple cider
vinegar with some water.
3.
Focus on sinks, toilets, and tubs
Residential Concrete Trough Sinks, or any other bathroom sink for the matter, covered with hair and toothpaste splatters sink can look nasty. Spray a suitable cleaning product on your kitchen sinks and then on your bathroom sinks, toilets, and tubs. Allow it to sit for several minutes to give the cleaner enough time to dissolve all the dirt and stains. Return to your kitchen and begin scrubbing and cleaning toilets last. If you need to clean a little deeper, like in the drains, then you can always pour some bleach down there or if it’s something that’s more severe and requires a professional hand, then looking to MetroPHA home services might be a good idea. It is important to note that whenever you use the sink, try not to let any food particles go through the sink pipe which may happen if kids are around and use the sink improperly. If this is not checked, it could clog the drainage system and eventually lead to the sink overflow or a pipe burst. Therefore, setting a rule for the kitchen which includes proper waste disposal instruction like segregation of wet and dry waste can be useful. Moreover, you can keep the contact with services such as Sydney emergency plumbing and others like it in your locality that could help you out in case of an emergency plumbing disaster. That said, you can keep a container of some disinfecting wipes under the sink, so they are handy. Wipe your sink’s faucet and basin after you are done getting ready for your day.
4. Keep moving as you vacuum
To keep your house clean, you should invest
in a handheld vacuum. Don’t worry about getting everywhere when
you vacuum. You should keep moving through your house, running the compact
vacuum in each carpeted room in a single pass. Some tasks do not require to be
done every week. These include cleaning the windows, waxing the furniture, as
well as washing bath mats and area rugs. Inspect these home
accessories and make your decision.
5. Do at least one load of laundry every day
Doing one
laundry every day is life-changing. You can put your load in before leaving for
work. However, if your washing machine comes with a delayed beginning cycle,
you can set it to run before you return home. Transfer all the damp clothing
items to the dryer after taking dinner, and then fold them before you retire to
bed. Putting away a single load of laundry will take a short time, and you can
also do it before going to bed.
Cleaning is more effective if you pick a single
task at a time like dusting, vacuuming, or mopping. You should do the same task
in each room in your house to prevent you from feeling as if you are in a
constant cleaning cycle, beginning the same job over and over again.
8. Make cleaning a team activity
One of the best techniques to clean your house fast is by making the cleaning routine a team effort. You can schedule a specific time with your family in advance and assign the tasks to every individual. Working together as a group can bring some fun to the cleaning routine, and your entire house will be tidy and organized within a short time.
For cat owners, as we come toward the back end
of spring and into May it is worthwhile remembering that we are entering “Flea”
season. As temperatures climb after winter, fleas and other such parasites commonly found on pets
become a real issue. We have to be careful to take precautions to make sure our
pets and houses don’t get invaded by these dirty little invaders.
The season starts in May and runs through till
September by which point frosty temperatures kill off fleas and end their life
cycle. In the meantime our pets are usually spending more time outdoors in the
better weather and are liable to accidentally pick up these parasites from long
grass, hedges and from contact with other cats and dogs. This can be a huge problem as your cat might end up swallowing fleas infected with tapeworm eggs while grooming themselves. As a result, your cat can get a tapeworm infection that could deteriorate their health. You may then have to take them to your trusted Veterinarian who can treat the cat accordingly.
However, you might need to understand the life cycle of a flea to properly treat them. The stages are – Eggs, Larvae (further divided into three stages), Pupae, and Adult. Flea takes nearly two weeks to reach an adult stage. It might be beneficial to start with some home remedies in the beginning to prevent or break the cycle. You might have to look for some signs like constant scratching, skin redness, scrabs, irritation, Dry skin, etc. (source: ehomeremedies.com)
To reduce the risks of your cat or dog picking
up fleas, now is the time to get a medicated collar on your pet or start
administering drops – even if your
animal hasn’t shown any signs of an infestation. If you prefer to use natural
ingredients to treat cat fleas you could follow some of the tips given at
Kittyinsight.com. If your pet is unlucky enough to pick up fleas
then be very wary. If your pet spends time in your house and has a flea issue it
won’t be long before the whole house is at risk and the problem becomes very
difficult to resolve.
Here are some simple precautions you can take
around the house to minimise the chances of suffering a infestation and to
reduce the duration of the problem if it arises:
Regular
Vacuuming
The number one
precaution you can take is to regularly vacuum your home and then empty the
vacuum contents a distance away from your home – preferably as far as possible.
Ideally you need to
be vacuuming every three days at a minimum. The aim of this is to pick up any
fleas brought in by your pet and get them out of the house as soon as possible.
Fleas have a real
short breeding cycle so it does not take long for any fleas on your pet to lay
eggs. You want these eggs gone. Any that might fall off your pet need removal
before hatching, if possible. More vacuuming is better than less if your pet
shows signs of flea activity and spends time indoors.
Dispose of the
contents of the vacuum away from areas your pet might move through so as to
avoid picking up the fleas and bringing them back in – hence get rid of the
contents as far from your property as you can. Alternatively, you can hire professionals from firms that can provide preventative pest control services for homes and businesses. They can do the necessary treatment in and around your property that can remove the flea population.
Wash Pet
Bedding
If you pet has a bed
you need to pay particular attention to that item of bedding and it’s immediate
surrounds as this is where most fleas and eggs are going to initially end up.
You want to wash pet
bedding with a good strong soap in a machine if possible. The fleas don’t like
water and will try to escape the water if you soak the bedding in a tub. If you
stick bedding in a machine the fleas and eggs will be washed down the drains.
Fleas don’t necessarily drown straight off – they can survive for hours
submerged. If they come round in the sewer that is better than coming around on
your property.
Setting Flea
Traps Using Dish Soap
Sounds like an old
wives tale, right? Flea traps? These things actually work! Here is the skinny –
fleas are attracted to light so you hang a light bulb or place a desk lamp at a
spot and then under the light you place a shallow bowl filled with water and a
bit of dish soap. The fleas come to investigate the light source and jump into
the water. Only this time the water has soap in it that reduces surface tension
so the fleas sink on landing and become engulfed in the water. At this stage
the flea goes into a type of catatonic survival mode and looks dead – but fleas
can survive underwater for hours! In the morning you need to flush them fleas
down the drain so when they come to they are relocated well away from your
place!
Check out this
youtube vid :
https://youtu.be/FYKOkaZN9cU
Consider
Getting Carpets and Soft Furnishings Professionally Cleaned
So you have
identified a potential problem and taken action by treating your animal and
getting the house treated with a fogger, what next? Get the place professionally
cleaned to make sure any flea eggs are removed – as well as all the other
benefits of having your carpets cleaned like removing toxins, molds, etc.
Once you know you pet
is clear of infestation nd you have removed the majority of fleas that might be
in your home by vacuum, washing, traps and fogger then give it the once over by
a professional carpet cleaner to remove the risk of infestation caused by the
odd flea egg or surviving larvae.
If you follow these basic tips hopefully your
summer won’t become a battle to free your house of these dirty parasites!
A person is always judged by his appearance that is his clothes and shoes. As correctly said, the first impression is the last impression. A person should always be conscious of his outer look. The clothes and the appearance communicate volumes about an individual. Subconsciously it has a strong impact on an individual’s mind that is the person who wears it and the person who see it. It is irrespective of the fashion being carried on; the dressing has to be apt. It raises the confidence level of a person to a newer level making that person feel self-empowered.
The apt dressing can be defined as clothes proper ironed and preserved. The quality of the cloth defines its outlook. To make appear the clothing perfect, use of waterproof spray for clothes is a very accountable option. The waterproof spray for clothes work wonders in maintaining the quality and durability of clothes, jackets etc.
Why use Water-repellent
spray?
The
waterproof spray alongside clothes is applied to sofa, furniture, glass, car,
shoes etc. This helps make fabric and object water-resilient, stain free,
grease free. The waterproof spray assists in protecting the fabric as well as
other materials in all season. In a country like Australia, where weather is
uncertain, wearing clothes that are covered with waterproof spray works as a
shield in protecting the body against all odds.
The waterproof fabric contains a durable water repellent coating which
keeps the fabric free from dirt, oil, sweat, etc. It helps to increase the
lifespan of a fabric making the outfit durable for longer wear.
There
Australia-based companies which manufacture the spray which is natural,
non-toxic and harmless to human health. This spray helps the window look salt-free,
stain free and away from dirt particles.
A person who is a travel freak, mostly involved in tracking, hiking, camping,
adventure sports, water sports, etc. applying waterproof spray on the clothes,
jackets, bag packs, make him tension-free irrespective of the weather being
faced. To say the least, this spray is as important as a tube for a non-swimmer, who happens to be a dire lover of water activities. Just like a tube, which can be sourced easily from a river tube rental, helps keep the person afloat on water, so does this spray in keeping the people protected.
Types of waterproof spray
Unlike any other products, the waterproof spray also has several types. The customer needs to select the best amongst all after the appropriate research and review. The spray used for the car makes it appear highly polished and shiny. Some people may even prefer ceramic coating which can improve a car’s exterior finish as well as make it waterproof. One can search for a ceramic coating company in Fayetteville NC, or elsewhere to find such service providers in their close vicinity. Moreover, the basic purpose of applying waterproof spray is to prevent it from scratch, pollution, dirt, etc. NANODIAMOND is one such product that is specifically designed for paint protection.
It
has specially designed products for glass coating protection. This provides a
ceramic coating around glass surfaces in the bathroom, kitchen as well as steel
and plastic. There are various water-repellent sprays; some of them are 303
Fabric Guard, Star Brite Waterproofing Spray with PTEF, Nikwax TX Direct
Spray-On, and NANODIAMOND etc.
Services provided
There are companies that provide coating services with waterproof spray. For instance, an automobile company may provide Ceramic Coating Sydney (or in other locations) for waterproofing and scratch-proofing. Similarly, other companies can provide coating services for a sofa, furniture, window glass, wall, kitchen, etc. The applicators visiting from the company are well-trained professionals. They are well versed with the standards and outlook to be maintained. The companies provide varied services like:
High-quality Ceramic
coating
Shiny clear finish
Self-Cleaning
Anti-Graffiti
Scratch resistance
coating
10 years warranty with
Permanent Protection coating
100% Environment-friendly
Colour protection from UV
rays
Protection from Chemical
Highly protective in
extreme weather
Temperature resistant
The
companies in Australia provide employment opportunities to the youth of the
country to join as approved applicators. A person joining the company is
provided an apt training and a certificate of the approved applicator. There
are financial rewards and incentives that withhold the person, motivating him
to work towards the expected goal.
Oh boy! Where do I start? Isn’t this a
question we ask ourselves when we plan to clean our house? Even though cleaning
is a chore that leaves us exhausted, it can be less tedious. These are a few
tips to keep your house clean with diligence.
Making
the bed
As soon as we wake up, the first thing we
do is to rush to get ready for work or get our kids ready for school. I would
say begin with your bedroom. When you wake up, make your bed before you leave
the bedroom. You will be happy to come back to an already made bed at the end
of the day. If your children are old enough, this will be a wonderful habit to
develop. Teach them and put this into practice to make their bed every morning
before they leave their bedroom.
Clearing
the mess in Kitchen
The kitchen gets easily dirty and
unorganized. Apply clean as you go plan for the kitchen. When you drop
something on the kitchen counter or stove, clean it right away before it gets
dried up. Keep the kitchen counter clear from clutter by keeping things back in
place. Do not leave containers, spoons, knives, or kitchen towels on the
counter; place it back where it belongs. This way it is easy to de-clutter, and
you will always have a less messy kitchen. Do not leave utensils in the sink.
If you don’t have time to clean them right away, pour water on the dishes so
that they don’t dry up. If you have a dishwasher, arrange the dishes in a
dishwasher. After your dinner, turn the dishwasher ON or wash the dishes. If you don’t have a dishwasher then it may be worth the purchase if you have a busy life and would rather spend that time that you would normally on washing dishes doing something more productive or fun. Furthermore, if you do decide to buy a dishwasher then make sure that you get it installed by using a company like this one makeitdrainplumbing.com/westwood-plumbing-services/ so that you can have your dishes washed without any issues suddenly occuring! Finally, don’t forget to wipe the kitchen counters and cabinets, and mop the kitchen floor before you switch off the kitchen lights. Having a good vacuum cleaner too helps when
you want to make sure that your house is clean.
Place
things where they belong
Always have a definite place for each item
in the house. Newspapers should be in the newspaper rack, pen and pencil should
be in the pen holder, shoes should be in the shoe rack, T.V and music system
remotes should be in the remote stand, and so on. After using each item, ensure
they are back in place. This rule should be applicable to all family members.
There will be less clutter, and your house will look organized. You could add some neon lighting from www.neonfilter.com or similar sites to make the space look even more inviting. Also, if
everything is kept in its place, you don’t have to waste time placing things
back in place. You only have to wipe away the dust that settles on these
things.
Bathroom
Place toiletries in one place after daily
use. Daily clean the toilet seat and washbasin for hygiene reasons. Do not let
water collect on your bathroom floor. Ensure that you leave the bathroom floor
to dry while leaving the house. For working women and men, it is not possible
to clean the entire bathroom every day. However, you can ensure a few basic
things like your mirror, toilet seat, and washbasin are clean and the
toiletries and essentials are set in place every day. You should also remember to refill your B-6699 toilet tissue dispenser, or any others you have, once the current roll of tissues has run out.
Laundry
Doing your laundry depends on how many members you have in your house and how many clothes get accumulated in a day. If you have a small family with just 2-3 members, you can wash once in 2 or 3 days. However, if you have a big family then put your clothes in the washing machine every day. To reduce drying time, soften clothes, and prevent your laundry from clumping inside the dryer, you can use rubber or wool dryer balls. Also, make it a habit for all your family members to place their dirty laundry in the laundry bag or hamper. This way you don’t have to go into each room to collect the laundry. Keep the laundry bag near the washing machine.
These are few things that you can do every
day to keep your house clean. It doesn’t have to be a once in a week chore. The
once in a week cleaning chore will get more easy if these things are followed
every day. Happy Cleaning!
16 gauge? 20 gauge? 24 gauge? What does it mean? Which one’s the
best stainless steel gauge thickness for my new kitchen sink? These are
some of the questions you might have when choosing your next stainless
steel kitchen sink. There are so many brands and styles from each
manufacturer, and you want to make sure you make an informed choice. This
article will focus on helping you decide on the thickness (gauge) of metal to
shop for and to make the best choice for your situation. If you are finding it hard to decide then you may want to consult a professional plumber or sink installer beforehand for advice. This is also a good time to ask questions such as is it better to use a gauge that has been treated by a heat treating company beforehand? Or what type of metal should you be using specifically for your sink? It can be helpful to get these questions sorted out so you may get all the information you need to be sorted out before you need to make decisions.
THE SHEET OF STAINLESS STEEL THAT IS USED DURING THE
MANUFACTURING PROCESS IS ROLLED TO A SPECIFIC THICKNESS. SHEET METAL IS
AVAILABLE AS FLAT PIECES OR AS A COILED STRIP. THE COILS ARE FORMED BY RUNNING
A CONTINUOUS SHEET OF METAL THROUGH A ROLL SLITTER. THE THICKNESS OF THE SHEET
METAL IS CALLED ITS GAUGE. THE GAUGE OF SHEET METAL RANGES FROM 30 GAUGE TO
ABOUT 8
MOST STAINLESS STEEL SINKS ARE MANUFACTURED USING A
PROCESS CALLED DEEP DRAW FORMING WHERE A SHEET OF METAL IS DRAWN DOWN INTO A
FORM THROUGH A SERIES OF STEPS CALLED REDUCTIONS. EACH REDUCTION STRETCHES THE
SHEET METAL DEEPER AND DEEPER INTO THE FORM, SO WHAT STARTED OUT AS AN 18 GAUGE
SHEET OF METAL WILL NOT END UP BEING 18 GAUGE THROUGHOUT THE ENTIRE FINISHED
PRODUCT. THE INDUSTRY STANDARD IS TO STATE THE GAUGE OF THE METAL THAT THE
MANUFACTURING PROCESS STARTED WITH.
ZERO RADIUS SINKS ARE MANUFACTURED USING A PROCESS
CALLED PRESS BRAKE FORMING WHERE THE SHEET METAL IS BENT INTO THE MAIN SINK
SHAPE UNDER TREMENDOUS PRESSURE BY A MACHINE. THE SIDES ARE THEN ADDED AND
WELDED TO THE MAIN ASSEMBLY, FORMING A BOX SHAPED SINK BASIN. ZERO RADIUS SINKS
ARE IDENTIFIABLE BY THEIR FLAT SIDES AND UNIQUE 90 DEGREE OR NEAR 90 DEGREE
CORNERS. SINCE THESE SINKS ARE BENT INTO SHAPE INSTEAD OF DRAWN, THEY RETAIN A
MORE UNIFORM THICKNESS THROUGHOUT THE FINISHED PRODUCT.
The following table shows the actual thickness for popular gauges
of kitchen sinks, as well as its density and % decrease in thickness compared
to 16 stainless steel gauge, which is typically the heaviest gauge
used for stainless steel kitchen sinks.
Gauge
Decimal Inch
Millimeters
lb/ft2
% Decrease in Thickness Over
16 Gauge
16
0.0625″
1.5875
2.52
–
18
0.05″
1.27
2.016
20%
20
0.0375″
0.9525
1.512
40%
22
0.0312″
0.7925
1.26
50%
24
0.0250″
0.635
1.08
60%
On a side note if you ever need a carpet cleaning service, and you live in the beautiful Eureka CA area. Give A-1 Cleaning Service, LLC a call. They also perform carpet cleaning in Arcata Ca.
Stainless steels are iron alloys with a minimum of 10.5% chromium. Other alloying elements are added to enhance their structure and properties such as formability, strength and cryogenic toughness. These include metals such as:
Nickel
Molybdenum
Titanium
Copper
After a review of a large sample of key players in the kitchen sink market,
including Blanco, Kraus and Houzer, the most common stainless steel alloy used
in the manufacture of stainless steel kitchen sinks is 304 surgical grade
stainless steel. The main elements added to the iron in 304 stainless
steel are 17.5-20% Chromium (Cr) and 8-11% Nickel (Ni). Most sink
manufacturers seem to choose 18% chromium and 10% nickel. With the rising costs
of ferrochrome (used to make chromium) and shortages of nickel, one of the ways
manufacturers control costs of kitchen sinks is to decrease the amount of
material used. However, before you choose any type of kitchen sink for your home, ideally you should consult with a plumbing service provider such as Santa Clarita plumbing by City Plumbing and Rooter and choose the one that best meets your needs. The reason for this is that plumbers are generally familiar with all types of kitchen sinks and can recommend the best option for you. Once you’ve decided on a sink, you can have it installed right away.
Double Sink
So what should I look for in choosing a kitchen
sink?
When shopping for a stainless steel kitchen sink, the number one thing to
remember when assessing the thickness is: “The lower the number, the
better.” Simply put, a lower gauge like 16 gauge is in most cases
“superior” to a 24 gauge sink because it is thicker. How much thinner is a 24
gauge sink compared to a 16 gauge? Its only 40% as thick. A manufacturer can
make a really cheap 22 or 24 stainless steel gauge sink because they are using
50-60% less material. Thinner sinks like this are usually seen
as topmount or self-rimming and are easily found in big box stores,
or maybe in your brand new home as a “contractor’s sink”. After you’ve decided on a kitchen sink, you should look for a reputable plumber who won’t undo all of your hard work. To find the nearest ones, you may search the internet for keywords such as plumbers Lynchburg or other places.
So why is thicker (lower gauge) better?
A lower gauge (thicker) sink is better for the following reasons:
Improved noise dampening
Less susceptibility to denting and bowing
Strength and durability
It is generally agreed by sink experts that a heavier gauge can
help prevent denting and bowing, and will also contribute to noise
reduction from garbage disposals and items dropped or placed into the
sink. Many sink manufacturers incorporate a sound proofing and
insulation on the underside of the sink with coatings and/or pads. This will
definitely help to make the sink quieter, but a thicker steel sink will have
much better damping characteristics due to its mass.
What happens when you accidentally drop the pointy end of a butcher knife
into the kitchen sink? Hopefully, nothing! A thicker kitchen sink will be less
prone to dent and because it is stronger, it could make the difference between
piercing the sheet metal, and not.
A thicker walled kitchen sink (lower stainless steel gauge) will bow less
when you suddenly drain the water from a pot on the stove because the sheet
metal is stiffer and will be more able to resist thermal expansion and
movement.There is also less tendency for that Pop! sound when
the boiling water hits the bottom of the sink.
Does a thicker (lower gauge) mean a better
quality kitchen sink?
No, not necessarily. There is inherent better quality in the noise damping
and structural integrity of the sink, however there are many other
features which are probably more important in assessing the quality of a sink
like finish, straightness and consistency. A stronger kitchen sink may also necessitate a better drainage system, as it can help prevent any leaks or clogs. Nevertheless, it could be smart to get a drain cleaning service for regular sink maintenance, just so that you can improve functionality and increase the lifespan of your kitchen sink system.
Is thicker always better?
Not necessarily for the sink manufacturer, since it is more difficult to
“deep draw”, or craft from a single sheet, and to reduce welding marks on zero
radius sinks. Depending on the complexity of the sink shape and its method of
manufacture, optimal gauge thickness of 16 or 18 gauge will be used to balance
cost with ease of manufacture and marketing.
So what stainless steel gauge should I buy?
The maximum gauge I would recommend for any stainless
steel kitchen sink is 18 gauge. The best choiceis of
course 16 gauge, however either 16 or 18 gauge will
provide the same top value in terms of cost, performance and overall
satisfaction. Don’t bother with higher gauges (20, 22, 24) which are
significantly thinner. My extensive market analysis shows there is no truth to
the myth that the lowest gauge sinks are the most expensive – 16 and 18 gauge
sinks are similarly priced.
18 Gauge vs 16 Gauge Sink?
If you had the choice between two identical sinks (16 and 18 gauge) at
similar prices, don’t hesitate in getting the 16 gauge sink. Why? A 16 gauge
sink is 0.0625″ thick, while an 18 gauge sink is 0.05″ thick, which is only 20%
less. There is no noticeable difference between the two
gauges, however at the same price range, 16 gauge is “better”
(thicker is better!).
If you had two identical sinks, one 16 gauge and the other 18 gauge, but
the 16 gauge sink was much more expensive, I would recommend the 18 stainless
steel gauge sink, because of the incremental benefits.
Conclusion
In summary, just remember a lower numbered stainless steel gauge is better (thicker is better). The best gauge for stainless steel sinks is 16 gauge if available and the price range is acceptable, however don’t exclude 18 gauge sinks from your selections – either one is great value! The stainless steel kitchen sink is used many times a day and in so many ways. Paying attention to the non-functional requirements as well as the functional requirements will provide many years of satisfaction and pride. Every kitchen deserves a great sink.
Once Christmas has been and gone and you’re left withthe dreaded aftermath of taking down the tree and decorations, it is also thebest time to organise a post Christmas clean up! From clever storage solutionsto recycling opportunities; this article by Thomas Cleaning breaks down a simple post Christmascleaningroutine for you to easily complete in time for the New Year.
Motivate
yourself
First things first, you need to actually find the motivation to have a good sort out and clean. What better way to do this than by putting on an inspiring playlist? You can also get help from family members by creating to-do lists and to make things a little more exciting – put a timer on for each task and see who can get their jobs finished first.
Another great tip to bear in mind before you take all
of the decorations down is to take a picture of the layout so that you can
easily recreate the look the following year.
Recycle
and Donate
Christmas offers the perfect opportunity to recycle
unwanted items not only so you have more space, but also to help others in
need. As you may have received many new presents, aim to donate one old item
for every new item you have received, to a local charity. This way you’re not
only making room for your new gifts, but you’re also giving away your old ones
to a worthy cause.
If you have a real Christmas tree don’t worry about
having to dispose of it yourself, many places offer a free tree collection if
you have purchased the tree from them, saving you time, hassle and stress! You
can also recycle your tree for composting, be sure to check local garden
centres and websites.
Fridges are often full to the brim over the festive
period, so when it comes to having a good clear out, ensure you get rid of any
items you are unlikely to use and give them to someone in need. You could
donate a food parcel to a homeless person or a food bank meaning it won’t go to
waste.
Choose
Clever Storage Solutions
Finding a suitable place to store your Christmas
decorations can be a bit of a nightmare, especially if you’re particularly
limited on space, however little tips and tricks can certainly help. Use multifunctional
items that can double up as storage such as suitcases that you rarely use, and
store these under your bed with decorations in.
Also keep any gift bags and tissue paper using them to
store baubles in until you can reuse the bags the following year. Another great
idea is to keep shoeboxes and gift boxes from any presents you have received,
and use them as extra storage instead of throwing them out.
Get
the Place Gleaming!
Last but not least, you need to give everywhere a good
clean; here are some key things to focus on:
Like most ovens at Christmas, yours
will probably be well overdue a clean. Make sure to take all baking trays and
shelving out so you can give it a thorough scrub removing any grease and grime
Get rid of any Christmas scented
candles or air fresheners and replace them with clean, fresh scents
Wave goodbye to the
Christmas-themed bedding and put some fresh sheets on
Make sure to hoover and then hoover
again! Decorations gather a lot of dust (and glitter)
Take the sofa apart and hoover
everywhere, pop the cushion covers in the wash and then replace
Move all furniture to clean under
it – you’ll be surprised what you may find hiding behind cupboards after
Christmas!
Tackle any tough Christmas stains
on clothing or furniture immediately
Author
Bio: Thomas
Cleaning are a domestic and commercial cleaning company
with over 26 years of experience, based in Chipping Norton. They offer a range
of highly professional cleaning services catering to offices, schools,
surgeries, personal homes and more.
Blood splatter. Brain matter which had dried up and had become difficult to remove. Stomach-turning smells of a decomposed body. Heart-wrenching scenes of grief-stricken survivors processing the grisly scene before them. For many of us, these scenes are something we are lucky enough to see only on TV. But for many people who clean up crime scenes and accident sites for a living, the horror is a stark reality. But although the work can be difficult and heart-wrenching, it can also be interesting and sometimes, mundane. In this article, we’ll explore the secrets of one of the grimmest jobs in cleaning, the world of the crime scene and accident scene cleanups.
Crime scene and accident site cleanup companies are a relatively new but rapidly growing and lucrative industry. Although crimes and accidents are mankind’s constant bedfellows since time immemorial, the difficult task of cleaning up the bloody mess had been the responsibility of the surviving family, building personnel, or the family’s domestic cleaners. In the event of vehicle accidents, for instance, it lies within the responsibility of the vehicle owner to reach out to experts like the ones at auto repair in Arvada to get the vehicle repaired and also seek guidance from lawyers for compensation. There are countless responsibilities that one has to take up after the accident has occurred. During the 1990s, a few enterprising individuals began to answer the public’s need for professional crime scene and accident site cleanups. Not only did this new brand of cleaners free grieving family members, building personnel, and domestic cleaning service providers from the task that they were unprepared and under-equipped to take on, they also helped secure the scene of the crime or accident from evidence tampering and contamination.
Despite the declining crime rate in the United States, crime scene and accident cleanups are still considered a lucrative business. Its profit has skyrocketed to $99 million, while its revenue has reached a whopping $375.5 million according to the market research group IBISWorld.
2. Cleaning up a scene of a crime or accident might look so simple, but it’s a complicated and difficult process. Remember that the police and other first responders do not clean up crime scenes. In the aftermath of a crime or an accident, it is the family or the building manager’s responsibility to arrange an appointment with a crime scene cleanup provider. The survivors will then need to have clearance from law enforcement before the actual cleanup can begin.
Once cleared, the cleanup will begin with an initial inspection. The technicians will determine what type of biohazard materials are present, and which disinfectants they should use to sanitize and decontaminate the area. The cleaners will do their best to restore the scene to the moment before the crime occurred. The process, however, can become difficult and dangerous if the blood, tissue, or other bodily fluids left behind in the crime scene contain pathogens.
3. Although a person doesn’t need a degree to become a crime scene or accident cleaner, prospective technicians need to receive special training conducted by the employers themselves. In-house training is provided by employers to ensure that their cleaners are familiar with proper cleaning and biohazard waste disposal methods, as well as to ensure that they comply with all OSHA and government safety regulations. Prospective technicians also do not need to be licensed or certified to work as a crime scene or accident cleaner. If they do not comply with the rules and regulations then they put themselves and others at risk for injury. If this does happen then professionals similar to an Arkansas personal injury lawyer or one within the injured person’s location, may be brought in to deal with the case if it goes to court.
4. Crime scene cleaners use regular cleaning materials but are also equipped with PPEs and other specialized equipment. Cleaning technicians are armed not only with an arsenal of conventional cleaning materials but also special clothing and equipment similar to this hazmat suit for sale. This is for their safety so that they are not exposed to dangerous scenes, health hazards, or strong chemicals as they perform their work.
Apart from being equipped with personal protective equipment, technicians also bring biohazard waste containers (such as thick plastic bags and heavy-duty containers). For complicated cleanup jobs (such as when the brain matter had dried or blood had coagulated), they are equipped with strong disinfectants, enzyme solvent, putty knives, shovels, foggers, and strong deodorizers. It is also normal for them to bring ladders, saws, sledgehammers, and other such equipment for very difficult cleanups. If there is a lot of debris that has accumulated at the scene, then they may need to have larger means of disposal which can come in the form of a skip bins for hire sydney company or one similar, to help with moving these large items away from the scene and disposing of them after they are checked.
5. The job can be physically demanding and emotionally draining, so it goes without saying that the turnover rate is higher compared to other industries. Cleaning up a place where someone committed suicide or was murdered is physically and psychologically draining, so it’s little wonder that many cleaners choose to leave the industry after several months or so. Although the business can be lucrative, many owners choose to leave the industry because of the psychological toll the situations can inflict upon them. Some companies arrange psychological counseling to help their employees compartmentalize and cope with the stress.
6. But for some people, the job can also be emotionally fulfilling. Witnessing the death of a loved one from a violent crime or an accident is one of the worst moments in a person’s life. Cleaning up a crime scene can sometimes only add to their trauma, that’s why cleaning technicians play a large role in easing the burden of the survivors by shielding them from the worst. Although the job is physically and emotionally exhausting, knowing that they had made a difference in the lives of the survivors and helping them cope with their grief can be emotionally fulfilling for many cleaners.
7. Depending on the difficulty of the cleanup and how hazardous the environment is, the service can sometimes be expensive. Some of the most difficult to clean sites are rooms where a decomposing body was discovered or where large sections were splattered with lots of blood, tissue, or other bodily fluids. A portion of the cost can be covered by insurance, but the family will still need to foot a portion of the bill.
8. Crime scene and accident cleanup providers also offer a host of other cleanup services. Crime scene and accident cleanups make up a small part of the business, that’s why some cleaning companies offer other cleanup services to supplement their income. Some companies provide animal waste disposal, basement or crawlspace cleanup, and even hoarding cleanup. Other providers even go as far as offer disease disinfection and contagious disease wipe downs for schools, hospitals, nursing homes, and other facilities in the case of disease outbreaks or epidemics.
Have you ever noticed that after doing a deep clean of your home that you tend to feel a whole lot better afterwards?
It’s a pretty common side effect.
In fact, many people experience an uptick in their overall health when being in a clean space. It’s not unusual to feel better both physically and mentally. If cleaning isn’t your thing then it might be a good idea to check out a site like https://cleanhomeguide.co.uk/ to give you some helpful tips on what you can do to make cleaning easier.
However, this spike in good feelings usually only lasts for several days or weeks and that energy boost from cleaning eventually fades away. You may want to chalk this up to the feeling of excitement from having a clean house diminishing, but there’s a lot more going on than that.
The truth is your home environment has a large impact on your health, especially the air quality.
Research has shown that indoor air pollution is two to five times worse than the air outside. How can that be? Because, there are so many types of contaminants that get trapped inside our homes and then have no way to escape unless we kept our windows and doors open all the time.
The reason you feel so much better after cleaning your home is because as you clean you’re getting rid of a lot of these contaminants.
As your house begins to accumulate more dust, dirt and other particles you’ll eventually start to feel less healthy because these pollutants start making their way into your lungs. The more polluted the air is inside a home, the worse you’ll feel. Some homeowners find that getting an air conditioning system could improve the air quality within their homes. Allergens and other issues often appear during the spring and summer months, so getting an air conditioner could help keep your home cool during the heat and ensure that indoor pollution is kept to a minimum. Thankfully, some services specialize in ac installations that could help to keep the air in your home fresh and allergen-free.
If you want to stay as healthy as possible it’s important to keep up with a regular cleaning schedule so you can reduce the amount of indoor pollution. I hear that having an air purifier can help reduce indoor pollution as well. My friend tells me that reading Productexpert’s reviews gave them so more information on air purifiers. If cleaning isn’t your thing or you don’t have much time for it then a service like A-1 Cleaning Service, LLC can be a valuable investment for your health and home. Professional cleaning can ensure that your house is free of indoor contaminants.
Here is a list of the most common indoor air pollutants that affect your health:
Dust, which accumulates every day and can’t be stopped. For example, if you have a white high gloss coffee table, it’s important to dust it as often as you can.
Dust mites, which feed off of dust
Pet dander, which animals shed year-round
Bacteria and viruses, which come from the outdoors and people inside the home
Mold, which travels through the air in the form of spores
Asbestos, which is inside many building and furniture products
Volatile Organic Compounds (VOCs), which come from air fresheners, cosmetics, glues, paints, furniture and carpeting
Formaldehyde, which is a form of VOC
Tobacco, cooking and wildfire smoke, which may or may not impact your home because of your lifestyle or where you live
Here are the most common symptoms you’ll experience from bad indoor air quality. These issues can come out of nowhere, may be sporadic or be something you experience on a daily basis:
Sneezing
Coughing
Watery or itchy eyes
Fatigue
Dizziness
Headaches
Respiratory congestion
The long-term effects of repeated exposure to high levels of indoor air pollution include:
Respiratory disease
Cancer
Death
By making it a habit to clean your home on a regular basis, you can cut down on the amount of contaminants that linger indoors. You’ll also reduce your chances of experiencing the above health issues.
Dusting and vacuuming are the two simplest measures you can take. Try to do this at least once every week or two at the most. Another thing you can do to improve the air quality inside your home is to use an air purifier. An air purifier is a device that creates fresh air indoors by removing airborne contaminants. This device sucks air into a filter, traps the particles, and pushes out clean air for you to breathe.
Air purifiers come in many different sizes, colors and prices. There are also specially designed ones to combat particular problems you may have in the home, like pet dander, smoke, dust or odors. Over at Home Air Quality Guides, you can find out everything there is to know about these appliances. That site explains every feature, function and purpose behind air purifiers that you’d ever want to know.
Adding an air purifier to rooms that you occupy the most, such as the living room and bedroom, is often all you need to see an improvement in your overall health. Most of us don’t spend as much time in other areas of the home, which makes them less of a concern. However, some air purifiers are powerful enough to cover an entire floor of a home. It just depends on what your needs are and how clean you want to be throughout the entire house.
There’s an old saying that “a clean home is a healthy home” and now you know why. By making it a practice to clean often, and possibly invest in an air purifier, you can improve the quality of air you breathe indoors which is essential to living a healthy life.
Sofas get dusty and food crumbs find their way into the deep corners and drinks inadvertently spill onto the upholstery. Fortunately, sofa cleaning is not a tough task if you have a bit of time and the right cleaning supplies. If you don’t want to call your local cleaning agency to clean up for you or you are simply looking at doing a quick clean before the next professional cleaning, our guide will take you through some simple and easy sofa cleaning steps.
It is important to know the sofa fabric
It is important to know the fabric type before you start cleaning. Look for the tag that tells you what material the sofa cover is made of. Most often these tags will provide instructions on which cleaning products can be used and which cannot be used.
Begin sofa cleaning by vacuuming
It is best to start by getting rid of any surface debris, dust and dirt from the sofa. For this you can use a dust-buster or a hose add-on of a vacuum cleaner to eliminate any dust particles. Use the long attachment of the vacuum cleaner to reach the crevices and don’t forget to vacuum the cushions. It is recommended that you start by vacuuming the cushions and then place them aside so that you can work on the sofa. In case you don’t have a vacuum cleaner and want to purchase it; you can visit websites such as omnihomeideas.com/appliances/best-quiet-shop-vac/ to get the relevant information about various vacuum cleaners.
Get rid of heavy dust
If there are spots on the sofa where dirt has been caked in, use a brush to break it loose and release the dirt. Ensure that you rub gently so that the fabric is not damaged.
Remove pet hair from sofa
Your vacuum cleaner will not be able to get rid of pet hair. To get rid of any fur, use a lint roller once you finish vacuuming the sofa. Work in a systematic pattern so that you don’t miss out on any hair.
Wipe clean
Use wipes to clean any hard surface, hand rests and any other exposed surfaces. Alternatively, you can use a cleaning product that is appropriate for wooden or other surfaces that you are cleaning. Keep an all-purpose surface cleaner handy so that you don’t have to scurry around looking for specific wipes. Use a leather cleaner for leather upholstered sofas.
Condition
Leather needs slightly different treatment to fabric. Water will dry it out, causing fading and cracks to appear, which is why only leather cleaner should be used. However, even leather cleaner will cause fading over time, so it’s important to use leather conditioner from somewhere like URAD.com to lock moisture back into it. Conditioner prevents cracking and leaves the leather silky smooth and soft. It will also give it a beautiful sheen, and should remove any of that “old leather” smell that can start to occur over time.
For tough stains
Fabric Pre-conditioner can be used to dissolve dirt and oil from the upholstery. Make sure that you spot test the preconditioner for discolouration on a spot that is not easily viewable.
Gentle wash
If you have removable sofa covers then it is best to toss them into the washing machine for a quick wash, especially if they are extremely soiled. Avoid washing them too often though or you will risk damaging the fabric.
It is recommended that every six months you get professional cleaners to clean your sofa. This will help maintain the original feel and look of the fabric. The domestic cleaning agency will use professional tools that don’t discolour or harm the fabric. Follow this up with regular cleaning before your next appoint with the cleaning company.
If you think that cleaning is bothersome and tiring, perhaps all you need to do is change the way you have been doing it so far. It is true that there are many things you have to take into consideration when it comes to effective home cleaning, but it is by understanding these basic guidelines that you can have easier time cleaning and longer lasting results. Alternatively, you could try a service similar to Red Deer cleaning services that might be able to help you with your cleaning, but if you want to you can follow the tips below to have effective cleaning results.
Develop a cleaning routine – this will allow you to manage your time better. Cleaning routine means a schedule that you will follow for your chores, and of course not forget to be flexible when you need to. Home cleaning consists of chores that you have to perform on a regular basis in order to keep the conditions of your room perfect. A typical example of a cleaning routine is to set an hour for carpet cleaning every second Sunday and take some time to de-clutter your rooms on Saturdays. Also, think about getting professional carpet cleaners dublin to clean your carpets each season. That way you will know exactly what you will have to do and how much time it will take you.
Take the small tasks out of the way – often time when you look at how much cleaning you have to do, you feel dread and feel like ignoring the chore. This is because when you leave your home unattended for too long chores add up. But if you deal with a number of small tasks you will notice that there is suddenly less home cleaning left to do. When you take care of the clothes lying around, clean the dishes in your sink and change the pet litter for example, you will get a better idea of what needs to be done.
Take regular breaks – this is important if you want cleaning to be less stressful and cause you less headaches. You will be able to work faster if you do not feel constantly tired and you will accomplish much more.
Always research for better solutions and techniques – if there is one thing that can frustrate you about cleaning it is the fact that sometimes it just does not work. Reading about how to deal with Water Damage Clean Up, for instance, can improve your chances of maintaining your high standard kitchen. No matter how much effort you invest and how much you spend, sometimes no positive result is present. For this reason you should take your time to research more ways to tackle home cleaning. This is very important because it can not only help you with a more efficient way of cleaning, but it will also teach you exactly what to use and what to avoid. Imagine if you pour a cleaning detergent on your carpet that will damage its fibers because you didn’t take the time to research what you should use.
Get help – home cleaning is not a chore ( for example, a company like http://www.greenfacilities.co.uk) that should fall on the shoulders of one member of the family. If you have been doing it on your own so far, maybe it is time to get others involved. If you are living alone, you can acquire the service of a cleaning company. Usually this is very effective solution, as the cleaners will come equipped with their own tools and very quickly deal with any cleaning task you have for them.
These simple tips will guarantee a better result next time you have to clean. Follow any number of them and you will quickly notice a positive difference.
The best way for the big domestic cleaning is usually the fastest, the cheapest and the easiest way of cleaning. This can be helpful when you’re about to putting your house up for sale, since it’s one of the most common parts of how to sell your house to potential buyers. However, that`s the perfect way to keep the house clean, rather than deep cleaning all the floor coverings, furnishings, upholstery and metal shelving from https://www.aluminiumwarehouse.co.uk/. Next is a short list with pros and cons of the house cleaning and you can look at the pros as easy tricks as well. For example:
PROS:
– Begin the house cleaning with the most soiled objects like carpets, rugs, tile floors in the kitchen, the walls in the bathroom. The kitchen equipment also get dirty quite easily and quickly, and so it`s a good idea to start with.
– Make homemade detergent solutions instead of buying a dozen of them from the store. It`s just needed to mix some of the most powerful degreasers and detergents that you already have at home. They may include soap, shampoo, dishwashing detergent, salt, baking soda, etc. If you’re looking for any cleaning products and you’re trying to find some of the best for the jobs you’re tackling, try reading up on some review sites similar to that of Product Playoffs and others.
– For truly persistent and heavily soiled spots – a better advice is to call a professional cleaning company rather than trying to clean it by yourself. If you don`t know the exact type of your rugs and carpets fibers, for example, you risk to damage them. Inappropriate use of powerful detergents can also lead to discoloration, dryness or shrinking of the fibers. Yet the professional cleaners know which type of detergent and cleaning solution are best for the heavily dirty objects. Any objects left over after this stage will more than likely be too worse for wear and you should be thinking of hiring a removal service like 1300 Rubbish to clear away all necessary rubbish before any other cleaning is continued, this simply keeps things cleaner and easier.
For your outdoor needs, such as cleaning outside walls, painting outside walls replacing tiles, cleaning guttering and eavestrough and chimney repairs, you may need professional help. Stone/brick walled properties in urban areas often fall prey to graffiti, it’s painful to remove and it quickly devalues the property. Graffiti cleaning services are widely available and can make walls look like they were laid yesterday. Likewise, there are specialist chimney repair services that can help fix a crumbling chimney. Tile replacement could be sorted by a plumber, but perhaps look into a specialist tilers, many have experience in making older tiles match the newer ones if you are not replacing the entire lot. Finally, for guttering, hire a company that specializes in gutter cleaning as regular cleaning companies don’t often cover this area.
– Wipe of dust at least a couple of hours after finishing with the deep cleaning or even on the next day. Thus, you will give enough time to the dust to accumulate on the surfaces and then to wipe it of easier and quicker. The same goes for vacuuming. You are going to want to look for the Best Stick Vacuum Appliance For Your Home and then run it over your carpets and floors at least three times in the days following a spring clean, to prevent dust settling into the fibres.
– Deodorize and sanitize your house right after cleaning. There are plenty of tips and tricks for the impeccable sanitizing activity and it`s truly recommended if you have pets at home.
– Mopping every day will ensure cleanliness and fresh look of the floorings with flat surfaces. From laminate floorings to the tiles in the bathroom – mopping is as easy as quick and it`s definitely worth it. It will keep the clean effect for a longer time and so it will reduce the need for deep cleaning of the entire house.
Or else, let`s take a look at the CONS and try to avoid them:
– Cleaning Oriental carpets and rugs with a hot-steam cleaning machine is a mistake that can damage the yet sensitive fibers. The same applies for a myriad of other types of carpets and rugs, for example, handmade carpets, lavishly appointed carpets with very sharp colors, old carpets and more. If you’re not sure about the best way to clean these carpets and rugs and would rather seek the help of a professional, then if you’re based in San Diego look no further than a company like Maid Just Right.
– Exposing the already cleaned carpets and floor coverings on a direct sunlight in order to enhance the evaporation and so to reduce the drying time is another risky thing. Especially if you plan a big spring cleaning or in the summertime maybe, the powerful sunshine can make your rugs and carpets visually unpleasing for only a few hours.
– Letting the kids to play over newly cleaned floorings and furnishings can lead to breathing unhealthy bacteria left over the surfaces or volatile chemical compounds. Even the hot-steam cleaning systems provide a tiny little chance of such a risk, although these cleaning machines can leave surfaces completely dry and ready to use.
– Cleaning windows, tiles, grout lines, kitchen equipment or other objects with a homemade detergent is one of the easiest and yet useful ways to achieve a good result, but only when you regularly change the water. Cleaning with a dirty cloth or rubbing a stain with a dirty brush can only spread the dirty stain.
Cleaning your home can be tedious and tiring. It is a chore that not many people wish to do, but one that is necessary. Cleaning is after all the only way to assure that the environment in your home is fresh and that there is no health risk for anyone in the form of dust and other unwanted allergens. Even worse yet, there is always the possibility that pests could enter and infest your home if it is unhygienic, which is a problem that washington pest services will have to resolve, as it’s quite difficult to tackle yourself. To live in a clean house is not a given, it is a result from a lot of hard work. And this work often times falls mostly on the shoulders of very few people. If that is the case with you, you can try to make it a team-effort by following some of these suggestions:
Benefits – try to explain the benefits of a clean home to anyone who is rather not willing to partake in cleaning. Everyone should understand that having a clean home is a good thing. Walking in to the sight of scattered clothing and unwashed dishes can be very unpleasant, and it is always preferable to avoid such chaos. Once that is taken care of, one would always feel better overall in the cleaned home. It seems only natural then to convince others in your home to try and help you achieve this clean environment since they will benefit from it too. If, of course, you can’t get the help of those from within your household, a home cleaning company can help instead which is well worth considering.
Established Cleaning Routine – If you have an established cleaning routine, you can more easily divide tasks among members of your family. That way, they will know exactly what is expected of them and when they need to clean. In turn, this means that they might be more willing to participate in cleaning and not leave everything to you. Beyond the aesthetic benefits, maintaining a necessary cleaning routine is crucial to preventing an untidy environment that can attract pests like cockroaches. Cockroaches thrive in unclean and cluttered spaces, making regular cleaning an effective measure of pest prevention. However, if you find yourself dealing with a cockroach infestation, seeking professional Cockroach Control services becomes imperative. Professional services can efficiently address the issue and implement effective measures to eliminate cockroaches and prevent their recurrence. That being said, integrating a routine cleaning schedule not only promotes a healthier and more organized living space but also acts as a proactive measure against potential pest problems, ensuring a comfortable and pest-free home environment.
Kids – one thing a parent can always do is get the kids involved in cleaning. It may sound weird and not advisable at first, but kids can be very enthusiastic in their desire to help clean. This should be encouraged in fact, as long as it is within reasonable limits and caution for safety of course. You could prepare in advance by going through some helpful home articles and figuring out what jobs children can safely do and what they should stay away from. It should not be too difficult to get the young ones to clean, as they view it as a game. And who is to say it isn’t one? Imagine for example mixing green cleaning solutions with them, or trying out new cleaning outfits. Then also consider how fun cleaning, as an activity, can be for kids. With all the running and moving involved, it is easy to imagine that they would be more than willing to work around the rooms.
Professional Cleaning Service – it should come as an obvious choice to consider this option, when cleaning tasks add up immensely. Hiring expert domestic cleaners is often times a preferable option when you have little time to spare and you require very fast and efficient results. Cleaners normally bring their own gear and tools, so you won’t have to worry about a thing. One more benefit is that you can have them in your home at a time that is entirely convenient for you.
Cleaning is always easier with a little help, be it from the people you live with, or professional. It is always more preferable to work with someone than alone, as this will leave you more time for yourself to just do something else. Furthermore, the work can be done in better ways when more than one people are involved.
The need to clean our homes doesn’t really rely upon a specific time of the year, so we often need to address the issue regardless of what else we have to deal with. There are many ways we can get lazy, allowing the filth to pile up and that happens even more often than we’d like to admit when we have kids to take care of. We also tend to forget one of the simplest facts concerning dust – the fact that it happens to be made of dander, hair and worse. If you want to deal with it and you have kids to deal with as well, then you will need some help after all. On the bright side of things, they may even help you out if you handle things right and you can turn things into a lot of fun, so you can move ahead with this in mind while making sure your home is clean and flawless:
Using teamwork
It would be a pretty lonesome thing to work in a bathroom by yourself, especially if you can find a fun way to clean together with your kids. You can have your kids helping you out with the smaller stuff, such as scrubbing the sink, helping you with polishing things and other things that may need to be done. You must always choose tasks that are suited to the kids themselves however, as this will be a necessary step toward finishing the job. This will also help the kids learn to deal with teamwork efforts in a friendly environment.
Keeping kids focused
In most cases kids will be amazing at tuning out what they need to do when they get bored, so you will need to figure out ways to keep them focused and happy at the same time. You will need to offer the tasks with suitable presentation if you want to make them interested in what you must do. You can organize things with a small board with tasks meant for you and your kids, offering rewards for helping you out in one form or another. If you handle things right your kids will be more than happy to help out and they will learn something from the experience while they help out. If, on the other hand, you wish to keep your kids quiet and seated while you are doing the toughest cleaning tasks, then you must provide them with something that can keep them occupied and focused. For instance, while you are trying to clean the ceiling fan, allowing them to watch cartoons online (perhaps by using the best streaming vpn that can unblock certain cartoons restricted in your area) could be a good idea since you will not need to keep an eye on them at all times while you are already doing a tough task.
The importance of music
There is a great way to inspire minds and bodies when you need to focus on a job and that is by listening to music. You can really up the mood by using some nice, upbeat tunes to help you and your kids, enjoying a good time while working with less hassle involved in the process. You could also use various methods to keep children completely preoccupied (so that you work with little or no obstruction). It is seen that children tend to stay focused when their favorite tunes or cartoons are on for them. Cable tv has tended to be the favorite way for mums to keep their little ones occupied often. If you’re interested, you could read up on more cable tv statistics and know more about this domain!
Give tougher jobs to teens
As kids grow, they will have the ability to do more to help you out, with the greater skill involved. It could be anything you need, from basic repairs and organizing to cleaning. However, note that basic repairs and cleaning do not include kids repairing or cleaning roofs. Tasks like these should better be left to a roofing contractor. Here basic repairs and cleaning refer to fixing a broken table or dusting the windows. Do not give them jobs that might lead to accidents.
Anyway, if you have been handling your kids right so far, they will not mind helping out even during the tougher and more emotionally difficult moments of their teen years. In some cases, teens may dislike the tasks you give them, but they can really deal with them in a favorable way if you handle things the right way.
Today, people focus on going green and they try to make use of the products that are made by using home based products. Using as less chemicals as possible is one of the major points of green cleaning. It’s a good idea to use eco-friendly and nontoxic cleaning supplies if you want to have an easier time cleaning without any danger involved. The toxic fumes of most hardcore commercial cleaners require good ventilation, so you will need to do your best to avoid if you want to have an easier time overall. Commercial cleaners have been trained in cleaning with dangerous chemicals and dealing with toxins. Some people enjoy the cleaning process so much that they to decide to take on a course in cleaning operations, which are widely available to do. A job in commercial cleaning is well-sought out and must be done to a high standard to ensure proper safety. However, if you would like some tips on how to get the same results commercial cleaners achieve then carry on reading!
Baking soda is quite effective for removing food spills and other stains from the oven. It can even deal with more stubborn stains as well. Baking soda can be considered the preferred cleaning product for oven cleaning due to its lack of toxicity and gritty, grease-cutting power which works pretty well on oven stains.
Baking soda can replace a number of commercial cleaning products when people want to go green and hesitate to use the products that contain harsh chemicals to wipe off food spills and other stains. Some strong chemical cleaners, such as bleach can leave traces upon surfaces, which makes them dangerous when used around kitchens in concentrated form. As a result, these chemicals also get into our food and our bodies. On the other hand, baking soda has no smell and it happens to be safe in the quantities used. For this reason, we suggest avoiding the use of harsh chemical products altogether for oven cleaning, replacing them with baking soda that is easily and readily available. Apart from being environmentally friendly another great benefit of using baking soda is that it is very cheap and found pretty much everywhere. It is far cheaper than many commercial cleaning products. There are many ways you can use it for cleaning purposes that go beyond oven cleaning, especially when combined with an acidic substance such as vinegar or lemon juice.
Normally baking soda is used along with a bit of water to get the job done but to make it more effective you can also make use of vinegar or liquid dish soap along with it. This will form a paste you can use in the oven with a sponge for optimum results. Leave it for few minutes so it can work its magic and rub the stubborn stains into oblivion. After that, make use of a clean, damp sponge to clean the oven. Baking soda is not a suitable disinfectant, however, as it simply doesn’t possess such a quality. You should work on disinfection through other means, such as borax for these purposes. It might also be ineffective for cleaning commercial kitchens or grease inside exhaust hoods. For such situations, it would be advisable to get in touch with Auburn Hood Cleaning Professionals or other similar service providers in your vicinity. However, when it comes to removing tough stains, distilled white vinegar has antibacterial properties that may easily complement those of baking soda. You may even use the mix to unclog your kitchen drain if the situation warrants its use and you have the patience for it. In these situations, however, it can be wise to consider the problems with DIY drain cleaning that can arise when done alone and unsupervised. Much like how the best results for oven cleaning come from hiring a professional in that area, so too is hiring one for unblocking drains like Apollo Plumbing and Drain Cleaning services, so you are not knee-deep in a blockage you can’t shift.
We love our pets—but accidents, shedding, and odors are part of the deal. Whether you’re dealing with a puppy in training, an older pet, or the occasional unexpected mess, acting quickly is the key to protecting your carpets, furniture, and indoor air quality.
Pet accidents don’t just create visible stains. Liquids can soak deep into carpet fibers and padding, leading to lingering odors and repeat soiling if not handled correctly. The good news? With the right approach—and fast action—you can minimize damage and keep your home clean and fresh.
Step 1: Act Immediately After an Accident
When a pet accident happens, time matters.
Blot, don’t scrub. Use clean white towels or paper towels to absorb as much moisture as possible. Scrubbing can push liquids deeper into the carpet backing, making odors harder to remove. [bissell.com]
Dilute the area. Lightly apply cold water and blot again to help reduce concentration before stains set.
Neutralize odors early. A mild solution of white vinegar and water can help neutralize smells and break down residue before it dries. [wikihow.com]
Fast response significantly reduces the chance of permanent staining or recurring odor issues. [flooringclarity.com]
Step 2: Control Pet Hair Before It Becomes a Problem
Pet hair builds up faster than most homeowners realize—especially in carpets, upholstery, and air vents.
To stay ahead of it:
Vacuum frequently using a high‑suction vacuum with a beater brush.
Use pet rakes or rubber brushes to lift embedded hair from carpet fibers without damaging them.
Lint rollers, velour brushes, or pet hair sponges work well on furniture and stairs.
Air purifiers with HEPA filters help remove airborne dander and hair, improving indoor air quality—especially helpful for allergy sufferers.
Regular grooming and bathing also reduce shedding at the source, making your home easier to maintain overall.
Step 3: Treat Stains and Odors the Right Way
Surface cleaning alone often isn’t enough. Pet urine and organic messes can migrate below the carpet surface, where odors linger and reappear—especially during humid conditions. [thestainguide.com]
For best results:
Use enzymatic cleaners designed for pet accidents. These break down odor‑causing proteins instead of masking smells. [bestvacuumexpert.com]
Allow proper dwell time per product instructions—enzymes need time to work.
Avoid steam cleaning until enzymatic treatment is complete, as heat can lock odors in. [carpetclea…valley.com]
Old or recurring odors often indicate contamination in the carpet padding, which may require professional extraction. [carpetclea…valley.com]
Step 4: When DIY Isn’t Enough, Call a Professional
If stains keep coming back, odors return after cleaning, or accidents were left untreated for too long, professional carpet cleaning is the safest option.
Professional hot‑water extraction and pet‑specific treatments can:
Reach deep into carpet fibers and padding
Fully neutralize odors at the source
Extend the life of your carpet
Restore freshness without harsh chemicals
At A‑1 Cleaning Service, we regularly help Humboldt County homeowners recover carpets affected by pet accidents—before replacement becomes necessary.
Final Tip: Speed Is Everything
The faster you respond to pet messes, the easier they are to remove. Fresh stains are always easier to treat than old ones, and quick action helps prevent long‑term damage, odors, and repeat marking behavior.
If you’re dealing with stubborn pet odors, heavy shedding, or carpet stains that won’t go away, professional help can save you time, stress, and money in the long run.
Need Help With Pet‑Related Carpet Cleaning?
Call or Text A‑1 Cleaning Service at (707) 442‑3229 Visit https://a1clean.com Serving Humboldt County with trusted, professional cleaning for over 30 years.
Obviously it is not possible to create a list of cleaning supplies that exactly and universally fits around. Many homeowners often tend to forget the importance of regular cleaning. That is why a lot of property owners hire home cleaning services to ensure that their home is always squeaky clean, even if they don’t clean it themselves. It is a fact that the needs of every home differs from one another. But a general list can be created for the cleaning materials that can largely apply to majority of the homes. As every house and its keepers do vary from one another so their cleaning habits and needs might also vary, which makes it difficult to create a universal cleaning list. Here we have discussed few of the cleaning supplies that are most commonly used. Few of these (if not all) under discussed cleaning materials will be necessarily used by all of us for home cleaning.
Dusting is an important cleaning job that is largely performed in almost all off the houses. The frequency of dusting varies from home to home. Some people do perform it daily while others perform it after a couple of days. This frequency is dependent on a number of factors including weather, lifestyle, health conditions and décor. Although people might use different cleaning supplies for dusting but the most common and recommended cleaning items include microfiber clothes, vacuum cleaner with the dusting head attachment, furniture polish and dusting spray.
No matter what the size of house is but it definitely will generate some amount of trash. The equipment that is needed to deal with trash is also a great help in cleaning. Although these cleaning tools are quite simple but these mean a lot in home cleaning. Domestic House Cleaners Domestic cleaning and flat cleaning cannot be done without these tools. These
trash cleaning tools include a trash bin, trash bin liners recycling bins, cleaning liquid and sponge (for cleaning the trash bins). It is suggested that these trash bins must be place in different rooms or areas of the house. It will make it easier to keep the rooms clean. Also, the recycling bins must be labeled so that it becomes easier to find out what kind of garbage is thrown in which bin. The regular cleaning of bin is also required so as to avoid the bad odor and seriously non hygienic conditions.
The dust and dirt can be clearly seen on almost each and everything. You can touch and check the surface of any item at your home. A good cleaner is required in order to keep each and every surface clear of spills, spots, dust, dirt and smudges. For this you might need an all-purpose cleaner, wipes, kitchen cleaner, bathroom cleaner, paper towels, cleaning clothes, sponges, scourers and gloves. When cleaning the kitchen, outside of using cleaning products, not many people actually know what to do to get their ovens clean, others might be interested in using all natural products, either way it always helps to check out oven cleaning tips. All these items are quite essential in order to give every part of your home a cleaning look apparently.
All the dust and dirt that enters in our homes are tolerated by the floor. A lot of things are smeared through, dropped on and walked across our floors every day and it is not possible to avoid these mistakes. But it is possible to get them cleaned. The cleaning supplies do vary from home to home according to the types of floors. If the flooring in your home is mainly hardwood or tiles, you’ll need to check out some steam cleaner reviews to make sure that your floors are clean and germ-free after cleaning them. For carpeted areas, you can use a vacuum or a specific carpet cleaning device. Always do buy the cleaning stuff according to your floor type so that you might get good results. But still, there are few common cleaning supplies as well including broom, mop, mop bucket, polish, vacuum cleaner, dust pan and floor cleaner.
After cleaning each and every part of your house, it is also required to keep your home organized and de-cluttered. De-cluttering is again a part of cleaning and you must have few storage boxes for it.
Every home needs a vacuum cleaner, depending on what type of floor covering you have it will determine what type of vacuum cleaner you need. There are however a number of vacuum cleaners that can clean multiple types of coverings, these are ideal if you have different floor coverings in different rooms of your home. If your home has multiple levels then perhaps a lightweight cordless vacuum would suit your needs as it would be easier to move from one level to the next, if you would like more information on vacuum cleaners including lightweight cordless vacuum cleaners click here https://homecleanexpert.com/best-lightweight-cordless-vacuum/.
These are the few most common tools and products that are required for home cleaning.
Have you recently purchased a new refrigerator? Maybe you decided to go out and rent one from a rent appliances service for a few months until you are able to get your own. If so, you’ll know the importance of having a clean fridge. This is important for a number of reasons, and you will find that getting it clean is actually a rather easy part of our domestic cleaning. Whilst it is more commonly thought of as a part of your deep cleaning process, you should certainly attend to the fridge at least once a month, as otherwise, it can get out of hand. If you feel like this is too often, then it may be worth having a contract cleaner, or a professional cleaning service around once a month, perhaps to do that and any oven cleaning, or even upholstery cleaning that you need to get sorted. Have a look over the following fridge cleaning tips and tricks to see if there is anything that you could be doing to improve on your technique when it comes to the house cleaning.
1. First off, you need to empty the fridge. For this reason, it makes sense to do your kitchen cleaning at a point when you have less in the fridge to need to remove. The process of cleaning the kitchen will only take ten to twenty minutes, but the part where you take out and replace the food from inside will be a little longer. You should look during this process for any jars or food packets that are not needed any more, as left overs can be left untouched in there for ages, and get smelly and disgusting. You will find that there are probably more stains and things to get cleaned up when you have emptied the fridge than you may have thought there would be.
2. Take out the shelves. These are usually removable, and will be made of glass, wire or plastic. Whatever the case, you should be able to fit them in a sink full of water and a bit of washing up liquid. Leave them to soak for a while as you attend to the other steps in the fridge cleaning process, and then when you get a chance, wash them up as if they were plates. Having soaked them, the dried on mess should have softened, and you won’t usually need much more than a rough sponge to get rid of the worst of the dirt.
3. Take your sponge with some surface cleaning spray on it, or some washing up liquid, and run it around the inside of the fridge. You will find that it takes a minute or two to cover the whole of the inside, but once you have gotten a bit of a lather up, you can leave it to soak into the dried dirt. Once you have left it for a minute or two, you can get to scrubbing away the dirt with the rough side of a sponge. If the dirt is particularly dried on, don’t resort to wire wool, as get insides of most fridges are made from plastic, and this will scratch very easily if attacked with metal cleaning implements.
4. You can clean the outside of the fridge if you feel like it is necessary. Do make sure that you pull it out from under the counter if you have a half-sized one, to give it a proper clean, as it can get really dusty down there! While cleaning, you may also want to check if everything is working properly as none of us want a clean, malfunctioned fridge in our house. If at all you find any issues and cannot fix them yourself, there are websites like amanafridgerepair.com and similar other sites that could come to your aid.
5. At this point, all there is to do is replace the shelves and the food that you took out! Be sure that you clean off the containers, so that you are not putting dirty things back into your newly cleaned fridge, and be sure to keep good care of it!
With a simple, step-by-step process, you may find that your cleaned fridge feels new again. You could consider this a habit to develop to ensure that your food is stored in a hygienic place. This is simply because not cleaning out your fridge from time to time can have some unexpected and rather undesirable results– clogging of cooling vents, bad odor developed due to stale and rotting food, and more. While these may not bother you too much initially, this could cause your fridge to stop cooling like it used to. With the lack of proper cooling, the conditions on the inside of your fridge would be more suitable for pests like cockroaches to roam about freely. Considering the worst-case scenario, you would be compelled to call in sammamish pest control professionals (or wherever you’re based) to rid a possible infestation.
You may be able to prevent infestations and overall degradation of your fridge by simply cleaning it regularly. Not only can you look at it as a hygienic habit, but you could also look at it as a way to ensure you eat food clean and free of any pests. That way, you could also be sure that your peers/children inculcate this habit of eating and keeping clean as well.
If you are concerned that you could be cleaning the sitting room in a more efficient way, then you could well be right. If you don’t have the right order or products then you could be missing dust and dirt every time you clean. Having high-quality products, such as a Hoover, then you will be able to get all of the dirt up in one. If you think getting good products will be too expensive then 10BestCarpetCleaners has done a budget friendly series on the best Hoover’s so be sure to take a look.
If you can get an order for doing any job together, it will ensure that you are not at risk of repeating yourself, wasting time, or having to think of what to do next when you are in the moment. The beauty of the ordered approach is that you will repeat it, and start to learn it off by heart, meaning that it will eventually become your natural way of doing things. You will likely find that the best way to deal with this is to develop your own order, but that can be hard, so there are some pointers below and a rough outline for the job. Have a look at how the order may work for your sitting room, or any room for that matter, and adapt it to your needs, so that the whole thing becomes a really useful tool in your overall cleaning sequence.
First, tidy everything away in to the places where it needs to be. You will find that there are many different ways in which you can find these places, but it is best to have a set place for everything, to ensure that there is no question as to how you tidy the house. You will find that tidying immediately makes the room look better, which can spur you on, as you are already half way there. You will find that it also removes the amount of stuff that the next step knocks dust on to, meaning that you have less to dust afterwards, which makes it a lot more practical to do first off…
Next, dust the room from top to bottom, with a feather duster for any difficult to reach bits. You will likely find that you have to run over the surfaces under the higher areas a few time to ensure that you get rid of it all easily enough. There is a lot to be said for taking objects off of mantles and sills whilst you are doing this, as it ensures that you are not having to dust around them, and it means that you are getting dust on less stuff again.
Next take the sofa cushions out, shaking the dust off of them, so that you can get rid of all of the rubbish and debris that comes to settle on them through use. Take a hoover and vacuum under the cushions, having taken out any money or larger objects that fall down the gap. Failure to do this may well result in breaking or clogging up the vacuum cleaner. Return the pillows to the sofa having plumped them up nicely.
Once you have dusted off the surfaces, polish them and the objects up with a polishing cloth and some polish, should the surfaces and objects need it. You will find that this is a pretty simple job, and that you will be able to get a decent shine up with a few sprays and a couple of buffs with the cloth.
Take the vacuum cleaner and vacuum the floor. If it needs mopping be sure to do this afterwards, as otherwise you risk scratching the floor with the mop as you push the debris around, and that would be a real nightmare, as that will mean even more cleaning and polishing to do after all the rest of it! http://www.carpetcleaningcleaner.co.uk/carpet-cleaning-wandsworth/carpet-cleaners-wandsworth.html
The sofa is really easy to get marked, simply because it is a much loved spot for the family, and goes through a lot throughout the day. As a place where you are able to sit back and relax in comfort, you will find that it is actually very much the kind of place that gets things spilled on it; whether it is your cup of tea, the kids’ dinner or your friend’s glass of red wine, you will find that there are often little marks here and there, some of which are easy to remove, and some of which are really hard to get rid of! The main issue with a sofa is that only some of them have removable covers, and this essentially means that getting the stained area wet on a sofa that cannot be uncovered is risky, as the wetness can soak in, fail to dry, and cause mold and damp smells! Clearly the last thing that you want if you are trying to get rid of marks on the sofa is more marks, or a nasty smell, so it might be a good idea to look down other options!
For a start, if you have a light mark, you can often just wipe it away, and allow it to dry out. This is only really an option if you are aware that the staining article is not something that will get worse with drying in to the fabric, as this will mean that the stain is pretty much permanent if you don;t get rid of it completely the first time! For instance, red wine is not going to come out with a wet cloth, it will need more specialist attention. However, a little gravy on a black sofa will likely wipe away with a cloth and then be fine to dry out, as the mark will be unnoticeable.
Using upholstery cleaners is a good plan, as long as you know how to use them. Each product is different, but most will spray on, or have some sort of opportunity to lather up on the stain. Leave this lather in place so that the chemicals get their full chance to react with the stained area, and then wipe the foam away. You should find that the lather takes on the color of the foam, and that you are able to get a decent amount of the pigment of the stain away form the fabric or the upholstery. Using lemon or white vinegar in the same way can be very useful in that the acid in both will break down the build up of the stain, allowing it to be soaked up with a clean cloth, without spreading to the surrounding area of the upholstery. You should be careful with tougher stains not to allow them to be spread by your scrubbing, making sure to lift things off the surface with a knife or scraper, and ensuring that nothing gets pushed on to clean parts of the sofa.
Take the vacuum cleaner to the sofa to get up all of the crumbs, debris, pet hair and other bits and pieces that fall on the sofa. These smaller bits of dirt may seem inconsequential over all, but they can contribute to the deterioration of the fabric as the sofa is used, and the cushions rub together. Removing this dirt and dust regularly will ensure that the sofa looks better for longer. You will also find that plumping the cushions has a lot to do with the life of your sofa, as allowing a groove to be worn in to the cushions where people consistently sit will mean that the fabric is stretched in to a set position. Reviving the feather or padding within the cushions and upholstery will mean that this is less quick a process, and you will have your sofa looking a lot better for a lot longer!
Having a wet wipe ready to clear up any little food spills and other lighter marks that might befall your sofa is a great way to ensure that you are never worrying too much about the way it looks. If you feel like you are in a situation where you are always having to clean things up, it can be a good idea to get a sofa cover that matches the look of the room, that you can just throw in the washing machine in the event of a spillage!
If you are starting tireless that your cleaning process is taking up a lot of time in your life, then it may well be the case that you are actually having issues with how much free time you have in the first place. As your job gets more and more stressful, there will be things that you need to change about the rest of your life in order that it does not become totally overrun by work and chores. Whilst many feel like they should be able to have a regular balance between work and the home, you will often find that work starts to encroach in a way that is not so appealing, and the only time that you feel that you have to sacrifice is your family and social time. This is some of the most important hours of your life however, so it is essential that you find a way of reducing the amount that you lose to working, and try to find time elsewhere. One way of doing this is to get out of the cycle of letting the housework take forever, and there are two ways in which you can do this.
First off, you could get a cleaner. This is a fairly simple answer that many professionals go for to ensure that they are not being forced to work when they get home after a long day at the office. There is little better relaxing than coming home to a clean and tidy home, so it is certainly a good idea to look in to this. Besides that, a cleaner often has a good supply of commercial cleaning products and knows exactly the tasks to be done—professionals often possess the know-how of these things. Of course, you may have to point out the areas of the house and let them know what to clean, but they will surely find a good idea to go about the work.
Be sure of the hours that you need before you call anyone. Remember to ask your friends and family if they have a cleaner that they can recommend before you even start looking. Have a think about the sort of budget that you are willing to spend on cleaning, and look in to how well the cleaners get paid by the various agencies that you are looking at using. There is a lot to be said for having a loyal and devoted cleaner, who will ensure that you are always looked after, and they can become like a member of the family if you cultivate the relationship carefully, so choose wisely!
You could also try streamlining your own cleaning process, so that it does not get in the way of your life. This process is not a particularly easy one, but if you were to clean more often, and in a less block like way, then you may well be in for a revelation in terms of how well you can get your place cleaned without having to allow the process to take up much of your time. By separating the tasks that contribute to the whole house clean, you can get them done within five or ten minutes, and this of course means that you are in a position where you can slot such jobs in amongst other larger things in your life. For instance, if you are waiting for the kettle to boil for your coffee in the morning, you can wipe down the kitchen, or if you are waiting for your favorite TV program to start in the evening, you could vacuum the living room! If you want, combining this way of doing things with a less regular cleaning service would make everything a lot easier, without the expense of a cleaner coming every week or more often.
Removing hardening stains like wax, tar, chocolate and chewing gum
There are all sorts of stains that come in all sorts of varieties, from fatty, oily stains, to strongly colored stains, and then those that will be concentrated on in this article, the hardening stains like wax, chocolate and chewing gum. If you feel like you suffer too often at the hands of the hardening stain, you will likely want to ensure that you have a set way of dealing with such issues. With most stains, the time with which you take to deal with them is the key part, but with stains that get hard, you have a little grace period, as the wax or gum has to be hardened anyway to get the residue away in the first place. Have a look through the following tips to see if they can work for your cleaning process.
For a start, with all of these stains, you need to get down to the core of the stain, where the color of the offending product has mixed with the fibers in the material that you are cleaning. This means that you need to get rid of any residue that has been left over it by the spillage, as this will only defend against the cleaning products that you use to get the stain from the fabric. For the most part, you can use a bag with ice in it to harden the viscose liquid into a solid mass, which can then be peeled or scraped off. Use a blunt but narrow object like a dull knife or a spatula to lift the hard residue off, so that the actual stain is revealed. Be careful not to rip or tear at the fabric, because this will leave a mark itself, and the issue may suddenly be that you have a hole in your sofa, rather than a bit of wax!
You can then address the actual stain, having rid yourself of the worst of it. For chocolate, you must use lukewarm water, as cold water will make the chocolate set in to the fabric more. Use a sponge with the water and a little detergent to work it out gently, and to be sure that the stain is not spreading. Keep flushing the area with water, and ensure that you dab it out with a clean cloth, as otherwise the dirt will spread to the regions outside of the stain. If you are able to keep repeating this, then you should find that the stain start to shift. If you feel like you have taken it as far as you can, and the material is machine washable, then you can throw it in the machine for a cool wash for the last step. If not, and you can’t get rid of completely, then you need to talk to a professional.
The rest of the materials that may cause hard stains will often be removable with a little rubbing alcohol or WD-40. You will find however, that certain fabrics will not be as resistant to such harsh treatment as others, so it is imperative that you check an area that is not as visible first, to ensure that you are not at risk of making the whole issue any worse! Again, if you have tried all that you can, and then do not get frustrated if a stain persists, just call a professional for some advice, and see if they can help you out.
A house cleaning process can often take in all aspects, including ones which you might not have expected. One of the lesser thought of pieces of home furnishings which are often forgotten about by budding cleaner are the cushions which they might have on their sofas. While upholstery cleaning and carpet cleaning can be handled reliably and professionally, many choose to forget about their cushions, even though they are one of the most used items in the home and one of those which is most at risk from the kinds of spills and stains which might affect and dictate your home cleaning system.
When it comes to cleaning a home, finding a way in which to get your cushions cleaned is essential. One of the best ways in which to do this is to check the label on the cushion cover. This will provide you with the information which you require before you continue. The material which it is made of is very important, as are the washing instruction which is listed. This will let you know what the best means of getting these cushions back to their old selves will be. Before you begin to wash anything, consult this information. However, if you’re getting bored seeing the same old cushion covers and you’re thinking of revamping your space a bit by doing little changes here and there, you could think of buying some designer cushions to decorate your room.
One of the best ways in which to keep a home fresh is to make sure that the upholstery is as clean as possible. This can be accomplished with a regular washing of the cushion covers which you use most. After having consulted your labels, you will know which cleaning method is preferred for these cushions and can wash them accordingly. The easiest option is those cushions which are machine washable, as these can simply be placed in a washing machine and then hung out to dry. For those which will not stand up to a machine wash, you might have to wash them by hand, which can take longer but is equally effective. You can also get some great upholstery cleaners from either ChemicalWIKI, a local hardware store and sometimes even your local supermarket which will make your cleaning process a lot easier. If machine washing, fabric softener can be a great addition and can really keep your home feeling fresh. The drying process is very important and you should always make sure that you get the cushion covers as dry as possible before placing them back on the cushions. Failure to do so can lead to a faint odour being emitted and then you will only have to wash the covers again. Hanging out on a clothes line is an ideal method of drying.
For those times when your cushions do have a faint odour, but washing might not shift it, you may want to turn towards something a little more specialised. There are many products on the market which aim to reduce the bad smells which linger around the house and one of the spray on solutions can be an excellent means of getting rid of the bad smells in both the short term and the long term.
When it comes to cleaning cushions, however, many people are primarily focused on stain removal. If you have spilled a liquid or dropped something on your cushions, you could well have left a mark which regular washing will not shift. In these instances, you might have to turn towards stain removal agents. Again using the knowledge which you gleaned from the label, look into the best method for removing that particular stain from that particular material. While some house hold goods are excellent for removing stains, you might need to get something more suited to your particular needs. Once you have found what should be an ideal products, follow the instructions which are laid out by the manufacturer. If this does not work, then you might need to call in professional upholstery cleaners.
One day I just woke up and seemed to be buried in clutter. I do not know how it happened or when it happened but it did. I do know what happened though. Life happened.
It was several years ago now when we moved to this home. It came about through a series of catastrophic events in my life at the time. My spouse left, I got into a terrible automobile accident, and we had to move. My mother was living with us along with my thirteen-year-old son. My daughter was off at college at the time but rushed back to help us out. She was a godsend at the time. She helped me to find this home, which was about a third of the size of the home we were living in. She contacted a relocation company to move our things and also found CarsRelo, who moved our vehicles for us. She did all the organising with for that, as I’m not always great at that sort of thing. She then moved in with us to help out because I could not walk. So between my stuff, mom’s stuff, and my daughter’s stuff we were jam-packed.
The garage was full of furniture and boxes and the house was crammed with too much furniture. I thought about getting a Roll off dumpster but at the time, we barely had any money. Our belongings were piling up quickly so I had to think of a solution. We had not planned on living here long and my daughter wanted to eventually get back to her life as she knew it. Like I said above, life happens and things do not always work out the way you plan. With my daughter trying to finish college, my son going into high school, and me taking forever to recover, not only physically but emotionally, we ended up being here a lot longer than we expected.
We tried for the longest time to pick up and move stuff around to clean underneath to keep the mess at bay. My mom was really good at this and she was the one doing most of the work because of my inability to get around. A few years went by and even though we were still surrounded with stuff it was not overwhelming. Then more life happened and after college my girl got a full-time job which kept her away. At the same time, mom started to get sick. We found out she needed carotid artery surgery and a triple bypass. Up until this time she was out cutting down trees with the chain saw we had gotten her for Christmas and she was seventy-seven.
After her surgery she stopped eating, was very weak, and was riddled with urinary tract infections. She could barely get up to use the restroom let alone do anything else. She ended up losing thirty-five pounds. So needless to say she was not cleaning. My daughter was working all the time and my son was busy being a teenager. It only took a short while before there was a noticeable change in the house. The dust was mounting and things started to pile up.
Since I was limited in what I could do it began to get out of hand very quickly. Not only was the house out of hand but I was also taking care of mom and we were going to the doctors at least once a week. I was exhausted and found myself in tears most days. My daughter did her best to help out when she could but no matter how fast or hard she worked it did not seem to make a dent in the clutter. We needed to get rid of a whole lot of things and there just was not enough time in the day for all that needed to be done. We were drowning in our own home under a sea of clutter.
It’s definitely not a nice feeling. It almost makes me feel and look messy, even though I know deep down that I’m not. I just don’t know where all this clutter has come from, and why we can’t seem to get rid of any of it. I broke down to my friend one day because it was all starting to get too much. She reassured me and said that it will get sorted one day, and even recommended using something like these Pueblo storage units if I wanted to store it away until I could do something about it. Now, this wasn’t a bad idea at all, so I might have to do some research into this. In the meantime though, I guess we’ll just have to keep digging our way through the clutter to try and make the house look cleaner.
The only time I get out of the house much anymore is to go to church and a Bible study every Tuesday evening. These times are precious to me and I have made some wonderful friends. I am thankful that the Lord allowed me to have the opportunity to meet the wonderful women I have met.
In the past few weeks I have felt so overwhelmed and have been praying and asking the Lord to help me with this house. It is hard to find rest in a home that is overrun with stuff. One Tuesday night I was so overwhelmed with it all that when the ladies asked how I was I finally had the courage to let them know what I was dealing with. It is so embarrassing to think of others seeing how we live that I had kept it to myself. I was surprised by the love and encouragement I received from my friends. I should not have been because I knew what loving women they are but so often it is hard to admit situations like we are in to others.
Several of the women said that they would be more than happy to come over and help us out. It was so encouraging but at the same time I did not know how I was going to feel when they saw the inside of my home. They asked me to call but I could not bring myself to do it. One lady kept calling me and asking when we were going to get started. I confessed to her that I was ashamed and she assured me that she cared about me and nothing could change that. So I told her to come and take a look.
When she came over I took her from room to room and all she kept saying was, “That’s doable!” I just looked at her and cried and kept hugging her over and over. She told me that we would just take on one thing at a time, for as long as I could handle it, if that was only thirty minutes that was fine. She assured me that it was not impossible and she did not run away screaming. This particular woman has the most beautifully decorated, immaculate home I have been in for a long time. I thought for sure she would flee the scene and never return.
She has since been here in my home working side by side with me and my daughter when possible. I have never seen anyone work so fast and with the ability to make decisions about what to keep and what to discard. And the whole time she is working she is chatting and making everyone feel at ease. I know the Lord sent her to us because I was asking Him for help. What a blessing.
Not only has she been helping with getting our home in order but in doing that she has encouraged us beyond measure. I am the type of person that sees the overwhelming mess; she has shown me that if you do not look at it as a whole but as separate little projects it is actually manageable. “Give a man a fish, and you feed him for a day; show him how to catch fish, and you feed him for a lifetime.” (Chinese Proverb)
You may be wondering what the point of this story is. There is a threefold reason I shared this with you. Life does happen and things sometimes get out of hand, that does not mean you are a bad person. We need other people in our lives and we can not stay shut off away from the world around us when we get overwhelmed. We need to trust in the love and kindness of others and give our pride to the Lord and let Him handle it. Just make sure the people you are trusting in are trustworthy. There are all kinds of supportive groups of people around that can help you. If someone hurts you then get away from them and seek out friends who are loving and kind.
It only took one person to come in and help us, not a team of people, just one loving person. If you find yourself in a situation like I am in then seek help from someone you trust. A family member or friend who is really organized can help more than you know. The most important thing I have learned is to look at it in small areas not on the whole and not to overdo it until I am too tired and want to give up on all of it. I just keep hearing my friend say, “It is doable.”
Since getting our home back in shape, we have even been inspired to start some renovation work. We would love to add value to our property by updating some of our fixtures and fittings, but it can be difficult to find the money to begin projects of this size. Loans can often be a useful way to pay for any home renovation projects. One of our friends recently had some renovation work completed on her property after using an online logbook loans calculator to workout home much money she could borrow based on the value of her car. If you are thinking of taking out a loan, just remember to do your research first.
Always curious, Ashley Hardway is constantly learning and passionate about sharing what she learns with others. Based in Houston, Texas, she loves to help families grow stronger, help their environments and communities, and keep moving forward! Check out @NannyLady on Twitter to connect and find out more
So many times parents wait to give chores to their children when they are much older. The best way to train your children to clean house is to start from the time they learn to walk. And even before they can walk you can talk to them about the work you are doing and what is the best way to get it done. Many studies show that children can learn to read or learn a foreign language in their infancy. It is never too early to start teaching them how to clean house as well!
I know that when I was very small my own mother would sit me near her as she was cooking or baking in the kitchen and she shared each step with me. She would also take all of us from room to room with her as she cleaned and she talked about everything she was doing. Now even though I do not recall these conversations as they took place at the time I know that I these experiences are stored in my mind. I have always known, almost instinctively, the best way to dust furniture, bake a cake, to clean a tub, etc.
Starting from the time your child can walk you can find chores that they can do. Picking up their own toys and putting them back into the toy box for example. Putting away their own clothes in the dresser or helping you to carry a few dirty clothes to the laundry room. These are things that babies can easily achieve. If you wait until they get older and more responsible, they will most likely at this point rebel against the idea of cleaning. Starting them out early making it just another natural part of life (and it is) will give them the skills they need in their adult years. It will also ensure that you as the parents will not have the entire responsibility of cleaning the home. I personally know families with teenagers and adult children that take no responsibility for the home and the parents are working and have the entire responsibility for the home as well. This should never be the case, it is not fair, but if you wait to train your children when you think they are old enough then you may find yourself in the same situation.
There are some really clever charts I have seen in several different posts lately about age appropriate chores for children. You could search the internet for these charts or just sit down and write down all the chores that need to be done in the house from the smallest on up. Write down your child’s or children’s names and start writing age appropriate chores under their names. Yes, you will need to spend a little more time in the beginning supervising and teaching but it will be well worth your time when you witness the results. Start them off small and work your way up to bigger and bigger challenges as they age. In the beginning you can work side by side with the children to train them and encourage them but as they advance in skill they can be left to work on their own.
Some people say that they have charts with stars and rewards for chores. Some children get allowances if they do their chores. Even though I do believe in giving children allowances I have never believed in giving it to them for doing their chores. I feel like everyone who lives in the home should be responsible for it and that their reward is a clean and nurturing environment. In my opinion the allowance should not be for doing the chores but instead for personal responsibility for their lives. Not just doing their chores but doing them with a good attitude. Being responsible for their homework and doing their best in school (which of course is different for each individual). One child may be an A student while the other brings home a B in a few subjects but you know they are doing their best.
And children should not just be taught to do their chores. They should also be taught to see a need and meet it. How many times have we all seen a child or even an adult for that matter walk right over something that needs to be picked up and put away or thrown away? Or you may be carrying in a lot of groceries and no one offers to help. This type of instruction is so very important for children to get early in life. We are only hurting our children when we do not give them proper training in thinking of others and noticing small things that need to be done and doing them. When they enter the workforce they will have a hard time adapting to being a team member and working with others if they do not receive the proper training at home.
Cleanliness is a big part of life and something that can not be ignored. As parents we need to look at it for what it is, a life skill, something that our children need to become successful independent adults. We only make it easier for them by starting them out from the beginning. Chores are not a punishment but a very important part of life.
Rachael Cherry is a wife, mother, and writer who is passionate about helping connect families in need with high quality caregivers. She has taken that passion and put it to work through NannyPro, a respected online nanny referral service. Learn more by visiting @NannyPro on Twitter.
Cleaning up after your kids can feel like a full-time job. That’s because most often, especially when parenting two or more, it is. The good news is with the right tools on hand you can significantly cut the cleaning time and even get the kids to help out with basic household clean up.
1. Baby Wipes – Keep a container on hand in every room in the house, in the diaper bag, and in the car for easily clean up. Clean faces, sticky hands in surfaces with a single swipe. Since they are safe enough for baby’s bottom, as your kids grow they can grow in their ability to help clean up little messes independently.
2. Hand Sanitizer – While washing yours and your little ones hands with soap and water is always the best defense for spreading germs, when a sink just isn’t available, opt for hand sanitizer instead. Keep a small bottle on your key chain, in your diaper bag and in your car for easy access. Monitor the kids carefully when using it so you can be sure that they rub their hands together properly and let their hands dry.
3. Bucketless Mops – Mops designed with reusable containers attached to them make laminate floor clean up a cinch. Simply squeeze the trigger to spray your floor with the cleaning material of your choice and you can quickly mop up nearly any mess. Once the map pads are nice and gritty, remove and throw it in the washing machine. For a deeper clean opt for a steam mop that kills bacteria without the use of chemicals.
4. Handheld Vacuums – There is hardly a thing handier then a handheld vac. From cleaning leaves and dried mud up from the entry way to clearing crumbs off the countertop, floor, and table, handheld vacs allow you to clean up the mess without making a bigger mess as you try to carry crumbs over to the trash can. Added bonus? The kids love to use it.
5. Steam Vac- At one point or another, your child’s bodily fluids are going to hit the floor, literally. Whether it’s a potty training mishap or a case of the stomach flu, forget calling the carpet cleaning professionals and clean up quickly – even in the middle of the night – with your very own steam vac. Having one on hand will save you time, money and effort.
Cleaning up messes is part of life. Make this part of life a little easier to keep up with by having the tools on hand that can save you time and energy as you tackle your children’s messes both big and small.
With over 20 years of experience in the nanny world as an award-winning nanny, agency director, and parenting author, Michelle LaRowe is considered a leading industry expert. A mom herself, she loves to educate parents and nannies on the importance of quality in-home childcare.
Living in a stinky home is not pleasant. Not only can grime buildup stink, but it can also cause breathing problems and even worse longer lasting health problems. However traditional cleaning chemicals can cause breathing problems as well. What can you do? Try to clean green with these simple tips:
Dishwasher smelling foul? Sprinkle in a handful of baking soda before your next load or between loads.
Remove the musty smell from sponges and loofas by soaking them overnight in four tablespoons of baking soda to one quart of warm water. Let them dry in the sun and they have new life!
Stave off bad smells in your refrigerator and freezer by leaving an open box of baking soda in your refrigerator all the time. Swap it out every month for optimum scent control.
Keep your trash can or recycling bin fresh smelling by sprinkling in a dash of baking soda every time you empty it. Also works great on big outdoor trash cans and helps keep the flies away!
Keep your closets from smelling musty and giving your clothes the same smell. Leave a container of baking soda in the corner of your closet and change out every few months to keep your clothes smelling fresh. Add a drop or two of essential oils for an even better scent.
Stinky gym bags? Sprinkle in a dash of baking soda to drive away smells.
Clean out ashtrays and remove the lingering smoke smell by scrubbing with baking soda.
Get the stink and stain out of plastic containers and lunch boxes with vinegar. Wipe with undiluted vinegar and let sit overnight. For tough stains let the container soak in a half and half solution overnight.
Clean and deodorize the oven with vinegar. Soak the oven with undiluted vinegar and let it sit for several hours or overnight. Then rinse well. For tough stains you can scrub them with baking soda.
Using baking soda and vinegar to clean can be a great way to cut through the grime and stink without further aggravating the problem. Try some of these easy cleaning tips in your home and see if you can breathe easier.
Author Bio:
This post is contributed by Christine Maddox. Currently she is pursuing her Master’s degree from University of Texas as well as blogging for www.4nannies.com. She loves to write anything related to parenting, kids, nanny care etc. She can be reached via email at: christine.4nannies @ gmail.com.
When the plumbing in your home develops a leak it can mean a big mess. I know because that has happened to me several times over the years. Each time there was a new kind of mess to clean up. Thankfully I had the internet and I was able to get some help. I looked around at so many different plumbing sites, and the key thing I was looking for was just someone who would be reliable and help me to get my life back in order after the problem was fixed. There were very few sites who showed what skills and qualifications their plumbers had.
Here are some issues you may face when leaks spring up in your home:
In the Bathroom
The bathroom is a hot spot for leaks. There is just a lot of plumbing going on there! If there is a pipe you can think of in the bathroom than my home has had a leak there. I don’t know if the warrantee ran out or what, but what can go wrong does go wrong at my house.
The first bad spot to face was the bathtub faucet leaking. It was just a constant drip dripdrip that drove me crazy and hiked up my water bill. I figured it would be easy to fix; just a new washer in the fixture. I had done it before in my old home, so why wouldn’t the same thing work in my new home? Of course, things did not work out that easily. The faucet was too old to fix and had to be replaced. It was not just a matter of screwing off the faucet and shoving a new one on. Oh, no that would have been too simple. Instead the tile around the faucet had to be broken and removed, the wall behind that had to be cut out and some of the piping even had to be replaced.
What a hassle! After the plumber had replaced the faucet and left I was staring in horror at my ravaged bathroom. Where would I shower now? Upstairs I suppose. Thankfully I was able to get the bathtub redone and back in good condition but it cost me a pretty penny. For one leaky faucet!
Another leak that sprang up in the bathroom was under the sink. The cabinet around the sink hid the evidence for a while, but when I pulled out a dripping wet towel I knew something was wrong. The hot water hose that connected to the bathroom sink had rusted and corroded over time. Now it was leaking but I couldn’t get it off to replace it. Another call to the plumber and my sink was fixed. I was able to catch the leak before it did major damage to my cabinets, but there was still some warping damage done. Not to mention all the towels that needed to be rewashed and dried. I am so grateful that we have plumbers in the area that on hand for emergencies! It is likely you will find a plumber like this in your area, we have found one example of a website who offer similar services to point you in the right direction – onetorontoplumbing.com
The final straw and biggest mess came due to a major mistake on my part. One Fourth of July I left a single firecracker in the bathroom. There are, of course, matches in the bathroom as well to light the scented candles. That combination proved disastrous when a person I shall not name decided to light the firecracker before thinking about where he would throw it. Into the toilet it went and a moment later the crack boom of shattering porcelain echoed through the house.
You would think that a crack in the toilet wouldn’t cause that much of a mess. Well, you would be wrong. That auto refill feature is a pain in the neck. Just for your information you cannot patch a toilet either. Glue and waterproof tape do not work. We ended up having to take out and replace the whole toilet but not before water had gotten everywhere: in the crevice between the bathtub and the floor, under the cabinets, and out into the bedroom carpet.
It stunk. It wasn’t even dirty toilet water and it still stunk. You can imagine the smell. Gag. I called out the big guns and had it all professionally cleaned. I was not going to risk smelling that stink for any longer than was necessary. Getting it out of the carpet was my number one priority as the carpet can hold on to a lot more liquid than you would think.
In the Kitchen
Moving on, the kitchen is another leak hot spot. My leak happened under the kitchen sink. Once again the cabinets hid the leak until it had become a disaster. This time the stink factor was the tip off. The faint whiff of something off turned into the stench of rotting within a day or two. We finally found the culprit by literally sniffing it out. Removing the sticky, stinky, and wet items from under the kitchen sink revealed that the connection between the garbage disposal and the drain had gone awry. Smelly, rotten, and wet food particulates sprayed across the entire area every time the dishwasher or disposal ran. The cabinets had softened to a mushy pile of pressed wood, rotting through with an unbelievable stench.
Again the professionals were called in. I can’t even imagine doing the clean up on that myself! Fully gloved and masked, they tore out that section of the cabinets and cleaned the cement beneath. The pipes had to be fully replaced, of course, and I bellied up for a new disposal while we were at it. After everything was in ship shape again the cabinet was replaced and we had our nice, scent free kitchen back. Moral of this story is to catch the leak early! Then you won’t have to replace everything like we did. If you do find a link just look up a company in your local area. For example, just searching ‘Plumbing company London‘ can give you hundreds of results.
In the Garage
My horror story about the garage is not as bad as a friend of mine’s. She left on vacation for two weeks and came back to find out her hot water heater had exploded and her entire garage was covered in a thick layer of mold. Ew!
My problem was not due to the water heater, though I know they can be a big leak danger. Mine was due to the air conditioning unit located above the garage. One hot summer the drainpipe got clogged up and the drip pan could not handle the overflow. Water dripped from the garage ceiling and turned a flat ceiling into a threatening bubble of dampness. Thankfully I was able to get everything out of the way before it collapsed onto the floor.
After getting the air conditioner repaired I called out cleaners to make sure the water damage had not spread to more of the ceiling and to clean up the parts of the carpet that had been damaged due to the water. I also had to get a Garage Door Opener Repair too as the water had affected the motor but it was easy to fix. I did not want to get into the fiberglass insulation either. After replacing the ceiling everything thankfully went back to normal.
As you can see, leaks can cause a lot of damage to your home. Even small ones. You need to take water damage seriously as it can lead to all kinds of health risks and complications. Call in professionals to help you with clean up and make sure the job gets done right.
Author Bio:
Ken holds a master’s in business leadership from Upper Iowa University and multiple bachelor degrees from Grand View College. As president of morningsidenannies.com, Ken’s focus is helping Houston-based parents find the right childcare provider for their family. When he isn’t working, he enjoys spending time with his three children and his wife.
At A‑1 Cleaning Service, LLC, we now proudly offer professional home cleaning services throughout Humboldt County. Whether you’re looking for routine house cleaning, deep cleaning, or help getting your home back in shape, our trained and background‑checked team is here to help.
In addition to our in‑house services, we understand that every home and situation is different. If you’re still exploring options or need a service outside our current scope, we’re happy to provide trusted local referrals and share helpful guidance on how to choose the right home cleaning service for your needs.
If you’d like to:
Learn more about our current home cleaning services
Ask about availability or scheduling
Request a referral to a trusted local provider
Please call or text our front desk — we’re happy to help.
Call or Text: 707‑442‑3229 Website: https://a1clean.com
It’s important to keep your house clean. You should always look for a company that offers professional home cleaning services in Denver or whatever city you’re in at least once a year. But you obviously can’t get your house clean yearly and think that’s good enough, you need to get into a weekly routine. But sometimes cleaning can seem like more of a chore than it really is. You’d be surprised how fast you can get work done when you stay organized and take things one at a time. Plus, if you buy the best quality cleaning products then it makes the whole process a lot easier. But that’s a very open statement. What is the best canister vacuum cleaner to buy? What type of cloth is the best? Who does the best bleach? All this can be found out through a little research. The point of this guide is to give a list of the items you’ll need to make an easy-to-carry cleaning kit that you can take around the house without hassle. First of all, start with a cleaning caddy to carry all of your things in.
Sponges
The sponge is a well-used tool used in a lot of light cleaning. It is much more eco-friendly than paper towels, as it is reusable and a lot more durable. And while sponges are known for carrying lots of germs, they can also be cleaned.
To clean your sponge, rinse it in hot, soapy water then put them in the microwave for a minute. Doing this will kill 99% of the germs in the sponge, so you don’t have to worry about spreading around those dirty germs. If you’re concerned about coming into contact with germs and spreading them about the surfaces of your house, you may want to carry a bottle of Hand Sanitizer Canada around with you for quick germ-killing action.
Toothbrush
A toothbrush is a really handy cleaning aid. They’re nice because, when your toothbrush is past it’s prime, you don’t have to throw it away; you can repurpose them to scrub places that other cleaning supplies can’t get into.
Whether it’s scrubbing away limescale or soap scum, a toothbrush makes the perfect handheld fixer upper.
Duster
You probably use a feather duster or dusting cloth, but one thing that’s good to remember is that dusters need to be cleaned too. By not cleaning out the dust, you’re actually making it harder to pick up more. I suggest vacuuming your duster after each job. This way it will be ready to go next time. You’ll pick up more dust this way too.
Along with a regular duster, you might want to consider picking up a specialty duster. You don’t absolutely need it,but getting dust off of your mini-blinds, ceiling fans, and such will be much easier. These dusters are shaped to reach those places where dust loves to hide, so with just a quick go-over with a specialty duster and you’re done.
The Only 3 Cleaners You Need
There are only 3 cleaner that you will need for your cleaning kit, and below I’ve explained the uses for each.
All Purpose Cleaner: All purpose cleaners are a housekeepers dream. You don’t have to keep switching cleaners every time you change surfaces. All-purpose cleaners can be used for a number of things: counters, floors, sinks, oven, toilets, windows, tile and more. While you may not want to use an all-purpose cleaner on all surfaces, this cleaner will usually get the job done.
Wood Polish Cleaner: Wood polish is great for keeping your wood looking clean, new, and dust-free. Use wood polish on sealed wood furniture, cabinets, wood floors, banisters, etc.
Scrubbing Cleanser: If you can’t seem to get tough stains out, that’s when you switch to a scrubbing cleansers. Scrubbing cleansers get tough dirt and grime off of sinks, toilets, bathtubs, ovens, pots, grout/tile, and more.
The Natural Alternative
If you’re looking for more natural alternatives to the commercial cleaners, then look no further. There are many supplies you probably already have in your kitchen that can get the job done.
Vinegar: Vinegar kills 98% of bacteria and germs, and you don’t have to worry about it being toxic.
Baking soda: Baking soda is naturally abrasive, so it can remove dirt and grime. It also absorbs odors.
Olive Oil: Olive Oil can polish naturally, and it doesn’t dry or leave sticky residue.
Handheld Vacuum
A handheld vacuum is great for doing small jobs that don’t require the attention of your full-sized vacuum cleaner. If you keep a handheld vacuum on hand, then it will be much easier to keep from doing those jobs that you’d otherwise leave for next time.
Magic Eraser
Special eraser sponges make dirt and grime disappear like magic. They’re made of a soft but strong material called melamine foam that can get to that dirt embedded in your wall or floor without using abrasive action that could damage your surfaces. They take care of scuff marks on your floor, and even get crayon off the wall; all without you having to use tons of elbow grease. All you have to do is add a bit of water and scrub.
Microfiber Cloths
Microfiber fabric is specially made to be good at grabbing and holding onto dust. It’s great for cleaning electronics, which always seem to attract a lot of the dust in the air. Microfiber cloths are handy too keep around for dusting purposes. They are available in both washable and disposable varieties.
Now that you’re well-equipped with the right tools, grab your cleaning kit and tackle those tasks!
Though there are many newer products that make cleaning easy, you might want to consider a more old-school alternative. Here are some household supplies you can use.
White Vinegar: Vinegar helps prevent the growth of mildew and mold, so use it to wipe down counter tops. If you mix it with warm water it can also be used to clean windows and mirrors.
Baking Soda: For baking soda, you can make a paste to clean spots from washable wallpaper, or you can mix it with water to clean dirty grout.
Hydrogen Peroxide: It’s a great disinfectant that you can use on many surfaces, but did you know you can mix a tablespoon of it with ¼ cup of water and spray it on fruits and vegetables to kill bacteria? Just make sure to rinse well after you apply it.
__________
Here are some tips and tricks for your spring cleaning to-dos.
Clearing Clutter and Organizing During Spring Cleaning Getting rid of clutter is one of the key points of spring cleaning. So box up items you don’t need. Get rid of clothes you haven’t worn for a year. Plan a garage sale, or donate items to a second hand store. Then you get your steam mop out similar and start cleaning with fewer obstacles in your way. This will make the rest of the cleaning process a lot easier. Having a reliable vacuum cleaner will help. I hear Vacuum cleaners in India are reliable and worth reading about.
Cleaning Windows
It’s safe to say window tinting Mishawaka is one of the most popular home improvement searches on Google at the moment. With that in mind, it’s important to keep those beautifully tinted windows sparklingly clean. Window cleaning is much easier when you use a rubber-edged squeegee, and they are much more effective than a cloth or paper towel. First, put a few drops of a mild soap into a bucket of warm water and wet your sponge. (You can also add a bit of vinegar to the mix for an extra clean.) Rub away dirt, then dampen the squeegee and, starting at an upper corner, draw it down the pane from top to bottom. Repeat, making sure to overlap strokes and wipe the rubber edge with the sponge after each stroke. Dry window sills with a cloth. It is best to clean your windows on a cloudy day, or else the cleaner dries too fast and leaves streaks.
Wash Your Blinds
You should wash your blinds once or twice a year. For wooden blinds, a few drops of wood cleaner on a nearly dry sponge will work. Aluminum blinds can be washed outdoors. Place them on a slanted surface and scrub with water and a noncorrosive cleaner. Rinse well with a hose and then dry thoroughly with a towel to prevent rust. Fortunately, the blinds offered at shuttercraft-worcestershire.co.uk are extremely durable.
Refreshing Window Treatments
Typically, curtains and drapes don’t get dirty enough to launder. Instead, use the upholstery attachment on your vacuum to remove dust and dirt. You can also have them steam or dry-cleaned. If you are replacing heavy curtains with lighter ones for the warmer weather, then it is especially important to make sure they are clean before storing them away. For removing dust from sheer curtains, put them in the dryer on low with a fabric-softener sheet.
Cleaning Out the Refrigerator
This task may seem daunting, but it will seem more manageable if you break it down. You should wipe up spills immediately so the surface doesn’t become stained. Make it a habit to check your fridge once a week for old food. Wash the interior with a solution of 2tbsp of baking soda for every quart of warm water. Wash the removable shelves in this solution (But let the glass shelves come to room temperature first to prevent cracking.) Loosen hard spills with the solution, allowing the residue to soften. Scrub the crannies with a toothbrush. Also, vacuum or brush the dust from the condenser coils to keep the system from overheating.
Sanitize the Sink
Did you know that your dirty kitchen sink has more bacteria than your toilet seat? To disinfect, clean your sink with soap and water first, then spray a mist of vinegar followed by a mist of hydrogen peroxide, then let air dry. (Do not mix the vinegar and H2O2 together, spray one and then the other.) If your sink is stainless steel, make it sparkle afterward by putting a few drops of mineral oil on a soft cloth and buffing. This prevents water build up, which deters mold and keeps the sink looking clean.
Dusting Tips
Always go from top to bottom to prevent having to go over surfaces more than once. Sometimes you will have to wet dust after dry dusting, but always dry dust first.
When dusting, don’t overdo the polish. When using a furniture oil or polish, be sure not to overuse the product; it can lead to a buildup on your furniture or clouding of the wood surfaces. Using just a dry microfiber cloth will actually pick up more dust and keep your furniture looking nice. You could also use fabric softener sheets as a substitute for more expensive electrostatic cloths. For ceiling fans, slip a pillowcase around the blade to keep the dust from going anywhere. For light fixtures and lightbulbs that are grimy, dampen your cloth with vinegar.
A bathroom is a prime place for mold to grow. The humidity and warmth give a perfect home for the spores to grow and become a real issue. It can have a damaging effect on the structure of the building, but more importantly, it can have a lasting effect on your health. Because of the high risk of mold, you should take steps to help avoid it. One of the foremost ways in which you can reduce mold risk is to check if your home has any kind of water damage. Say, for instance, if you have a leaky roof, you would need to get in touch with the best companies for Roof replacement Canberra (or somewhere in your vicinity). You have to check the root of the problem and fix it, before you can go to the surface!
The next step could be by applying anti mould paint to the walls, cleaning the tiles, keeping the bathroom well ventilated and washing your shower curtains, you will be able to stop mold from ever being an issue. Additionally, you could also remove mold with a dehumidifier. A dehumidifier can help clear the air and remove any lingering moisture. It catches the water and then you can simply remove the bottom tray, empty the water, and then use it again. If you use the dehumidifier before spores appear, it should reduce any mold growth in the future. However, if it is already a problem and you have discovered a large area of mould it might be better to seek help at AWAMoldInstpecitons.com, but if it’s just a small spot of stubborn mold in the corner between your shower door and the stall, then the mold may have become encased in the silicone caulking. If no cleaning agent has worked for you so far, then try removing the silicone with a single blade razor and a pair of tweezers. After, clean the area with some diluted bleach and dry it thoroughly. The process takes about 15-20 minutes and leaves your shower mold-free. Shower mold dangers include several respiratory disorders, stomach infections, and allergies.
Cleaning tips for places that you may often times forget.
Sometimes when cleaning gets tedious, we tend to cut corners to shorten the time it takes us to get our chores done. I know I need to take some of the below cleaning tips more seriously in my own home. Since it’s flu season right now, it’s especially important to get the high-contact areas; this will make sure to keep your home germ free and flu free, too. It’s not only your home that needs to be clean during these times, but it goes for any public spaces too. For exceptional infection control, you can find companies who specialise in these commercial places and who offer services like Church, School or Office Cleaning services. Cleaning is important all round so you have to know how to do it properly. Here are some of the places where cleaning can be missed:
Door Knobs
Its FLU SEASON, are your knobs germ free? Door knobs are probably the dirtiest thing we can forget to clean. Countless people come into contact with them every day, leaving behind the oils from their hands, their germs, and who knows what else. Simply take a clorox wipe and wipe down your doorknobs daily to keep the grime at bay.
Lamp Shades
Lamp shades always seem to attract a massive amount of dust and pet hair, a simple and effective way to clean dirty lampshades are by running a lint roller over the shade. For more soiled plastic, fabric, or stitched shades, go ahead and fill up a tub with cool, mildly soapy, water, swirl, then rinse clean. Alternatively, if this doesn’t seem to be doing the trick of getting rid of any dirt or stains,y ou can always click here for Pagazzi’s selection of table lamps and purchase a new one.
For paper and shades with glue water might not be a good idea for obvious reasons, your best bet is to vacuum them frequently with your dusting/upholstery attachment.
Plant Leaves
Use water and a very mild degreaser-if you absolutely must use chemicals to clean, although I’d only suggest water for LIVE house plants.
Microwave
Of course, wipe away all crumbs, then fill up a microwaveable safe bowl with about 1-2 cups of water, mixed with lemon juice (or a freshly cut lemon half, squeezed into the bowl) microwave until the water boils and let it sit for a few minutes to let the steam really penetrate, the steam will loosen any yucky dried on particles and the lemon will leave a nice smell, naturally. Wipe down the interior with a damp cloth, and wash the revolving tray like any normal dish. Wipe down the outside after spraying with your choice of kitchen surface cleaner. Also, don’t forget to microwave the rag or sponge you used for 45 seconds to kill any nasty bacteria it may have picked up.
Base Boards
As you sweep, take your broom and run it along the edges of your baseboard to knock off any dust that may have accumulated, then go over it with a Lysol or Clorox wipe, or your own favorite cleaning solution, to make them sparkly clean.
TV/Computer Screens
Here are some cleaning tips for a few different types of screens. Each type is a little different, but they should all be handled with care. If you’re not sure about something, refer to your owner’s manual for further cleaning tips and instructions. If you are getting glare off your screens and cleaning them hasn’t helped, you may need to look at glare reduction glasses from websites such as https://felixgray.com/glare-reduction to see if they can be more beneficial.
Plasma- Use only a microfiber or 100% cotton cloth, to dry dust. If you absolutely need to damp your cloth using only water, however if you need a little more power in your punch, you can add a touch of vinegar
LCD– Follow the steps for a plasma tv, but make sure to dry the surface quickly with a separate dry cloth, make sure your screen is dry before turning it on and never push on the screen, it can permanently damage your screen, and that would be a bummer.
Projection- Projection televisions that have a special plastic screen over the actual television screen can be cleaned with a damp soft cloth. The screens can be damaged by paper towels and heavy duty cleaners. Projection televisions without a shielding screen will need special consideration, so refer to your owners manual.
Conventional- While older televisions can usually be cleaned with glass cleaner and a paper towel, some newer models still have special coatings on the surface that could be scratched and damaged. If your not sure about your television, the best thing to do is use a soft dampened cloth.
Books
Books can get especially dusty, especially fast. Make sure your books are tightly closed, weather it be because you are holding it, or because they are packed on a shelf. Take your dusting/upholstery extension (the kind with bristles) on your vacuum and go to town.
Kitchen/Bathroom Drawers and Carpets
Every 2 to 4 months pull out your drawers and carpets can be give them a good wipe down with a Clorox wipe, or surface cleaner. This is also a good time to re-organize your junk drawers. However, if you have pets, it is possible that your carpets get stained more often and the Clorox wipe may not work well. You know, the pee and the furs stick longer. So, thoroughly cleaning the carpet might be a complicated task. You can contact professional carpet cleaning in Beaufort County (or where it is more local to you) to remove all the unwanted stains stuck inside your carpets.
Front Door
While your guests are waiting to be let in, they’re staring at your front door, think, is your covered with grime from seasons past? You can simply spray the door down with a hose, but for the more adventurous, an alternative solution–give the front door a makeover, painting it in a playful, fun color! We like RED! The outside of houses often gets forgotten when it comes to cleaning but it’s also important to clean your gutters, or at least get some gutter covers from MastershieldAtl to stop a build-up of leaves and other debris. If your door has seen better days and a clean-up is not doing as well as it should be, you may want to look into having it changed so that not only is it a lot cleaner but it is more protective for your home. Companies such as Doors Plus can help in these instances.
Bonus Cleaning Tips: Since flu season is in full swing, and not letting up any time soon, go ahead and take your clorox wipe and attack any and all surfaces that come into contact with germs! To help get your mind rolling here are some suggestions, but make sure you’re wiping down anything that gets handled a lot, such as: the phone, keyboards and mice, doorknobs iPods and tablets, faucets, coffee pot handles, the steering wheel and gear shifts in your car, etc. If you’re wanting to give your car a once over detail to make it look like it’s near-new research into cleaning products on the likes of Australia’s leader in car cleaning and detailing products and see which could be the best products for you to make your car have a new sheen to it.
Hopefully these cleaning tips will help you keep your home germ free this spring. And, as always, you can’t forget the most important thing–your carpets! Fresh, clean, carpets are inviting, and clean carpets say ‘I care about my home’!
Call us today to schedule your carpet STEAM cleaning!
Have you ever gone to use your oven, and were totally grossed out by all the caked on oven grease? Is your oven a self-cleaning oven, and yet it still doesn’t ever seem to really get clean? Did you know many repairman have been called out due to the self cleaning function on ovens, because the high temperatures it takes to clean off oven grease are especially hard on the oven itself.
Well, I have a tip to help you fight oven grease cheaply and naturally! However, before you begin going through them, keep in mind that it is important for you to keep your oven clean. If you allow grease buildup, then there is a good possibility that your device might soon start acting up, leading you to opt for Appliance Repair Services. Even worse, grease buildup can lead you to get the device replaced. That is why, it is prudent for you to clean the appliance at regular intervals. As said earlier, I have the below-mentioned tips ready for you to make your job easy.
Instead of using harsh cleaners and chemicals, why not use the ever-so-handy baking soda! Conventional oven cleaners will dissolve the toughest oven messes, but they are packed full of corrosive chemicals like lye that are dangerous, especially if you have young children. Baking soda is a natural, chemical-free alternative that will make your cleaning job safer.
Just sprinkle it in the oven then scrub down with a soapy, mildly abrasive sponge! For harder spots inside the oven, use a fine grade steel wool instead of a sponge since the inside surfaces might need more abrasion to take off the grime. No need for the toxic cleaners, and your oven grease won’t stand a chance!
There are other natural cleaners for your oven as well. Baking lemons in water for 30 minutes gets rid of bad smells. Non-toxic dish soap (find them on trvst.world) is also good for grease, and is derived from plant sources that dissolve fat. For a more powerful cleaner, try mixing vinegar with baking soda (Dilute the vinegar first or it may “erupt” on you like a 2nd grade volcano experiment!) and apply with a sponge, then leave it to sit for a while. This will definitely make cleaning those caked-on stains much easier and less of a chore. Cleaning your oven regularly can help to avoid any malfunctions happening and causing you to have to buy a brand new oven constantly. Having a home warranty plan can get your oven replaced or fixed if it were to breakdown. However, it is always best to try and avoid this from happening with proper cleaning and maintenance.
For more natural cleaning tips, check out some of our other posts, like Cleaning Your Dishwasher or 30 Uses for Hydrogen Peroxide.
Read These Steps to Clean Your Dishwasher and Prolong It’s Life!
Dishwashers are extremely convenient kitchen tools to have around. It takes the chore out of washing your dirty dishes, leaving you more time to do other activities. Still, did you know that your dishwasher gets dirtier even as it’s cleaning your dishes? It seems strange, with it running hot water and soap frequently, but that actually doesn’t clean your dishwasher. Read these steps to take care of bacteria and get your dirty dishwasher clean again.
First, take out the bottom rack so you an examine the drain area for chunks of food that can plug the drain. It’s very important that you keep the drains clear, as clogging can cause damage to the pump and anything hard can also scratch your dishes. You would be surprised at the list of things dishwasher repairmen find in the drains-bones, chipped pieces of glass, crab shells, and even bits of gravel! This is just some of what those who provide a blocked drain service in Coogee have found down the drains. If you start smelling an unpleasant odor from your dishwasher or sink area and it is slow to drain, this could be due to a drain blockage further down the system causing wastewater or sewage to be backed up into your home. This is something you’ll want to get seen to by professionals as soon as you notice the problem. Those in the UK could enlist the help of this drain unblocking company in Essex.
Second, fill a cup with white vinegar and set it on the top rack of your dishwasher. Set it to the highest temperature available then run the dishwasher through a cycle. For this process, the only thing that should be in the dishwasher is one cup. With the cycle running, the vinegar will help clean your dishwasher by removing any loose grime, sanitizing your dishwasher, and helping to remove any musty odors.
Third, after sanitizing with vinegar, fill a cup with baking soda then sprinkle that around the bottom of the dishwasher. Run it through a short but complete cycle on the highest temperature. The baking soda will clean your dishwasher by refreshing the smell inside and brighten the insides by removing stains.
Here are some tips for preventing build-up in your dishwasher and prolonging that visit from the mechanic. Making sure you clean your dishwasher regularly will ensure a long life for your appliance.
1. Run your garbage disposal before every dishwashing. Since the dishwasher drains to the same pipe as your sink, make sure you keep the drain clear to prevent clogging and to stop you from needing to have a drain cleaning Brooklyn service come and sort it out for you.
2. Run the sink until the water gets hot. Running the water before starting the dishwasher will get you cleaner dishes because the cycle will start out hot. If you’re worried about wasting all that water, you could always put a bucket under the faucet and use it to water your plants.
3. Set your water to start at the right temperature. Check the thermostat on your water heater. Water that is cooler than 120F (50C) won’t clean well enough, but the water that is any hotter may scald.
4. Don’t pack your dishes too tightly. It’s good to run full loads to conserve energy and water, but if you pack your dishes too tight you may not be getting them adequately clean.
5. Don’t prewash your dishes before putting them in your dishwasher. Consider this for a second, detergent requires grease to do its job. If you wash all the grease before cleaning them in the dishwasher, then the detergent will start to foam up during the cycle, which is bad for your dishwasher.
Now that you have gone through all that trouble to clean your dishwasher, have some fun with these tips and tricks the next time you feel like experimenting.
1. Wash hats! Baseball caps usually don’t hold up in the washer, but they do hold their shape fairly well in the dishwasher. Just run your hats through the rinse cycle once, but don’t use soap.
2. Steam salmon! Wrap your salmon well with tin foil and your favorite marinade. Be sure to seal it well. Run a full cycle, drying process included (don’t add soap though, of course). This will steam your salmon perfectly; it will be moist and it won’t leave that fishy smell in your kitchen.
3. Clean vacuum attachments! Make sure to shake all the loose dust and hair into the garbage first so you don’t have to clean your dishwasher out again. Put the attachments in the silverware basket, then run a cycle.
4. Wash your kids toys! Small plastic toys like Hot Wheels or action figures can go into the cutlery closure. You could also put them in a mesh bag or the plastic basket. This can be done for pet toys, too!
5. Wash your potatoes! Instead of having to wash them individually by hand, set them on the top rack and run them through the rinse cycle.
6. Make yourself a warming oven! If you are expecting a company and don’t have enough ovens to keep all your hard-cooked dishes warm, try putting some in the dishwasher on the dry cycle (make sure you don’t set it to wash), and you have yourself a makeshift warming oven.
7. Wash gardening tools! Garden and household tools can go into the dishwasher if they have plastic handles. If there’s any chance that they have chemicals on them, make sure to wash them separate from your dishes, then make sure you keep your tools safe and dry in a garden shed.
8. Wash your light fixtures! Wash your light fixtures in a very gentle setting. This is much easier than dusting them.
9. Wash thongs, wellies, and crocs! Run a wash cycle with a small amount of baking soda to clean any plastic footwear you have.
10. Wash combs or hairbrushes! Combs and hairbrushes made of plastic material are dishwasher safe and can go in the cutlery tray to be washed. Don’t use wood or boar-bristle brushes, as that can damage your brush. Protect the drain by removing all the hair from the hairbrushes first.
NOTE: For most of these items, you should wash them separately from your regular dishes.
Get the Most Out of Your Hydrogen Peroxide With These 30 Tips
Today I will be giving you some tips on cleaning with the miracle compound H2O2, also known as hydrogen peroxide. This product is used in tons of cleaners today; you can always spot the brands that contain H2O2 because they have “Oxy” in the name. Hydrogen peroxide is a great cleaner that you’re able to use in any room of the house. It’s safe for kids and pets, cheap, readily available, and best of all, it actually works! However, getting it in your eyes can cause damage so keeping it away from the face is advised; when using the substance in laboratories, being positioned close to a storemasta eyewash station safety shower would be a good health and safety measure to avoid permanent damage. Here are some interesting facts about hydrogen peroxide:
Because hydrogen peroxide is basically the same chemical makeup as water (with an extra oxygen atom), it breaks down quickly and harmlessly in oxygen and water.
You can find it in all living matter
Your body’s white blood cells naturally produce H2O2 to fight bacteria/infections.
Vegetables and Fruit naturally produce H2O2. This is why it is so healthy to eat fresh produce, among other things.
It is found in large doses in a mother’s first milk, and when fed to the baby it boosts their immune system.
The different uses for hydrogen peroxide are endless. Here are a couple of ideas you can utilize the next time you grab a bottle of this miracle cleaner.
In the Kitchen
1. Clean sponges of bacteria. Sponges get gross after a couple weeks of use, so use hydrogen peroxide to revitalize your sponges. Soak them in a mixture of half H2O2 and half warm water for ten minutes, then rinse thoroughly.
2. Wash your fruit and vegetables naturally. Add ¼ cup to a sink full of cold water, then rinse thoroughly afterwards.
3. Add a couple of ounces of H2O2 to the detergent before turning on your dishwasher for a sanitizing boost. You can also make your dish soap more sanitizing by adding 2 oz of 3 percent hydrogen peroxide to the bottle.
4. Clean your kitchen appliances with hydrogen peroxide. It’s great for cleaning places that you store and cook food because hydrogen peroxide is non-toxic.
5. Remove gunk from pots/pans by combining hydrogen peroxide with baking soda until you get a paste. Rub this onto the dirty dish and let it sit for a while. After enough time has passed (it really depends on how baked-on the gunk was), grab a sponge and some warm water and the gunk should wipe right off.
6. Clean your countertop and cutting boards. Let the hydrogen peroxide bubble for a few minutes, then scrub and rinse like normal.
7. Wipe your kids’ lunch boxes/bags with hydrogen peroxide to sanitize.
8. Just like using lemon juice on apples, you can use hydrogen peroxide on your leftover salads to keep them from wilting. Use a mixture of one tbsp of H2O2 to half a cup of water and spritz your salad to keep it looking and tasting fresh.
In the Bathroom
9. Freshen your breath by using hydrogen peroxide as a mouthwash. It will kill the bacteria that causes halitosis.
10. Between uses, soak your toothbrush in hydrogen peroxide to keep it clean. This will also prevent the transfer of germs. This is an extremely tip to use if your family has a cold or the flu.
11. Clean your toilet bowl. Pour ½ cup of hydrogen peroxide into the toilet, let stand for twenty minutes, then scrub and flush.
12. Whiten the grout in your bathtub/shower. First dry the surface well, then spray it with hydrogen peroxide. Let it sit for a while, then scrub the grout with an old toothbrush. This process may have to be repeated a few times.
13. Remove mildew and soap scum from shower curtains with hydrogen peroxide. For plastic curtains, wipe down with H2O2 and then rinse. For cloth curtains, put them in the wash with a bath towel, then add your regular detergent plus one cup of hydrogen peroxide to the rinse cycle.
14. You can kill any bacteria/viruses in your shower or tub with hydrogen peroxide. This is what the bubbling is doing!
15. Use baking soda and H2O2 to make a paste that’s good for brushing your teeth. Mix baking soda and hydrogen peroxide until you get a paste, then brush. This helps kill bacteria, so it’s good for the first stages of gingivitis. If you mix this solution with salt, hydrogen peroxide will work as a whitening toothpaste as well. Even though this might be another way for people to get their teeth clean, not everyone is going to feel confident in giving this a go. With that being said, it may be easier to check out sites like HTTPS://WWW.DURHAMDENTAL.NET/OUR-SERVICES/, in the hopes of booking an appointment at Durham Dental (or a local clinic). Leaving something like this to the professionals may be for the best, especially if there is uncertainty.
16. According to some physical therapists, adding ½ a bottle of H2O2 to your bath water can help to detoxify the body. Some are still skeptical about this claim, but bathing has never hurt and the addition of hydrogen peroxide will leave both you and your tub squeaky clean.
On Cloth Materials
17. Hydrogen peroxide can remove yellowing from lace curtains or tablecloths. Fill your sink with cold water and 2 cups of three percent H2O2. Soak for at least an hour, then rinse in cold water and air dry.
18. You can use hydrogen peroxide to pre-treat stains on clothing, curtains, tablecloths, etc. Soak the stain in 3% H2O2 for a little bit before tossing it in the laundry. You could also add one cup of hydrogen peroxide to your whites to boost brightness. It works just as well as the green bleach alternative.
19. Get rid of the musty smell in your bath towels. Combine ½ cup of vinegar and ½ cup of hydrogen peroxide and soak the towels for 15 minutes. Then wash normally.
Miscellaneous
20. Control the fungi in your aquarium. Don’t worry, this won’t hurt the fish any. Use sparingly in this case.
21. Dab some H2O2 onto acne or pimples to clear your skin. However, since the skin on your face is sensitive, it would be wise to use something natural, such as CBD oil or creams (available from online dispensaries like Blessed CBD), which may be less harsh on the skin and might offer better results.
22. Clean humidifiers and steamers by adding one pint of hydrogen peroxide to a gallon of water, then running them.
23. Add natural highlights to your hair using hydrogen peroxide. Spray a solution of half water and half H2O2 on wet hair to create subtle, natural highlights.
24. Ward off the fungus that grows on your plants. Next time you spritz your plants, add a little hydrogen peroxide to the water to help out your plants.
25. Hydrogen peroxide helps improve the health of new sprout seeds. Use 3 percent H2O2 once a day to spritz the seed whenever you remoisten. You can also use hydrogen peroxide diluted in water to improve your plant’s root system.
26. Clean your children’s toys and play area. Hydrogen peroxide is safe to use around kids and people with respiratory problems because it isn’t a lung irritant. Spray toys, doorknobs, toyboxes, baby gates, anything your kid comes into contact with on a regular basis.
27. Help make foot fungus go away. Spray a mixture of half H2O2 and half water on your feet (especially the toes), every evening and let it dry. Alternatively, you could soak your feet in this solution to help soften calluses or disinfect wounds.
28. Remove ear wax with 3 percent hydrogen peroxide and olive or almond oil. Add a few drops of oil, then H2O2. After a few minutes, tilt your head to the side to remove the wax and the solution.
29. Brighten your floors. Combine a gallon of water with ½ cup of hydrogen peroxide then scrub your floors. Because H2O2 is so mild, it is safe for all floor types, and you won’t have to rinse.
30. De-skunkify yourself with 1 qt of three percent H2O2, 1 tsp Dawn Dish Soap, ¼ cup of baking soda, and 2 quarts of warm water. Wash with this to make the skunk smell go away.
Great Cleaning Tips Using Original BLUE Dawn Dish Soap!
Blue Dawn Dish Soap is no longer limited to just washing your dirty dishes. While it works amazingly well for cleaning pans, pots, glass, tupperware, or any other diningware you can think of, it’s everything else it can clean that makes it so useful to have around the home. In fact, Blue Dawn is almost as versatile as baking soda when it comes to cleaning products! Here are a few tips that will make cleaning your home that much easier.
1. Pretreat Stains from Clothing or Upholstery
It seems that most stains people tend to get are oil based stains; this is one of the hardest kind of stains to get out. Some examples of oil based products that commonly end up on clothes/furniture is lipstick, butter, motor or cooking oil, grease, and certain pen inks. Dawn dish soap can take care of these stains for you! All you have to do when faced with an oily stain is apply the soap directly to the stain and scrub the spot with a toothbrush until the oil stain is removed. For clothes, launder as you normally would after this.
2. Make your ant problem disappear
Getting rid of ants is easy with Dawn Dish Soap. Spray a mixture of water and Dawn directly onto countertops, floors, sinks, or wherever the ants seem to be. This will leave behind a residue that ants refuse to walk across. It is also safe for kids and pets, so you don’t have to worry about any harsh chemicals. If you spray the solution directly on an ant, Dawn will penetrate their exoskeleton and kill them on contact. This also works for wasps and cockroaches. If you have a bigger infestation than you initially thought, you’ll want to get in contact with professional exterminator services such as pest control Olathe KS that provide their services in many other areas too!
3. Window Washing
Clean your windows like a pro with Blue Dawn! Fill a spray bottle with only three drops of Dawn to a gallon of water, then clean your windows the same as you would with any other window cleaner. This will leave your windows shiny and streak-free!
4. Remove Stains from Your Driveway
We always want to keep our driveways clean because they’re one of the first things people see when they arrive at your house. This is why people get pearland pressure washing companies to clean their driveway regularly. But what do you do if you find there’s a stain on your driveway? A lot of concern with using chemicals is whether it is biodegradable or not. There are many chemical degreasers and solvents that could get rid of outside stains, but they aren’t really good for the environment. Blue Dawn, though, is and it can take care of stains in your driveway. First, use the kitty litter method to pick up all the extra oils then use warm water and Dawn Dish Soap to further remove oils from your pavement with great effectiveness. Finish the job by using a little elbow grease and a scrub broom on the spot, and your driveway will soon by stain free!
5. Take Control of Smelly Pets and their Pesky Pests
Were you aware that Dawn can kill fleas on contact? It is not as expensive as dog/cat shampoos, and safe for the babies who are too small to be given medicine for their flea problems. For bathing larger animals, use 1 tsp per gallon of water and half a tsp for smaller animals. Make sure to rinse THOROUGHLY or the leftover residue will dry and cause mild skin irritation for your furry friend. To help add moisture to their fur and skin, finish the bath with a few drops of conditioner.
*BONUS* To completely get rid of fleas, make sure to clean any furniture your pet may use often as well as the carpets. Wash your pet beds in warm water mixed with Dawn soap. To clean carpet or upholstery, fill a 16oz spray bottle with water and 1 tsp of Dawn Dish Soap. Shake well to mix them together, then spray the solution onto whatever needs cleaned. Let this sit for 15 minutes, then wipe down with a damp towel and vacuum (for the carpet).
6. Unclog Your Drain
Instead of calling a plumber, try Dawn Dish Soap to get rid of clogs in your drain. To make the solution boil 3-4 tbsp of Dawn in a pot full of water. Pour this mixture down the clogged sink drain, but be careful not to burn yourself! This will break down most sink clogs because Dawn can break down grease. If it’s not just grease blocking pipes and there’s still a blockage then you can get Tucson plumbers to help get rid of it. Failing to address the problem in time could cause the issue to snowball and become even more costly to fix. This is why you should find professional plumbers local to you and contact them so that they can come and solve whatever plumbing problem is getting you down. Perhaps turning to the likes of Elite Plumbing in El Monte could be the solution to your problem and return your plumbing to working order once more.
7. Clean Grimy, Messy Tools
Dawn is a lifesaver for cleaning tools in your workshed because of how tough it is on grease. Right after finishing your automotive projects, soak your tools in Dawn and water to remove all the grime and oils from them. Many mechanics also claim that Dawn can keep the tools from rusting.
8. Find Leaks with Bubbles
Find a puncture in any tire by mixing Dawn Dish Soap and water and brushing the soapy mixture on the leaky tire. The exact location will be easy to find because it will bubble in that spot. You can try this same method with anything that holds air to find a hole.
9. Keep Glasses Lenses Clean and Defogged
Prevent fogging of your lenses by rubbing a drip of Dawn Dish Soap on eyeglasses and the wipe them off. This will clean them and leave a film that prevents fogging.
10. Get Gunk Out of Your Hairbrush
Mix 1 tbsp of Dawn Dish Soap, 1 tbsp of borax, and ¼ cup of water, soak your dirty combs and brushes in the mixture. Rinse well and let dry.
11. Keep Yourself Clean When Painting
Before starting a paint job, rub straight Dawn Dish Soap over your hands and arms, wherever you think paint might end up, and let dry. When you’re finished painting, any paint that may have gotten on your will wash right off your skin.
12. Clean Up Your Fireplace
You can use Dawn to remove soot that has settled or hardened onto the external bricks of your fireplace by combining equal parts Dawn Dish Soap and Morton Salt. Add enough water to this mixture to make a cream, then rub the mixture into the brick with a cloth. Wait 10 minutes, then scrub the dried solution with a stiff brush and wipe clean with a wet sponge.
13. Make Your Grill Look Good-As-New
Clean up your grill for those Sunday dinners out on the deck. First place the grease-coated grill in a trash bag that can be sealed. Using a half cup of Dawn Dish Soap to a gallon of water, pour the soapy mixture over the rack that’s inside the bag, seal it, and let it sit overnight. The next day, scrub the grill with a wire brush and rinse.
14. HAVE FUN!
This is a giant bubble recipe used in bubble makers at many museums for children.
Gently stir a mixture of half a cup of Ultra Dawn, half a gallon of warm water, and 1 tbsp of glycerin (available at any drug store). Skim the foam off the top, because too much foam keeps bubbles from forming. Then just dip bubble wand and begin blowing. Have fun!!
15. Save the World!
Sort of at least-You can use Dawn to do your part in saving wildlife. By supporting Dawn products, you are also supporting efforts to clean oil spills and protect wildlife across the globe. Dawn Dish Soap is the preferred wildlife cleaner after an oil spill. According to the “International Bird Rescue Research Center,” Dawn is the most effective at removing grease while not harming the skin of birds. It is also biodegradable and doesn’t contain phosphates.
DAWN WILL DONATE $500,000
TO HELP SAVE WILDLIFE THIS YEAR!!
Over the past year, Dawn donated a total of $500,000 ($250,000 each) to two wildlife organizations-The International Bird Rescue and The Marine Mammal Center (TMMC)- so when you’re using these tips just remember, you’re supporting a company that contributes back in a great way!
On a side note if you ever need a carpet cleaning service, and you live in the beautiful Eureka CA area. Give A-1 Cleaning Service, LLC a call. They also perform carpet cleaning in Arcata Ca.
Make cleaning a breeze with these essential cleaning tools.
Folks often confess that their cleaning arsenol consists of supplies they bought, used once, and stored in the attic for the next garage sale. They have separate cleaners for toilets, showers, baths, carpet stains, clothing stains, 5 window cleaners that all streak, all the cleaning tools ever advertised and none of this stuff works, Let’s widdle this down to the necessities and take the confusion and expense out of cleaning. The following list is geared to serve a typical home.
1) Start with a divided tote tray found at hardware stores. Do not use cleaning aprons unless you like trips to the doctor to straighten your neck due to the weight. Or worse email me asking what to do after bumping a sprayer and the cleaner ruined your antique coffee table.
2) A large plastic cup to hold a plastic scraper, stiff bristled toothbrush, non-scratch pad or other small cleaning tools.
3) A plastic container with holes in the lid filled with baking soda. You can also use a clean, plastic parmesan cheese shaker. Use baking soda to scrub sinks, tubs and shower floors and toilets.
4) A gallon of vinegar. Use to remove hard water stains in the sink and add a bit to your diluted concentrated cleaners. Vinegar boosts the cleaning ability of a cleaner. If your concentrated cleaner calls for one ounce per quart of water add ¼ cup of vinegar and use ¾ of an ounce of cleaner.
5) Toilet bowl brush – do not use the ones with the metal ring as the metal part scratches.
6) Sink brush
7) Two clean spray bottles for dilution – three if you use my Wood Care. It’s the only wood cleaner and conditioner on the market that can be diluted.
8) A concentrated eco-friendly all-purpose cleaner like my CleanEz. They clean most counter tops, appliances, toilets, showers, tubs, clothing and carpet stains. No you don’t need separate products to do these chores. Concentrated cleaners save you a bundle of money so look for concentrates.
9) A streak free, concentrated bottle of glass cleaner. I carry a good one called Benya. Make certain it does not contain acids or ammonia so it’s safe for Corian, granite and marble countertops. Glass cleaners are especially useful for frameless glass showers (Glass Shower Direct let you design showers online) and large windows. This is because they can leave you with a streak-free shine.
10) Color coded towels. I use blue terry towels for the bathroom, white for the kitchen and a green one for the floor. Then baby diaper cloths for dusting and lint free towels for windows. Windows and glass are the only safe surface for microfiber. Buy the expensive microfiber cloths. The cheap ones leave lint and smear.
• Note: I use color coded towels because they are faster. You’ll dig for hours looking for the right towel to clean the bathrooms, or kitchen or dust. Don’t waste the time. Color code your towels for fast cleaning.
11) A good mop. Of course, I’m a bit prejudiced but I feel the one I manufacture is faster and outlasts anything on the market. Plus, it does cobwebs, walls, windows, and dries off cars, RVs, and boats. Again you may not want to use microfiber mops unless you want to replace or refinish flooring. You can also look into flooring options such as concrete (probably done by professional concrete contractors Columbus GA or elsewhere) to get durable flooring material. Concrete may take longer than other materials for wear and tear, which could make it more sutaible for interiors as well as exteriors.
12) A good vacuum cleaner. Here is where we may part company. After using Kirbys, Hoovers, Eurkea’s and half a dozen others during my 12 years professionally cleaning, I’m hooked on the Meile vacuums, even ones that you can hold in hand are powerful. This is a personal choice but I’ve been very pleased since switching to Meile. They are expensive and worth every penny. If you’re having trouble deciding on a good vacuum cleaner, I’ve found this site to be helpful: http://appliancehunter.co.uk/cheap-vacuum-cleaners/
Lastly always refill your bottles when you finish cleaning. That way they are ready to go for spills or quick clean up.


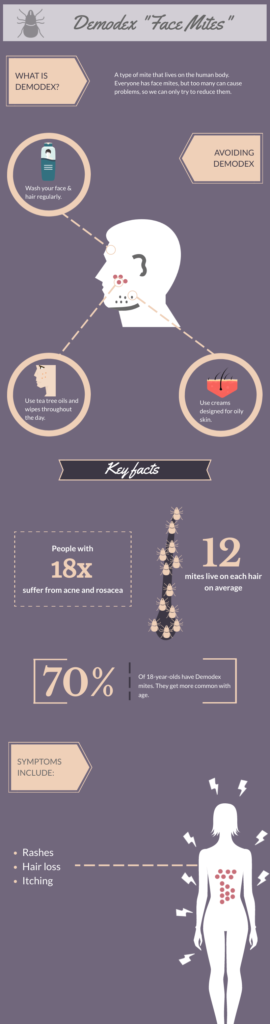
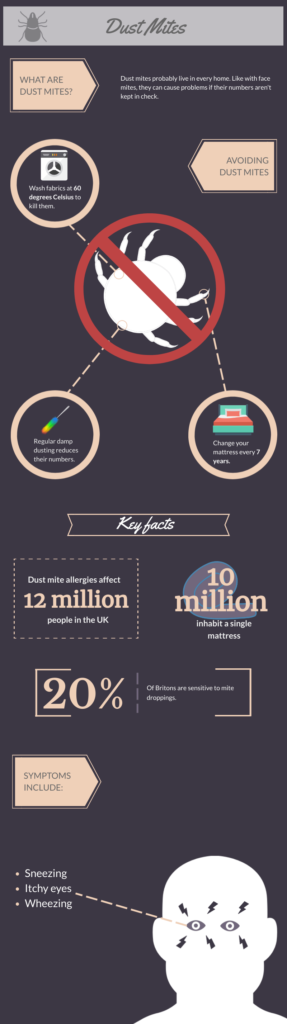


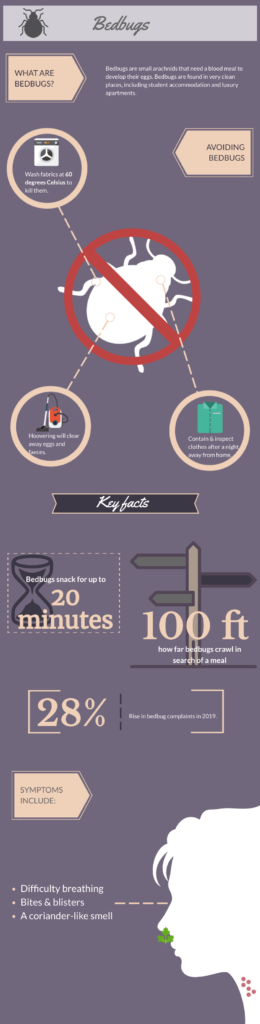


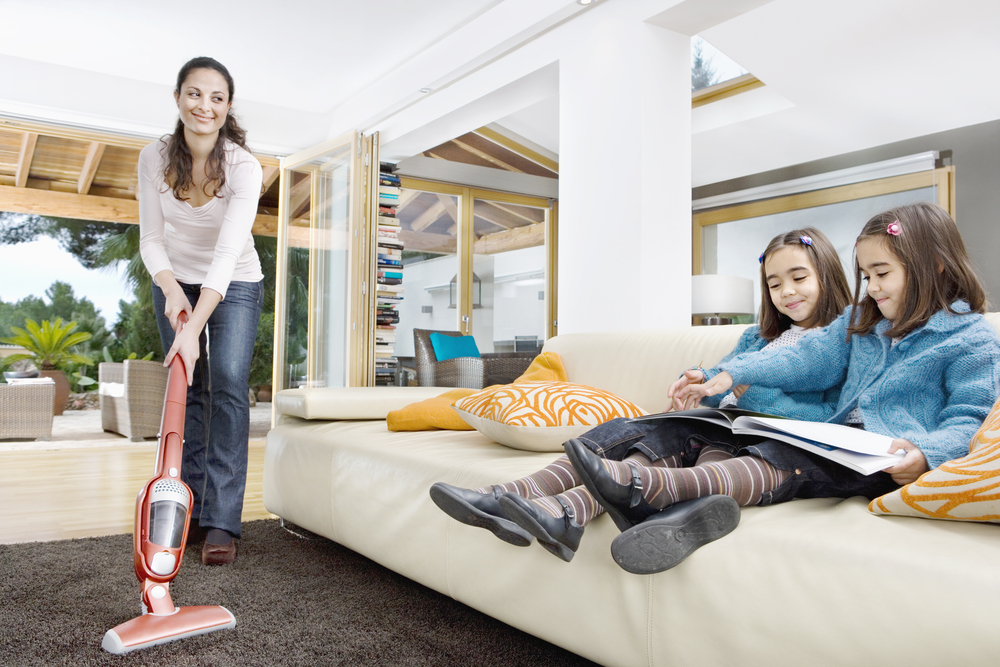
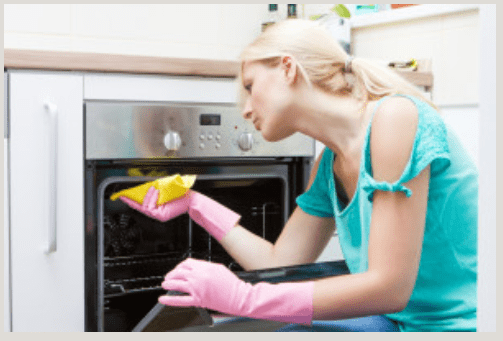
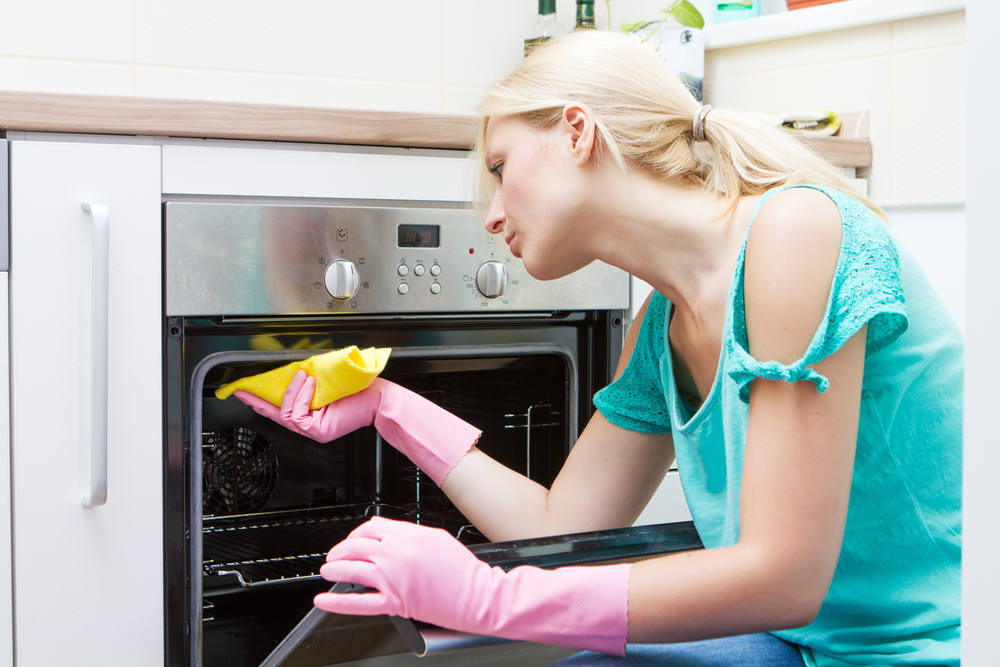
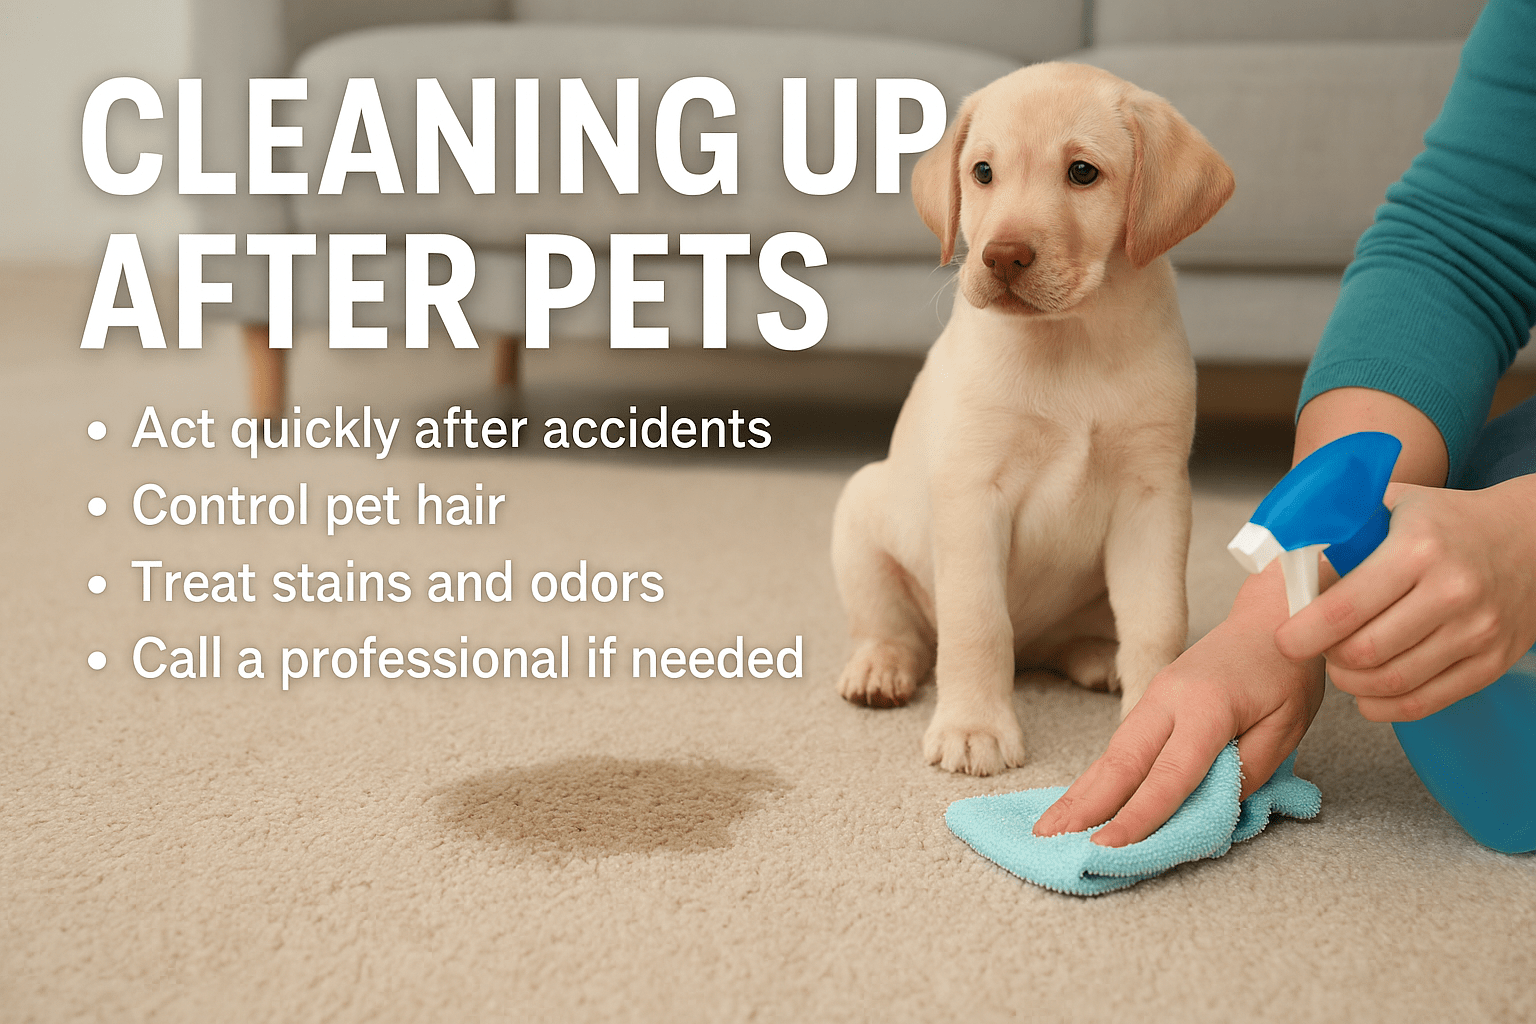


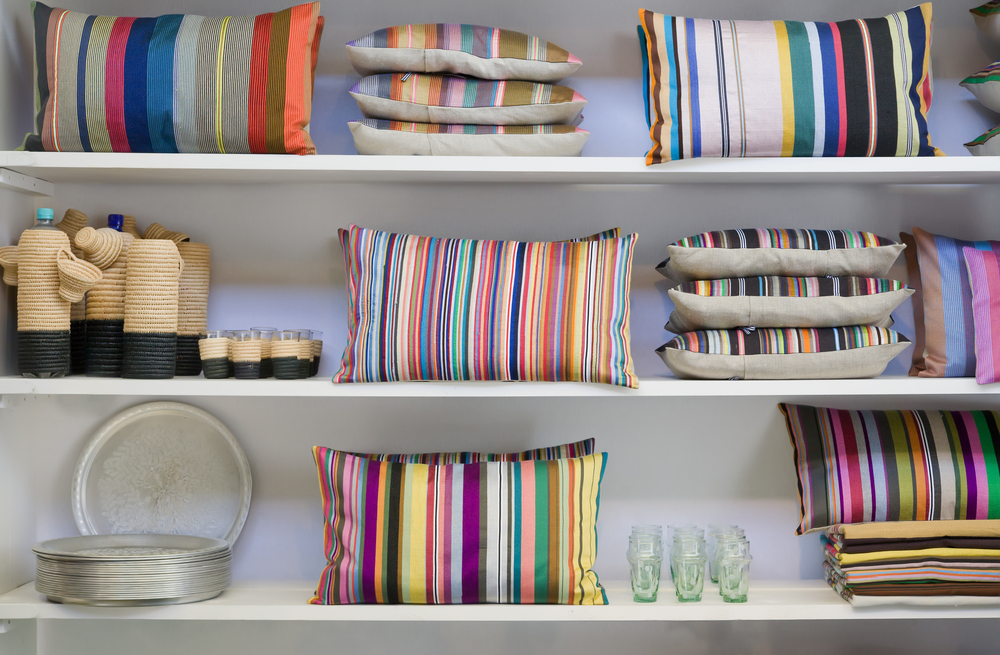
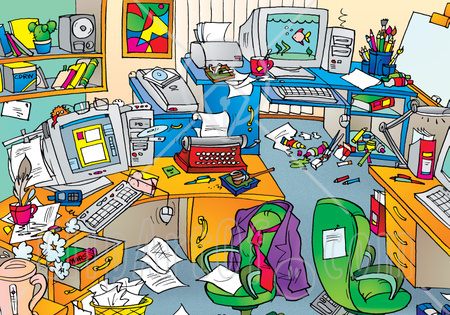 One day I just woke up and seemed to be buried in clutter. I do not know how it happened or when it happened but it did. I do know what happened though. Life happened.
 So many times parents wait to give chores to their children when they are much older. The best way to train your children to clean house is to start from the time they learn to walk. And even before they can walk you can talk to them about the work you are doing and what is the best way to get it done. Many studies show that children can learn to read or learn a foreign language in their infancy. It is never too early to start teaching them how to clean house as well!

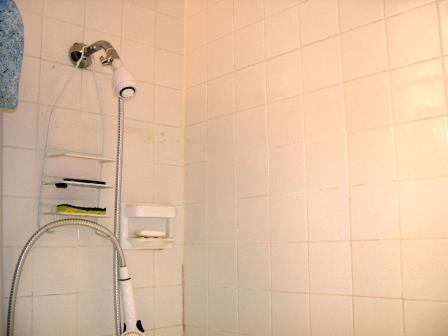
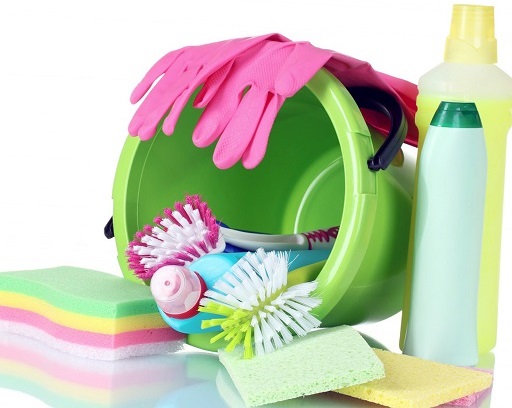


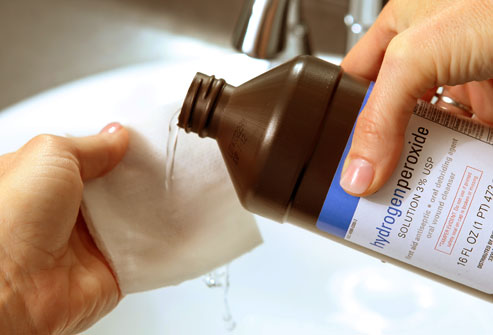 Today I will be giving you some tips on cleaning with the miracle compound H2O2, also known as hydrogen peroxide. This product is used in tons of cleaners today; you can always spot the brands that contain H2O2 because they have “Oxy” in the name. Hydrogen peroxide is a great cleaner that you’re able to use in any room of the house. It’s safe for kids and pets, cheap, readily available, and best of all, it actually works! However, getting it in your eyes can cause damage so keeping it away from the face is advised; when using the substance in laboratories, being positioned close to a