Tag: Cleaning Tips

  • Must-Haves for Your Cleaning Kit

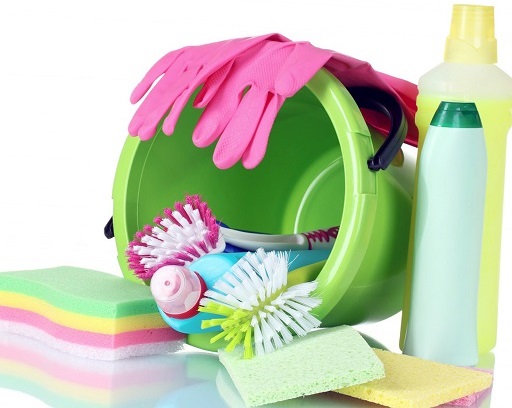
    Things to Have for Your At-Home Cleaning Kit

    It’s important to keep your house clean. You should always look for a company that offers professional home cleaning services in Denver or whatever city you’re in at least once a year. But you obviously can’t get your house clean yearly and think that’s good enough, you need to get into a weekly routine. But sometimes cleaning can seem like more of a chore than it really is. You’d be surprised how fast you can get work done when you stay organized and take things one at a time. Plus, if you buy the best quality cleaning products then it makes the whole process a lot easier. But that’s a very open statement. What is the best canister vacuum cleaner to buy? What type of cloth is the best? Who does the best bleach? All this can be found out through a little research. The point of this guide is to give a list of the items you’ll need to make an easy-to-carry cleaning kit that you can take around the house without hassle. First of all, start with a cleaning caddy to carry all of your things in.

    Sponges
    The sponge is a well-used tool used in a lot of light cleaning. It is much more eco-friendly than paper towels, as it is reusable and a lot more durable. And while sponges are known for carrying lots of germs, they can also be cleaned.

    To clean your sponge, rinse it in hot, soapy water then put them in the microwave for a minute. Doing this will kill 99% of the germs in the sponge, so you don’t have to worry about spreading around those dirty germs. If you’re concerned about coming into contact with germs and spreading them about the surfaces of your house, you may want to carry a bottle of Hand Sanitizer Canada around with you for quick germ-killing action.

    Toothbrush
    A toothbrush is a really handy cleaning aid. They’re nice because, when your toothbrush is past it’s prime, you don’t have to throw it away; you can repurpose them to scrub places that other cleaning supplies can’t get into.

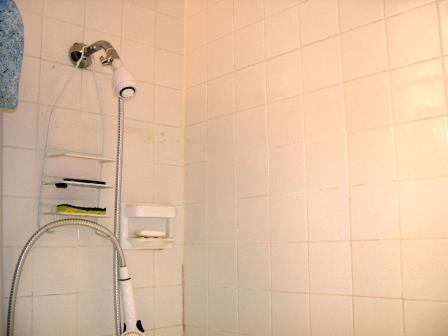
    Whether it’s scrubbing away limescale or soap scum, a toothbrush makes the perfect handheld fixer upper.

    Duster
    You probably use a feather duster or dusting cloth, but one thing that’s good to remember is that dusters need to be cleaned too. By not cleaning out the dust, you’re actually making it harder to pick up more. I suggest vacuuming your duster after each job. This way it will be ready to go next time. You’ll pick up more dust this way too.

    Along with a regular duster, you might want to consider picking up a specialty duster. You don’t absolutely need it, but getting dust off of your mini-blinds, ceiling fans, and such will be much easier. These dusters are shaped to reach those places where dust loves to hide, so with just a quick go-over with a specialty duster and you’re done.

    The Only 3 Cleaners You Need
    There are only 3 cleaner that you will need for your cleaning kit, and below I’ve explained the uses for each.

    All Purpose Cleaner: All purpose cleaners are a housekeepers dream. You don’t have to keep switching cleaners every time you change surfaces. All-purpose cleaners can be used for a number of things: counters, floors, sinks, oven, toilets, windows, tile and more. While you may not want to use an all-purpose cleaner on all surfaces, this cleaner will usually get the job done.

    Wood Polish Cleaner: Wood polish is great for keeping your wood looking clean, new, and dust-free. Use wood polish on sealed wood furniture, cabinets, wood floors, banisters, etc.

    Scrubbing Cleanser: If you can’t seem to get tough stains out, that’s when you switch to a scrubbing cleansers. Scrubbing cleansers get tough dirt and grime off of sinks, toilets, bathtubs, ovens, pots, grout/tile, and more.

    The Natural Alternative
    If you’re looking for more natural alternatives to the commercial cleaners, then look no further. There are many supplies you probably already have in your kitchen that can get the job done.

    Vinegar: Vinegar kills 98% of bacteria and germs, and you don’t have to worry about it being toxic.

    Baking soda: Baking soda is naturally abrasive, so it can remove dirt and grime. It also absorbs odors.

    Olive Oil: Olive Oil can polish naturally, and it doesn’t dry or leave sticky residue.

    Handheld Vacuum
    A handheld vacuum is great for doing small jobs that don’t require the attention of your full-sized vacuum cleaner. If you keep a handheld vacuum on hand, then it will be much easier to keep from doing those jobs that you’d otherwise leave for next time.

    Magic Eraser
    Special eraser sponges make dirt and grime disappear like magic. They’re made of a soft but strong material called melamine foam that can get to that dirt embedded in your wall or floor without using abrasive action that could damage your surfaces. They take care of scuff marks on your floor, and even get crayon off the wall; all without you having to use tons of elbow grease. All you have to do is add a bit of water and scrub.

    Microfiber Cloths
    Microfiber fabric is specially made to be good at grabbing and holding onto dust. It’s great for cleaning electronics, which always seem to attract a lot of the dust in the air. Microfiber cloths are handy too keep around for dusting purposes. They are available in both washable and disposable varieties.

    Now that you’re well-equipped with the right tools, grab your cleaning kit and tackle those tasks!

  • Making Spring Cleaning Easier for You

    A Guide to Spring Cleaningspring cleaning tips

    Though there are many newer products that make cleaning easy, you might want to consider a more old-school alternative. Here are some household supplies you can use.

    White Vinegar: Vinegar helps prevent the growth of mildew and mold, so use it to wipe down counter tops. If you mix it with warm water it can also be used to clean windows and mirrors.

    Baking Soda: For baking soda, you can make a paste to clean spots from washable wallpaper, or you can mix it with water to clean dirty grout.

    Hydrogen Peroxide: It’s a great disinfectant that you can use on many surfaces, but did you know you can mix a tablespoon of it with ¼ cup of water and spray it on fruits and vegetables to kill bacteria? Just make sure to rinse well after you apply it.

    __________

    Here are some tips and tricks for your spring cleaning to-dos.

    Clearing Clutter and Organizing During Spring Cleaning
    Getting rid of clutter is one of the key points of spring cleaning. So box up items you don’t need. Get rid of clothes you haven’t worn for a year. Plan a garage sale, or donate items to a second hand store. Then you get your steam mop out similar and start cleaning with fewer obstacles in your way. This will make the rest of the cleaning process a lot easier. Having a reliable vacuum cleaner will help. I hear Vacuum cleaners in India are reliable and worth reading about.

    Cleaning Windows
    It’s safe to say window tinting Mishawaka is one of the most popular home improvement searches on Google at the moment. With that in mind, it’s important to keep those beautifully tinted windows sparklingly clean. Window cleaning is much easier when you use a rubber-edged squeegee, and they are much more effective than a cloth or paper towel. First, put a few drops of a mild soap into a bucket of warm water and wet your sponge. (You can also add a bit of vinegar to the mix for an extra clean.) Rub away dirt, then dampen the squeegee and, starting at an upper corner, draw it down the pane from top to bottom. Repeat, making sure to overlap strokes and wipe the rubber edge with the sponge after each stroke. Dry window sills with a cloth. It is best to clean your windows on a cloudy day, or else the cleaner dries too fast and leaves streaks.

    Wash Your Blinds
    You should wash your blinds once or twice a year. For wooden blinds, a few drops of wood cleaner on a nearly dry sponge will work. Aluminum blinds can be washed outdoors. Place them on a slanted surface and scrub with water and a noncorrosive cleaner. Rinse well with a hose and then dry thoroughly with a towel to prevent rust. Fortunately, the blinds offered at shuttercraft-worcestershire.co.uk are extremely durable.

    Refreshing Window Treatments
    Typically, curtains and drapes don’t get dirty enough to launder. Instead, use the upholstery attachment on your vacuum to remove dust and dirt. You can also have them steam or dry-cleaned. If you are replacing heavy curtains with lighter ones for the warmer weather, then it is especially important to make sure they are clean before storing them away. For removing dust from sheer curtains, put them in the dryer on low with a fabric-softener sheet.

    Cleaning Out the Refrigerator
    This task may seem daunting, but it will seem more manageable if you break it down. You should wipe up spills immediately so the surface doesn’t become stained. Make it a habit to check your fridge once a week for old food. Wash the interior with a solution of 2tbsp of baking soda for every quart of warm water. Wash the removable shelves in this solution (But let the glass shelves come to room temperature first to prevent cracking.) Loosen hard spills with the solution, allowing the residue to soften. Scrub the crannies with a toothbrush. Also, vacuum or brush the dust from the condenser coils to keep the system from overheating.

    Sanitize the Sink
    Did you know that your dirty kitchen sink has more bacteria than your toilet seat? To disinfect, clean your sink with soap and water first, then spray a mist of vinegar followed by a mist of hydrogen peroxide, then let air dry. (Do not mix the vinegar and H2O2 together, spray one and then the other.) If your sink is stainless steel, make it sparkle afterward by putting a few drops of mineral oil on a soft cloth and buffing. This prevents water build up, which deters mold and keeps the sink looking clean.

    Dusting Tips
    Always go from top to bottom to prevent having to go over surfaces more than once. Sometimes you will have to wet dust after dry dusting, but always dry dust first.

    When dusting, don’t overdo the polish. When using a furniture oil or polish, be sure not to overuse the product; it can lead to a buildup on your furniture or clouding of the wood surfaces. Using just a dry microfiber cloth will actually pick up more dust and keep your furniture looking nice. You could also use fabric softener sheets as a substitute for more expensive electrostatic cloths. For ceiling fans, slip a pillowcase around the blade to keep the dust from going anywhere. For light fixtures and lightbulbs that are grimy, dampen your cloth with vinegar.

  • How To Get Rid Of Shower Mold

    How To Get Rid Of Shower Mold

    A bathroom is a prime place for mold to grow. The humidity and warmth give a perfect home for the spores to grow and become a real issue. It can have a damaging effect on the structure of the building, but more importantly, it can have a lasting effect on your health. Because of the high risk of mold, you should take steps to help avoid it. One of the foremost ways in which you can reduce mold risk is to check if your home has any kind of water damage. Say, for instance, if you have a leaky roof, you would need to get in touch with the best companies for Roof replacement Canberra (or somewhere in your vicinity). You have to check the root of the problem and fix it, before you can go to the surface!

    The next step could be by applying anti mould paint to the walls, cleaning the tiles, keeping the bathroom well ventilated and washing your shower curtains, you will be able to stop mold from ever being an issue. Additionally, you could also remove mold with a dehumidifier. A dehumidifier can help clear the air and remove any lingering moisture. It catches the water and then you can simply remove the bottom tray, empty the water, and then use it again. If you use the dehumidifier before spores appear, it should reduce any mold growth in the future. However, if it is already a problem and you have discovered a large area of mould it might be better to seek help at AWAMoldInstpecitons.com, but if it’s just a small spot of stubborn mold in the corner between your shower door and the stall, then the mold How To Get Rid Of Shower Moldmay have become encased in the silicone caulking. If no cleaning agent has worked for you so far, then try removing the silicone with a single blade razor and a pair of tweezers. After, clean the area with some diluted bleach and dry it thoroughly. The process takes about 15-20 minutes and leaves your shower mold-free. Shower mold dangers include several respiratory disorders, stomach infections, and allergies.

    Suggested reading: Ways to remove bathroom mold

  • 10 Cleaning Tips for Often-Missed Places

    Cleaning tips for places that you may often times forget.

    Cleaning-Tips-and-Tricks
    Sometimes when cleaning gets tedious, we tend to cut corners to shorten the time it takes us to get our chores done. I know I need to take some of the below cleaning tips more seriously in my own home. Since it’s flu season right now, it’s especially important to get the high-contact areas; this will make sure to keep your home germ free and flu free, too. It’s not only your home that needs to be clean during these times, but it goes for any public spaces too. For exceptional infection control, you can find companies who specialise in these commercial places and who offer services like Church, School or Office Cleaning services. Cleaning is important all round so you have to know how to do it properly. Here are some of the places where cleaning can be missed:

    Door Knobs
    Its FLU SEASON, are your knobs germ free? Door knobs are probably the dirtiest thing we can forget to clean. Countless people come into contact with them every day, leaving behind the oils from their hands, their germs, and who knows what else. Simply take a clorox wipe and wipe down your doorknobs daily to keep the grime at bay.

    Lamp Shades
    Lamp shades always seem to attract a massive amount of dust and pet hair, a simple and effective way to clean dirty lampshades are by running a lint roller over the shade. For more soiled plastic, fabric, or stitched shades, go ahead and fill up a tub with cool, mildly soapy, water, swirl, then rinse clean. Alternatively, if this doesn’t seem to be doing the trick of getting rid of any dirt or stains,y ou can always click here for Pagazzi’s selection of table lamps and purchase a new one.

    For paper and shades with glue water might not be a good idea for obvious reasons, your best bet is to vacuum them frequently with your dusting/upholstery attachment.

    Plant Leaves
    Use water and a very mild degreaser-if you absolutely must use chemicals to clean, although I’d only suggest water for LIVE house plants.

    Microwave
    Of course, wipe away all crumbs, then fill up a microwaveable safe bowl with about 1-2 cups of water, mixed with lemon juice (or a freshly cut lemon half, squeezed into the bowl) microwave until the water boils and let it sit for a few minutes to let the steam really penetrate, the steam will loosen any yucky dried on particles and the lemon will leave a nice smell, naturally. Wipe down the interior with a damp cloth, and wash the revolving tray like any normal dish. Wipe down the outside after spraying with your choice of kitchen surface cleaner. Also, don’t forget to microwave the rag or sponge you used for 45 seconds to kill any nasty bacteria it may have picked up.

    Base Boards
    As you sweep, take your broom and run it along the edges of your baseboard to knock off any dust that may have accumulated, then go over it with a Lysol or Clorox wipe, or your own favorite cleaning solution, to make them sparkly clean.

    TV/Computer Screens
    Here are some cleaning tips for a few different types of screens. Each type is a little different, but they should all be handled with care. If you’re not sure about something, refer to your owner’s manual for further cleaning tips and instructions. If you are getting glare off your screens and cleaning them hasn’t helped, you may need to look at glare reduction glasses from websites such as https://felixgray.com/glare-reduction to see if they can be more beneficial.

    Plasma- Use only a microfiber or 100% cotton cloth, to dry dust. If you absolutely need to damp your cloth using only water, however if you need a little more power in your punch, you can add a touch of vinegar

    LCD– Follow the steps for a plasma tv, but make sure to dry the surface quickly with a separate dry cloth, make sure your screen is dry before turning it on and never push on the screen, it can permanently damage your screen, and that would be a bummer.

    Projection- Projection televisions that have a special plastic screen over the actual television screen can be cleaned with a damp soft cloth. The screens can be damaged by paper towels and heavy duty cleaners. Projection televisions without a shielding screen will need special consideration, so refer to your owners manual.

    Conventional- While older televisions can usually be cleaned with glass cleaner and a paper towel, some newer models still have special coatings on the surface that could be scratched and damaged. If your not sure about your television, the best thing to do is use a soft dampened cloth.

    Books
    Books can get especially dusty, especially fast. Make sure your books are tightly closed, weather it be because you are holding it, or because they are packed on a shelf. Take your dusting/upholstery extension (the kind with bristles) on your vacuum and go to town.

    Kitchen/Bathroom Drawers and Carpets
    Every 2 to 4 months pull out your drawers and carpets can be give them a good wipe down with a Clorox wipe, or surface cleaner. This is also a good time to re-organize your junk drawers. However, if you have pets, it is possible that your carpets get stained more often and the Clorox wipe may not work well. You know, the pee and the furs stick longer. So, thoroughly cleaning the carpet might be a complicated task. You can contact professional carpet cleaning in Beaufort County (or where it is more local to you) to remove all the unwanted stains stuck inside your carpets.

    Front Door
    While your guests are waiting to be let in, they’re staring at your front door, think, is your covered with grime from seasons past? You can simply spray the door down with a hose, but for the more adventurous, an alternative solution–give the front door a makeover, painting it in a playful, fun color! We like RED! The outside of houses often gets forgotten when it comes to cleaning but it’s also important to clean your gutters, or at least get some gutter covers from MastershieldAtl to stop a build-up of leaves and other debris. If your door has seen better days and a clean-up is not doing as well as it should be, you may want to look into having it changed so that not only is it a lot cleaner but it is more protective for your home. Companies such as Doors Plus can help in these instances.

    Bonus Cleaning Tips:
    Since flu season is in full swing, and not letting up any time soon, go ahead and take your clorox wipe and attack any and all surfaces that come into contact with germs! To help get your mind rolling here are some suggestions, but make sure you’re wiping down anything that gets handled a lot, such as: the phone, keyboards and mice, doorknobs iPods and tablets, faucets, coffee pot handles, the steering wheel and gear shifts in your car, etc. If you’re wanting to give your car a once over detail to make it look like it’s near-new research into cleaning products on the likes of Australia’s leader in car cleaning and detailing products and see which could be the best products for you to make your car have a new sheen to it.

    Hopefully these cleaning tips will help you keep your home germ free this spring. And, as always, you can’t forget the most important thing–your carpets! Fresh, clean, carpets are inviting, and clean carpets say ‘I care about my home’!

    Call us today to schedule your carpet STEAM cleaning!

  • Clean Oven Grease Naturally

    Use Natural Solutions to Get off Oven Grease

    Have you ever gone to use your oven, and were totally grossed out by all the caked on oven grease? Is your oven a self-cleaning oven, and yet it still doesn’t ever seem to really get clean? Did you know many repairman have been called out due to the self cleaning function on ovens, because the high temperatures it takes to clean off oven grease are especially hard on the oven itself.

    Well, I have a tip to help you fight oven grease cheaply and naturally! However, before you begin going through them, keep in mind that it is important for you to keep your oven clean. If you allow grease buildup, then there is a good possibility that your device might soon start acting up, leading you to opt for Appliance Repair Services. Even worse, grease buildup can lead you to get the device replaced. That is why, it is prudent for you to clean the appliance at regular intervals. As said earlier, I have the below-mentioned tips ready for you to make your job easy.

    oven grease

    Instead of using harsh cleaners and chemicals, why not use the ever-so-handy baking soda! Conventional oven cleaners will dissolve the toughest oven messes, but they are packed full of corrosive chemicals like lye that are dangerous, especially if you have young children. Baking soda is a natural, chemical-free alternative that will make your cleaning job safer.

    Just sprinkle it in the oven then scrub down with a soapy, mildly abrasive sponge! For harder spots inside the oven, use a fine grade steel wool instead of a sponge since the inside surfaces might need more abrasion to take off the grime. No need for the toxic cleaners, and your oven grease won’t stand a chance!

    There are other natural cleaners for your oven as well. Baking lemons in water for 30 minutes gets rid of bad smells. Non-toxic dish soap (find them on trvst.world) is also good for grease, and is derived from plant sources that dissolve fat. For a more powerful cleaner, try mixing vinegar with baking soda (Dilute the vinegar first or it may “erupt” on you like a 2nd grade volcano experiment!) and apply with a sponge, then leave it to sit for a while. This will definitely make cleaning those caked-on stains much easier and less of a chore. Cleaning your oven regularly can help to avoid any malfunctions happening and causing you to have to buy a brand new oven constantly. Having a home warranty plan can help this too, where you can get a home warranty florida, texas, and many other states, which will help you to get your oven replaced or fixed if it were to breakdown. However, it is always best to try and avoid this from happening with proper cleaning and maintenance.

    For more natural cleaning tips, check out some of our other posts, like Cleaning Your Dishwasher or 30 Uses for Hydrogen Peroxide.

  • How To Clean Your Dishwasher and More!

    Read These Steps to Clean Your Dishwasher and Prolong It’s Life!

    clean your dishwasher
    Dishwashers are extremely convenient kitchen tools to have around. It takes the chore out of washing your dirty dishes, leaving you more time to do other activities. Still, did you know that your dishwasher gets dirtier even as it’s cleaning your dishes? It seems strange, with it running hot water and soap frequently, but that actually doesn’t clean your dishwasher. Read these steps to take care of bacteria and get your dirty dishwasher clean again.

    First, take out the bottom rack so you an examine the drain area for chunks of food that can plug the drain. It’s very important that you keep the drains clear, as clogging can cause damage to the pump and anything hard can also scratch your dishes. You would be surprised at the list of things dishwasher repairmen find in the drains-bones, chipped pieces of glass, crab shells, and even bits of gravel! This is just some of what those who provide a blocked drain service in Coogee have found down the drains. If you start smelling an unpleasant odor from your dishwasher or sink area and it is slow to drain, this could be due to a drain blockage further down the system causing wastewater or sewage to be backed up into your home. This is something you’ll want to get seen to by professionals as soon as you notice the problem. Those in the UK could enlist the help of this drain unblocking company in Essex.

    Second, fill a cup with white vinegar and set it on the top rack of your dishwasher. Set it to the highest temperature available then run the dishwasher through a cycle. For this process, the only thing that should be in the dishwasher is one cup. With the cycle running, the vinegar will help clean your dishwasher by removing any loose grime, sanitizing your dishwasher, and helping to remove any musty odors.

    Third, after sanitizing with vinegar, fill a cup with baking soda then sprinkle that around the bottom of the dishwasher. Run it through a short but complete cycle on the highest temperature. The baking soda will clean your dishwasher by refreshing the smell inside and brighten the insides by removing stains.

    Here are some tips for preventing build-up in your dishwasher and prolonging that visit from the mechanic. Making sure you clean your dishwasher regularly will ensure a long life for your appliance.

    1. Run your garbage disposal before every dishwashing. Since the dishwasher drains to the same pipe as your sink, make sure you keep the drain clear to prevent clogging and to stop you from needing to have a drain cleaning Brooklyn service come and sort it out for you.

    2. Run the sink until the water gets hot. Running the water before starting the dishwasher will get you cleaner dishes because the cycle will start out hot. If you’re worried about wasting all that water, you could always put a bucket under the faucet and use it to water your plants.

    3. Set your water to start at the right temperature. Check the thermostat on your water heater. Water that is cooler than 120F (50C) won’t clean well enough, but the water that is any hotter may scald.

    4. Don’t pack your dishes too tightly. It’s good to run full loads to conserve energy and water, but if you pack your dishes too tight you may not be getting them adequately clean.

    5. Don’t prewash your dishes before putting them in your dishwasher. Consider this for a second, detergent requires grease to do its job. If you wash all the grease before cleaning them in the dishwasher, then the detergent will start to foam up during the cycle, which is bad for your dishwasher.

    Now that you have gone through all that trouble to clean your dishwasher, have some fun with these tips and tricks the next time you feel like experimenting.

    1. Wash hats! Baseball caps usually don’t hold up in the washer, but they do hold their shape fairly well in the dishwasher. Just run your hats through the rinse cycle once, but don’t use soap.

    2. Steam salmon! Wrap your salmon well with tin foil and your favorite marinade. Be sure to seal it well. Run a full cycle, drying process included (don’t add soap though, of course). This will steam your salmon perfectly; it will be moist and it won’t leave that fishy smell in your kitchen.

    3. Clean vacuum attachments! Make sure to shake all the loose dust and hair into the garbage first so you don’t have to clean your dishwasher out again. Put the attachments in the silverware basket, then run a cycle.

    4. Wash your kids toys! Small plastic toys like Hot Wheels or action figures can go into the cutlery closure. You could also put them in a mesh bag or the plastic basket. This can be done for pet toys, too!

    5. Wash your potatoes! Instead of having to wash them individually by hand, set them on the top rack and run them through the rinse cycle.

    6. Make yourself a warming oven! If you are expecting a company and don’t have enough ovens to keep all your hard-cooked dishes warm, try putting some in the dishwasher on the dry cycle (make sure you don’t set it to wash), and you have yourself a makeshift warming oven.

    7. Wash gardening tools! Garden and household tools can go into the dishwasher if they have plastic handles. If there’s any chance that they have chemicals on them, make sure to wash them separate from your dishes, then make sure you keep your tools safe and dry in a garden shed.

    8. Wash your light fixtures! Wash your light fixtures in a very gentle setting. This is much easier than dusting them.

    9. Wash thongs, wellies, and crocs! Run a wash cycle with a small amount of baking soda to clean any plastic footwear you have.

    10. Wash combs or hairbrushes! Combs and hairbrushes made of plastic material are dishwasher safe and can go in the cutlery tray to be washed. Don’t use wood or boar-bristle brushes, as that can damage your brush. Protect the drain by removing all the hair from the hairbrushes first.

    NOTE: For most of these items, you should wash them separately from your regular dishes.

    Be clean and have fun!

    If you liked this post, you should check out some of our other posts like our Guide for Spring Cleaning or how to Clean Oven Grease Naturally.

Online Booking