Buckingham Palace is big. Try to imagine a single residence with 775 bedrooms, 78 bathrooms, 92 offices, 19 different staterooms, 760 windows, 350 clocks, and a cash machine, and you’ll soon have an idea of how big the Queen’s home actually is.
Nowadays the Queen — and the Royal Family at large — is more of a diplomat than a sovereign. The result is that Buckingham Palace entertains more guests now than at any other time in its history — about fifty thousand people a year, it is reckoned. Piers Morgan once asked the Queen if she liked hosting so many guests. The Queen replied: “[Well Mr Morgan] how would you like 12,000 complete strangers trampling over your lawns?”
And that’s just guests and doesn’t include actual footfalls from tourists. The Queen’s comment is amusing because it begs the question: How does the Queen keep the Palace clean? At what cost? Here’s how, in five ways, Her Majesty pulls it off.
With a ‘Royal Army’ of cleaners
Things sound less daunting when you realise the Queen employs over 800 cleaners to look after the Palace. Most of them are paid a surprisingly low amount — about £17,000 a year. But they do get free accommodation and free meals in the Palace in addition to their duties, along with a pension scheme and 33 days’ holiday.
The cleaners must work hard: as the Palace has a reputation for being remarkably free of dust. Despite its titanic size, the Royal Army of cleaners quickly removes any dust before it is allowed to settle in the historic home.
The Palace’s garden also has a Royal Army, but a different kind: a legion of eco-gardeners. This Army tends to the 42-acre grounds of the palace. They recycle all the green waste and, using their advanced horticultural skills, take the droppings and straw from the Queen’s stables, start the process of rotting them, and then use them to prepare new flower beds.
A third kind of Army is drafted for one of the Queen’s legendary garden parties, but not to repair the trampled flower beds. This army of 400 staff uses all of its military capability on the grinding out of 20,000 sandwiches, over 20,000 slices of cake, and in the brewing of over 27,000 cups of tea.
With super-sized telescopic window-cleaning poles
The Queen requires her window cleaners to use 100-foot long telescopic poles to clean the near-thousand windows of Buckingham Palace. The Queen requires them because she — like any other person — has the right to a private life. In the few rooms that are off-limits to the forever curious public, these 100-foot poles rule out any possibility that anyone from the outside can effectively peer into those private quarters.
By having ‘unique’ job roles
Perhaps the greatest threat to the maintenance of Buckingham Palace is that so many roles it requires are threatened with extinction. Twice a year, to correspond with the turning of the clocks forwards and backwards, the Queen employs a ‘horologist’. But horology is studied by precious few people. The British Horological Institute only has 2,400 members, and in 2013 only 86 people in the entire country had the qualifications necessary to adequately tweak the Queen’s clocks.
Other jobs the Queen requires include the role of cleaning “historic vases and irreplaceable paintings” (a scantily paid 20 hour a week job, with a salary of under £10,000 a year); a “frames conservator” who looks after the picture frames of said irreplaceable paintings (the salary for this is a modest £27,800 a year); and a “senior art handler”. The latter role is tasked with handling over 8,000 paintings and 3,000 miniatures and is paid £30,000 a year.
The Queen even has her own in-house pot washers. With there being so many garden parties and guests each year, a handful of kitchen staffers are paid to non-stop wash pots all year round.
The most glamorous job role of all (in both stature and pay) however, is perhaps the “Master of the Household” position. At a handsome £122,000 a year, the Master has the job of ordering all of the domestic staff about in the Royal kitchens, along with any pages, footmen, the Housekeeper, and the Housekeeper’s staff.
By having a “110 percent” culture
Unsurprisingly, the Queen requires her staff members to give their all and cut no corners. For example, staffers in the dining room employ what is known as a ‘Butler’s Ruler’ to make sure each plate is exactly an inch from the edge of the table.
Folding is also important to get right. The Queen once remarked to a staffer, named Barbara Allred, that “one could cut one’s lip” on the stiff napkins that she had set out improperly. The “110 percent” culture is perhaps no better noted than in the schemes that the Palace runs for the public. Anyone can train to be a royal-standard butler if they can find £7,000 and a place to stay near the training grounds of Blenheim Palace in Oxfordshire (etiquette lessons are also included). The course may take four weeks to complete but then, and only then, can one properly eliminate the fear of having one’s Queen cut her lip on the napkins.
— This article was written by Neil Wright on behalf of Thomas Cleaning.
Cleaning the house is one of those things that most people just don’t like to do. Getting out the rubber gloves, smelling all of the chemicals and spot cleaning with a toothbrush isn’t exactly the most appealing activity.
However, different areas in your house can be a breeding ground for bacteria, mold and fungus. Places you didn’t know were hazardous like your kitchen and bathroom sinks can become some of the most disgusting places.
So how often, exactly, should you clean each area of the home? We’ve got your answers!
Living Rooms
Your living rooms are naturally some of the cleanest parts of the home. However, we can track dirt in or kids and pets can make spills, so it’s best to keep up with this area fairly often. Here’s how often you should clean things in your living room.
Carpet
Once a week: Your carpet is a place where dust, dirt and allergens tend to hide. Giving your floors a weekly clean with a good-quality vacuum cleaner is super important. In places with constant foot traffic, you may want to vacuum more than once a week.
Protip: If you need to spot clean a stain, you can mix a teaspoon of liquid dish detergent with a quart of warm water and teaspoon of white vinegar. Apply this mixture on the spot and then rinse and blot dry!
Couch
Once every two weeks: Most people don’t realize how much dirt, dust, fur and oils your furniture absorbs. It can host allergens and other nasty things if left unattended. Regular cleaning can help extend the life of your furniture, which means a surface cleaning every couple of weeks using the upholstery attachment on your vacuum.
Protip: You should also plan to have a professional clean the upholstery about once a year, depending on how much you use the piece of furniture. If you develop a stain in between cleanings, put your iron on the “steam” setting and wave it back and forth over the problem spot.
Windows and Blinds
Once a month: The windows and blinds in your house can accumulate dust and dirt. To keep the mess at bay, you should try to wipe down your windows and blinds at least once a month.
Protip: When cleaning your blinds, you can use an old sock dipped in a 50/50 solution of vinegar and water. Stick your hand inside the sock and swipe it over each blind for a quick and easy clean.
Ceiling Fans
Once a month: Have you ever had dust accumulate on the blades of your ceiling fan? Since it’s so high up, many people forget that it’s up there until the dust bunnies have already taken over and interfered with the function of the fan. To prevent dust buildup, clean the top of your fan once a week.
Protip: You can prevent the dust from falling everywhere if you slide each fan blade into a pillowcase, enclose the case around it, then slide it off.
Furthermore, make sure you have a ladder that lets you reach high enough to comfortably reach the fan without pulling on it. Otherwise you may potentially break the wire fixtures, requiring emergency electrician options to fix or replace it.
Baseboards
Once a month: Your baseboards can collect dust and dirt, but most homeowners don’t see cleaning the baseboards as a priority. If you keep up with cleaning them once a month the task won’t be too time-consuming.
Protip: Use the brush attachment on your vacuum to swipe the top edge where the dust settles. If there are scuffs or spills, wipe them away with an erasing sponge.
Fireplace
Once or twice a year: If you own a fireplace, it is most likely that you would use it mainly in the winters. Cleaning it once a year, preferably just before or after the entire timespan of you using it, can be ideal. The same goes with the chimneys.
Protip: Do not try to clean your fireplace by yourself. There can be a high chance of you getting the dust and soot everywhere and not really getting anything cleaned. Instead, you can hire professionals for Milwaukee chimney sweeping services (or based on your location), and let the experts handle the job.
Bedrooms
Your bedroom may accumulate more germs than you realize. Since you spend a good amount of time here (approximately one-third of your life), it tends to accumulate germs. How often exactly should you clean your sleeping quarters? We explain here.
Bed Linens
Once a week: Bed sheets can accumulate a serious collection of sweat, body oils, dirt from outside, and more. When they get too dirty they can become a breeding ground for bacteria and fungi. Those are not things you want sharing a bed with you! While most people wash their sheets only every four weeks, experts recommend washing them once a week.
Protip: If you have white sheets, toss a squeeze of lemon juice in the washer. It’s a natural brightener without the chemicals in bleach products.
Duvet Cover
Once a month: If you use a top sheet you can get away with washing your duvet cover once a month. If you don’t, you may want to wash it every two weeks just to be safe. Like pillows and bed linens, duvet covers can be a breeding ground for bacteria, fungus and dust mites.
Protip: Changing a duvet cover is on most people’s list of top annoying things, but did you know there is a simple hack to make the job easier? Use the burrito method for an easy switcharoo. Turn your duvet cover inside out and place comforter on top. Roll it up, tuck it in, and unroll it-it’s magically on!
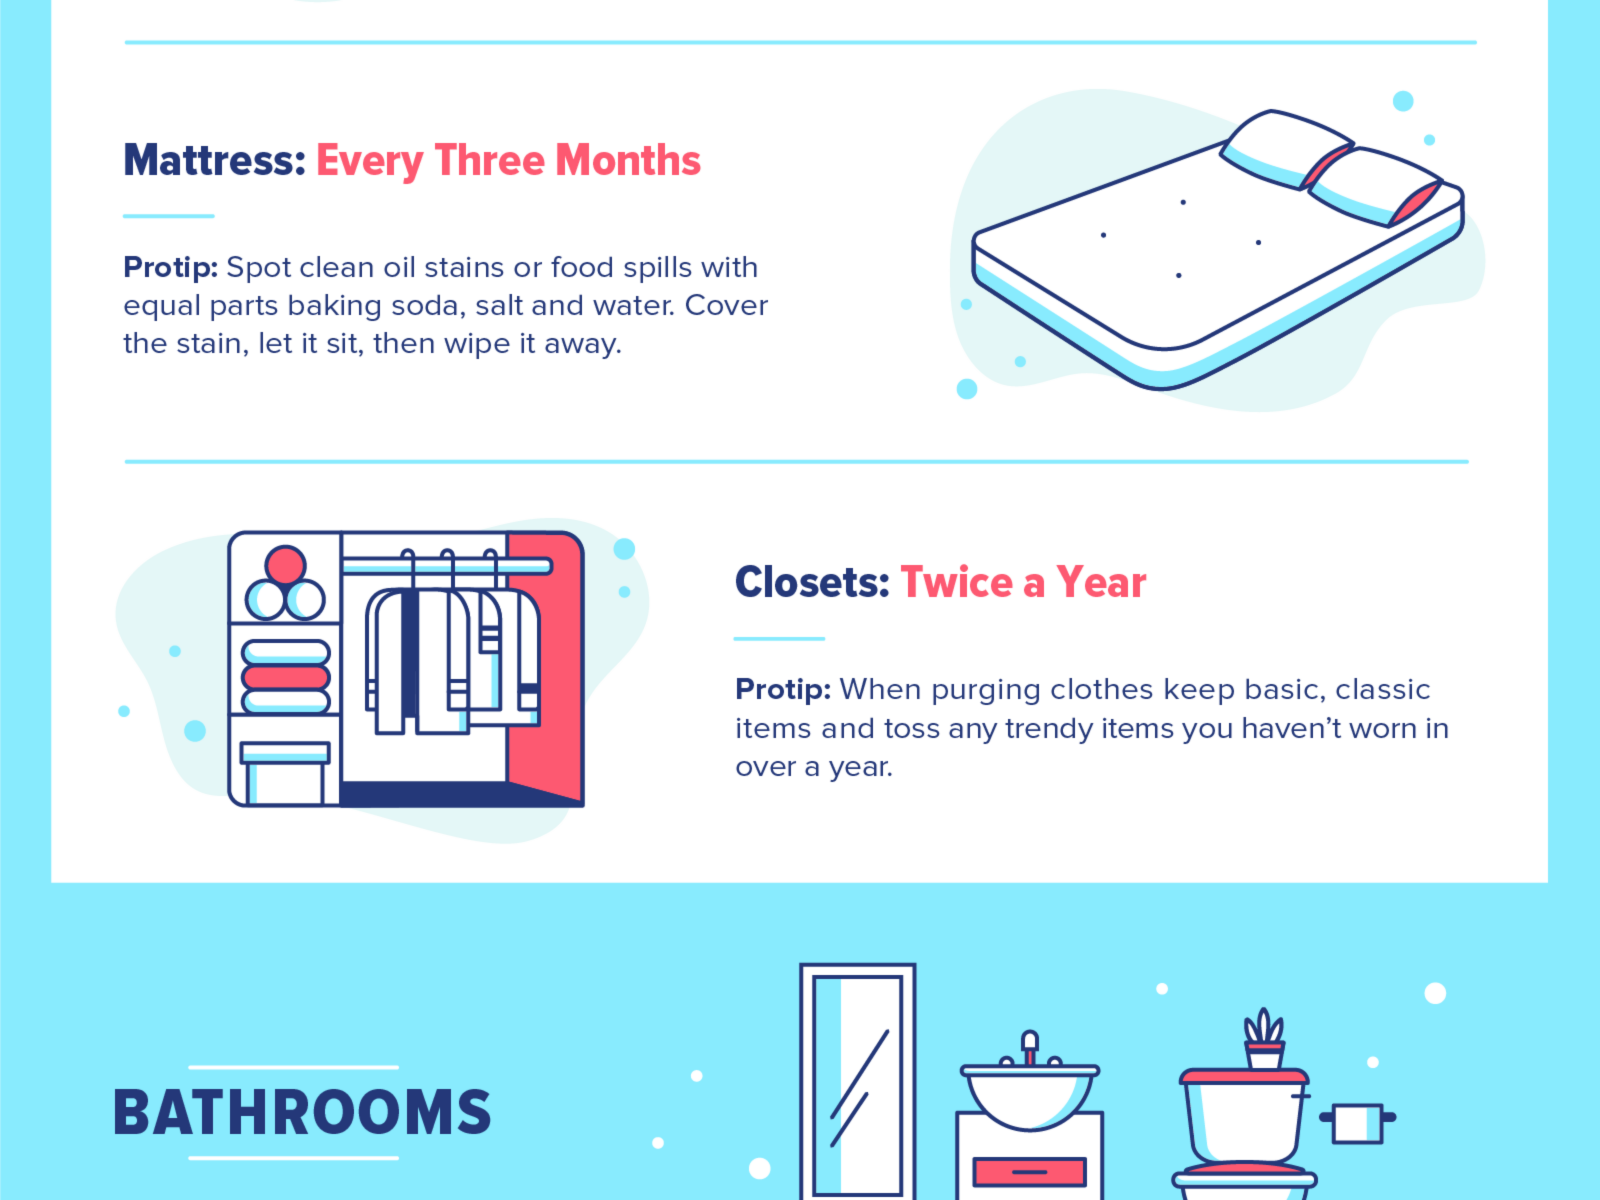
Mattress
Every three months: Your mattress is another thing that can accumulate sweat, dust, dust mites and allergens quite easily. To keep the bacteria and fungi at bay, clean your mattress with the seasons. You can use the upholstery attachment to vacuum the mattress, and clean its cover (if it has one).
Protip: Spot clean oil stains or food spills with a mix of baking soda, salt and water. Cover the stain, let it sit for 30 minutes then wipe it away with a damp cloth.
This might not always be the best way forward, you have to know when your mattress has had enough and you need to upgrade. There are plenty of places to find a new mattress online. Perhaps it is a better bet to find some reviews of styles and materials so you know what might be best for you. Everyone has their own unique desire of comfort. Start with this interesting aldi mattress as an example of a good all rounder mattress.
Closets
Twice a year: It’s usually a best practice to do a full-closet cleaning and purge twice a year. While it can seem like a daunting task, having a clean closet full of clothes you actually wear can be a game changer for your morning routine.
Protip: When purging, keep basic, classic items and toss anything trendy you haven’t worn in over a year. You can also ditch duplicate items or things you don’t feel comfortable in. Your closet should be full of only things that make you happy!
Bathrooms
We all know the bathrooms can get pretty gross, but most people probably still don’t clean them as often as they should. Things like bath towels and bath mats can accumulate mold, while your toilet and sink can be a bacteria breeding ground. Here’s how often you should clean the things in your bathroom.
Toilet
Every day: Toilets have a reputation for being the dirtiest place in the house, but the average toilet is cleaner than you think. To make sure your toilet stays sanitary, it’s best to give it a light clean every day, then give it a deep clean once a week.
Protip: Want to keep toilet stains at bay? Pour vinegar in the top of your toilet and let that sit while you spray vinegar around the seat and clean. If you are continuing to get excessively nasty smells from your toilet it might be a sign of a plumbing issue. The Summers Plumbing Heating & Cooling – plumber website might be able to help you if you suspect this to be the case.
Bathroom Sinks
Every day: Did you know that your bathroom sink is even dirtier than your toilet seat? The bacteria travel from your hands onto the sink every time you wash your hands, so it’s incredibly important to disinfect your bathroom sinks every day.
Protip: You can use disposable disinfecting wipes daily to make sure the area stays sanitized. It’s easy, and you can throw the whole mess away afterward!
Bath Towels
Every three or four uses: Towels are tricky, because the more you use them, the more often you will need to change them. If you take more than one shower a day, or if you have multiple family members using a towel, it may need to be cleaned once every couple of days.
Protip: On the other hand, if you’re the only one using it and you shower at the gym three times a week, you may be able to get away with washing it weekly. Be sure to wash your towels in water that is at least 140 degrees Fahrenheit (60 degrees Celsius) so that you kill all of the bacteria that’s inevitably breeding them.
Shower Grout
Once a week: Your grout can be one of the most annoying things to clean in your bathroom. However, it can also make the most impact on how clean your bathroom looks. Nobody likes a shower with dirty grout, so keep up with cleaning it weekly.
Protip: To clean, dip a toothbrush in bleach and scrub any discolored areas. Every once in a while you will need to seal your grout so that water and mold can’t seep in.
Bath Mats
Once a month: Bath mats that have rubber backing can wear out faster if they are washed more than once a month. However, mats that don’t have a rubber backing, or that are in a frequently used or extra-dirty space like the kids’ bathroom can be washed more often.
Protip: If a rug doesn’t have time to dry out it can harbor all kinds of mold and fungi. To kill all signs of life, wash the rug on high heat. Rugs with rubber backing should be air-dried.
Bedrooms
Your bedroom may accumulate more germs than you realize. Since you spend a good amount of time here (approximately one-third of your life), it tends to accumulate germs. How often exactly should you clean your sleeping quarters? We explain here.
Bed Linens
Once a week: Bed sheets can accumulate a serious collection of sweat, body oils, dirt from outside and more. When they get too dirty they can become a breeding ground for bacteria and fungi. Those are not things you want sharing a bed with you! While most people wash their sheets only every four weeks, experts recommend washing them once a week.
Protip: If you have white sheets, toss a squeeze of lemon juice in the washer. It’s a natural brightener without the chemicals in bleach products.
Duvet Cover
Once a month: If you use a top sheet you can get away with washing your duvet cover once a month. If you don’t, you may want to wash it every two weeks just to be safe. Like pillows and bed linens, duvet covers can be a breeding ground for bacteria, fungus and dust mites.
Protip: Changing a duvet cover is on most people’s list of top annoying things, but did you know there is a simple hack to make the job easier? Use the burrito method for an easy switcharoo. Turn your duvet cover inside out and place comforter on top. Roll it up, tuck it in, and unroll it-it’s magically on!
Bed Pillows
Every three months: While you should be washing your sheets (and pillowcases) once a week, you should be washing the pillows themselves once every three months. Pillows can play host to critters and debris like dirt, oil, skin cells and even dust mites.
Protip: Most down-alternative pillows can go in the washing machine, while feather pillows need to be dry cleaned. Buy down-alternative to ensure cleaning is easy and frequent.
Mattress
Every three months: Your mattress is another thing that can accumulate sweat, dust, dust mites and allergens quite easily. To keep the bacteria and fungi at bay, clean your mattress with the seasons. You can use the upholstery attachment to vacuum the mattress, and clean its cover (if it has one).
Protip: Spot clean oil stains or food spills with a mix of baking soda, salt and water. Cover the stain, let it sit for 30 minutes then wipe it away with a damp cloth.
Closets
Twice a year: It’s usually a best practice to do a full-closet cleaning and purge twice a year. While it can seem like a daunting task, having a clean closet full of clothes you actually wear can be a game changer for your morning routine.
Protip: When purging, keep basic, classic items and toss anything trendy you haven’t worn in over a year. You can also ditch duplicate items or things you don’t feel comfortable in. Your closet should be full of only things that make you happy!
Kitchens
Believe it or not, your kitchen is one of the dirtiest place in your house. This is pretty unsettling considering we cook our food here. But, that’s precisely why it’s so dirty! Germs like e.coli can stick on cutting boards, hide in your fridge and set up camp in your sink. Here’s how often you’ll need to clean to maintain a safe and sanitary cooking environment.
Kitchen Counters/Sink
Every day: The kitchen sink and counters can be another place that germs accumulate. Since you’re often cutting meat and dealing with food products, the kitchen sink can actually end up being one of the dirtiest places in the whole house. Also, while doing your dishes, make sure you don’t put food particles into the sink. Regular deposits of leftover food can end up clogging up the sink and you may have to call in a professional plumber from firms like AC Plumbing (https://www.acplumbing.com.au/plumber-brisbane/) or the ones like them in your vicinity who can fix the clogging issue. Additionally, a clogged sink can be the perfect place for bacteria and viruses to thrive. Therefore, it’s imperative that you disinfect your bathroom sinks every day.
Protip: To keep your eating area sanitary, use one tablespoon bleach in one quart of water and spray down the sink daily. You can also use disposable disinfecting wipes here.
Sponges
Every week: Unfortunately, the trend is to keep your kitchen sponges until they smell and fall apart. Letting them get this bad means that they’re teeming with bacteria, funguses and things that can potentially make you sick. You should be cleaning your sponge weekly, and replacing them every two to three weeks.
Protip: For their weekly cleanings, mix cups bleach in one gallon of water and let your sponges soak for several minutes. Then just rinse and you’re done!
Oven
Once a month: Many people think that cleaning their oven is something to save for a special occasion, but the longer you wait to clean it, the harder it will be. Keeping up with monthly cleanings is the best way to make sure your oven stays in good working order.
Protip: A trick to making the process easier is to put a bowl of water in the oven and turn it up to high for 20 minutes. This will help loosen some of the dried dirt and grease. Then, wait for the oven to cool before wiping it clean!
Dishwasher
Once a month: Most people don’t realize that their dishwasher can accumulate all sorts of gunk and grime. It cleans the dishes you eat off of so you will want to make sure you give it a routine cleaning once a month (and a deep cleaning once or twice a year).
Protip: Place a cup of vinegar inside the dishwasher and run it on a hot water cycle. This is a great way to routinely clean your dishwasher and keep it in tip-top shape.
Refrigerator
Four times a year: A clean fridge is a safe fridge, yet nobody likes to deep clean it. While it’s best to give it a wipe down daily, you should only need to give it a deep clean about four times a year.
Protip: When you’re getting ready to clean the fridge, purge it of any ingredients that are past their “use by” date. Remove and soak the drawers in warm water while you wipe down the rest of the fridge. It’s best to work in sections so that all of your food doesn’t get too warm!
Every homeowner wants only the best for their houses. From the roof to walls and floors, everything has to be perfect. One of the standard and most useful covering people use at home is the carpet. It makes any flooring surface more beautiful and comfortable. You can now choose from the different types of carpet materials and a variety of designs and colors to match every room in your house.
Homeowners often check sites like CarpetNurse.com for the best carpet brand and they get them installed in the bedroom, kids’ play area, home offices, stairs, and basements. However, maintaining the right carpet needs time, effort, and a lot of commitment, especailly if the carpet experiences heavy foot traffic. You can either hire a Scottsdale Arizona Carpet Cleaner to wash the rcarpetfor you or diligently clean it yourself.
Homeowners love the thought of having a clean carpet after some time. Although it sometimes is unfortunate when you notice that it smells differently even after washing. Then, you ask yourself how does this happen when the carpet has just been cleaned. Continue reading to know why.
What Makes a Carpet Smell Awful?
Why do carpets stink even after washing? Below are some of the usual reasons why you have a smelly carpet at home.
● Moisture
One of the leading causes of bad smelling carpets is moisture. You might not know it, but the back of the carpet may still be wet, hence giving a musty smell even after carpet cleaning. It also happens if an inexperienced carpet cleaner accidentally over wets your carpet and cannot suck up all the moisture from the fibers.
Mold and mildew may grow in the underlay. This, this part of the carpet is not exposed to air and light; it needs more time to dry appropriately. Damp carpets need immediate attention so as not to create more significant problems in the future. Sometimes, though, a musty smelling carpet could be a pointer to an underlying, likely more serious problem of water damage in the house. In that case, it might be the right time to call in NW Suburban Chicago Water Damage Restoration experts (or providers closer to you) for a thorough inspection and quick remediation.
● Old Carpet
Another reason for smelly rugs is an old carpet with the bottom part starting to break down. Therefore, it is essential to check your carpet’s underlay every so often to ensure that it is still in good condition.
● Low-Quality Carpet Cleaning
There are times when people tend to save on money that the quality of carpet cleaning is sacrificed. Cheaper carpet cleaning services may not have the proper equipment to extract the fibers’ leftover water, leaving your carpet still wet after cleaning. You may sometimes find some carpet cleaners using electric fans to help the drying process. There are also instances when the carpet cleaner is inexperienced, who tends to use too much detergent and does not rinse the carpet thoroughly afterward.
● Stains
A persistent carpet stain is another viable reason for that funky smell in the room. A stain that you forget to clean immediately thoroughly will get through the carpet’s fibers and will start to smell. One example is a spilled milk that you did not instantly clean. At some point, the spilled milk will turn sour and begin to stink. When this happens, you will need a professional carpet cleaning service.
● Other Reasons
Other reasons you might not know about are the following:
Cigarette smoking since cigarette smell can quickly penetrate all kinds of fabrics, including carpets, curtains, and even underlays.
Smoke, just like cigarette smell, can get into materials. To get rid of this unpleasant smell, you can have your carpet deep cleaned.
Untrained pets typically make a mess on your mat. Pet urine, in particular, is a nightmare to carpet owners. If the stain is not correctly removed immediately, the smell will get stuck and making it difficult to remove.
How to Keep Your Carpet Smelling Good?
If you happen to have a smelly carpet even after cleaning, don’t worry. You can always opt to go for professionals from a nearby home improvement company who can get your carpet smelling as good as new again. Although, if you do not want to go to the experts, there are some home remedies to get rid of the stench as well. Below are some of the tips you can follow to bring back the sweet scent of your flooring.
Open all windows to ensure the proper air circulation in the room where the wet carpet is.
Sprinkle some baking soda on the mat and vacuum it afterward. You can open a box of baking soda and leave it open overnight to absorb the carpet’s smell.
Combine white vinegar with equal parts of water, then apply it to the carpet using a soft brush and let the fabric air dry afterward.
Place bowls with white vinegar and let them absorb the stench from the entire room.
Use a dehumidifier in the room.
Pour Borax onto the carpet and gently scrub it in with a dry brush or broom.
Use fans to help dry up the carpet quicker. You can also rent a space heater to soak up the room’s humidity and make the drying process a lot faster.
Not to Do’s with a Carpet
Simply knowing what to do when you have a carpet at home is not enough. Being aware of not what to do is just as important as knowing what you should do. Here are some more tips on the things homeowners should avoid doing:
Placing furniture on the carpet, especially if it still wet. Carpets need to breathe to dry up, and by putting heavy stuff on it, you are preventing fresh air from circulating.
Stepping on the carpet while it is wet.
Using a home vacuum to soak up the moisture from the carpet. Instead, you can try contacting a professional carpet cleaning service, or if you want to do it yourself, use a wet vacuuming model.
If you have done everything, but your carpet remains smelly, then it is time to call the professionals. Just make sure that you choose a reliable and trusted carpet cleaning service in your area. You can ask relatives and friends for recommendations or search for cleaners with a high satisfaction rating from customers. Nobody wants to end up with a bad-smelling carpet after spending a lot of money.
Few things are more important than maintaining a clean home. Living in a clean, orderly environment does wonders for one’s mental state, but it also saves money down the road-a home left alone for too long might result in having to hire professionals to perform drastic measures such as power cleaning stubbornly stained windows or other cleaning services that cost a pretty penny.
While most agree that it’s necessary to clean their home regularly, many people, when sprucing up their home, prefer to use store-bought cleaning products. For cleaning the house in a better way, Refillable Cleaning Products can be considered as an alternative to those store-bought products. Refillable bottles could prevent you from losing out money due to the frequent purchase of new bottles. Instead, it could be much more cost-effective to buy refills. However, there might be (store-bought cleaning) products that are made with harmful chemicals and are usually sold at higher prices. Apart from costing money, these products can irritate not only the skin, but the eyes and throat as well. They can even cause headaches and other health problems.
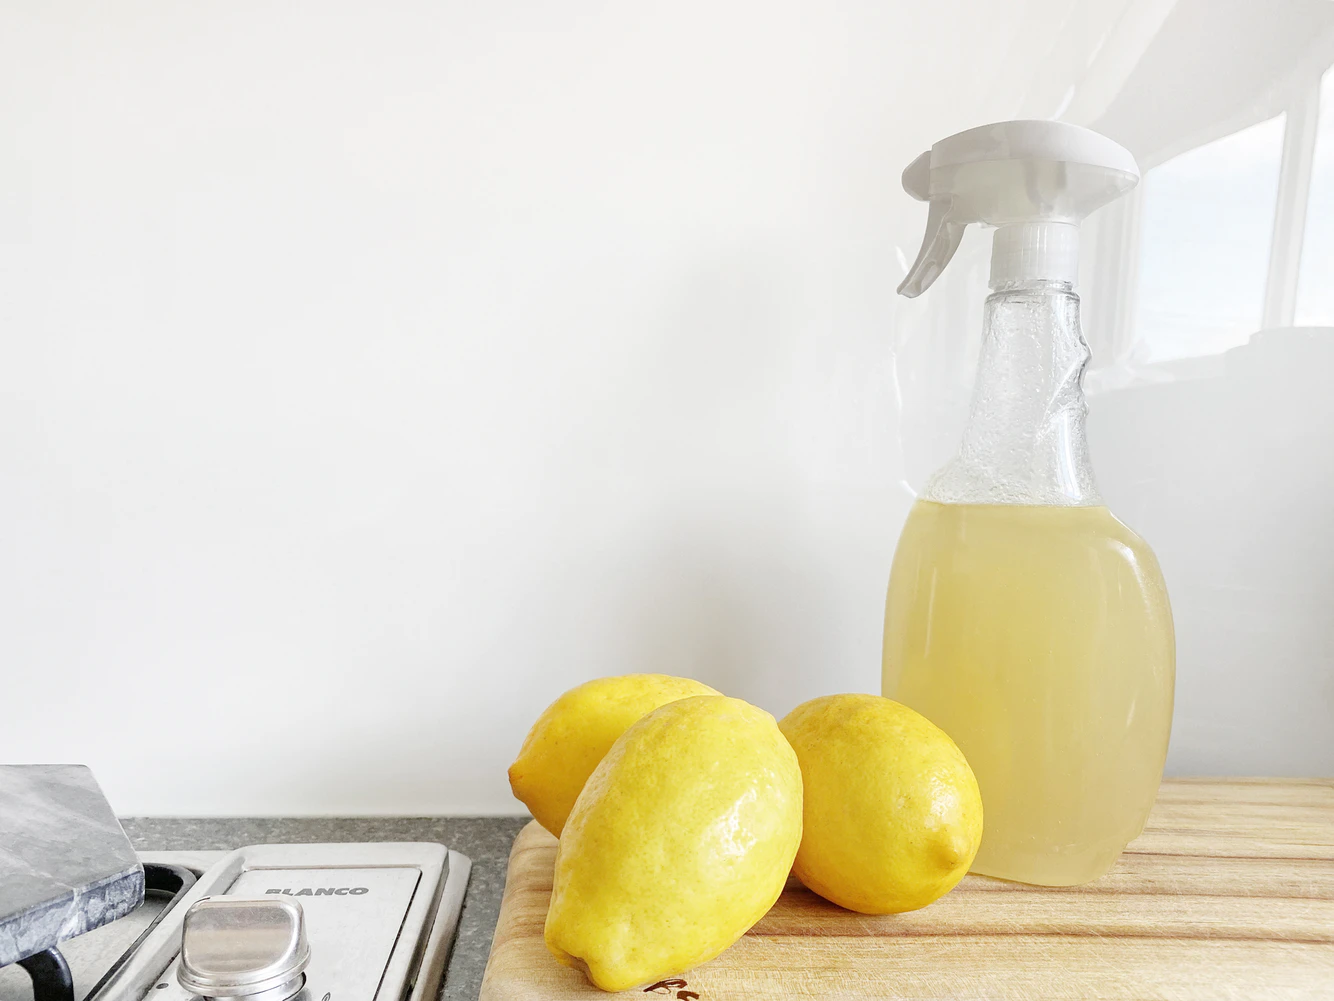
They’re also wholly unnecessary. Using simple ingredients, you can make your own effective cleaner and disinfectant without going out to the store and without these potentially hazardous chemicals. According to Nathan Kiening, pests like roaches are most likely to be found in kitchens because they have easy access to scraps and crumbs that they can eat. If this seems to be the case, by using the contents you have lying around at home, you could create a pest control spray on your own. However, you should keep in mind that it might not always be effective, and you might need to hire a pest control company to help you get rid of them. That said, here are six simple homemade recipes for safe, environmentally friendly cleaning agents.
A Simple Homemade Glass Cleaner (h2)
This easy DIY glass cleaner utilizes ingredients you can easily find around the home. And it promises a streak-free shine!
Take the following ingredients and mix them in a spray bottle:
1 Tbsp. cornstarch
1/4 cup white vinegar
1/4 cup rubbing alcohol
2 cups water
8 drops of an essential oil of your choice for fragrance. (This could include lemon, lavender, orange, or any scent you’d like.)
You should have most of these ingredients handy, though you might need to pick up essential oils, which you can find easily online. They’re also available at many supermarkets and health stores such as Target and GNC.
The best news about this recipe? It costs only roughly 33 cents to make a batch. Your windows, and wallet, will thank you.
A 2-Ingredient Kitchen Cleaner and Deodorizer (h2)
An even more simple, and equally inexpensive, homemade cleaner needs only two simple ingredients. For a simple way to clean kitchen countertops, appliances, and the inside of your refrigerator, simply combine the following items:
4 tablespoons baking soda
1 quart warm water
You can use these ingredients in a variety of ways. A simple solution of baking soda and water can be used to deodorize surfaces and clean counters, but you can also remove spots from stainless steel by applying a paste of baking soda and water on the steel and gently scrubbing the affected area with a damp rag.
An Easy and Safe Brass Cleaner (h2)
If you have any brass items in your home, you know that they can tend to tarnish easily. But there’s no need to go to the store and pick up a chemical brass cleaner. You can polish your brass with just three simple ingredients:
1 teaspoon salt
cup vinegar
Flour (until mixture becomes a paste)
Once your vinegar, salt and flour has acquired a paste-like consistency, rub the cleaner into your brass and leave it for ten minutes. Once you rinse it off with warm water, you should find a tarnish-free finish!
A Safe and Affordable Marble and Granite Cleaner (h2)
When cleaning stone surfaces, it’s best to avoid chemical-laden cleaners. But even natural acidic liquids such as vinegar or lemon juice can cause permanent damage to these surfaces.
Thankfully, you don’t need much to create a mixture that’ll perfectly buff and clean marble and granite countertops. Simply combine:
2 cups warm water
2 drops liquid dishwashing soap
That’s it! A little bit of dishwashing soap in warm water will clean your countertops without damaging them. The key here is to not let the wet surface air-dry, once the solution has been applied, buff it off with a dry towel or soft cloth. If you have just had new custom countertops put in, you may want to speak with the company who provided them first to see how best to clean your own. If they agree with this type of cleaning, then carry on with what you were going to do.
An All-Purpose Cleaner for Everyday Use
This recipe is similar to the glass cleaner, but cuts out the rubbing alcohol and cornstarch added to avoid a streaky finish. What you’re left with is a simple, effective all-purpose cleaner that you can use on most surfaces. Take the three following ingredients and add them to a spray bottle:
2 cups warm water
cup distilled white vinegar
20 drops essential oil (of your choice)
Assuming you’ve already procured essential oil for your window cleaning recipe, you can find more use for the bottle to help give your all-purpose cleaner a nice, fresh scent. While we would not recommend using this cleaner on glass or stone countertops, it’s a perfect cleaner for wood, plastic, and everyday items around the home.
Which finally brings us to our last cleaner recipe.
A Natural and Effective Cleaner That’s Guaranteed to Break Up Grease
Arguably the most difficult part of cleaning is dealing with built up grease and gunk, especially in the kitchen around your stove and oven. Most cleaners that can effectively break up these greasy areas are filled with toxic chemicals and fumes that can impact your health with too much exposure.
This recipe, while requiring some ingredients you might have to go out of your way to purchase, helps knock out these grease stains without any nasty chemicals. It requires orange essential oil (though lemon works in a pinch) and castile soap, which you can find at most supermarkets and national chain pharmacies throughout the nation, or you can order it online.
Either way, castile soap is a vegetable-based soap that is environmentally friendly and will help give your degreaser some disinfectant qualities. Once you’ve acquired those two ingredients, you’re good to make your cleaner:
2 tablespoons castile soap (make sure you get a liquid soap version, as castile soap comes in both hard and liquid varieties)
1 and cups water (if you have distilled water, like those sold at Golyath, it will give your cleaner a longer lifespan)
20 drops orange essential oil
And that’s it! Put those three ingredients into a spray bottle, and you’ll be able to knock out grease stains in a heartbeat. And you’ll do so without filling your home with toxic fumes. In fact, this cleaner will smell downright refreshing.
With these six natural, safe, and homemade cleaning products at hand, you’ll find yourself saving money and saving yourself from exposure to harsh chemicals. It’s a win-win!
Because of these difficult times, you probably are spending a lot of time in your room. There are two types of people. The first one, those that during the lockdown developed a love for cleaning and have everything nice and tidy. And the second, people who suddenly have a mess around them as if it were magic.
If you feel like you belong to the second group, then you might be feeling kind of guilty, but at the same time, without energy for cleaning your room. The whole pandemic situation has been a challenge, making us abandon our routines and leaving us with feelings of uncertainty.
But if you really want to start changing things, you better start by cleaning your room, and I’m serious. Dr. Jordan Peterson, a Canadian psychologist, believes that if you want to make an impact or to jump into bigger challenges, you first need to take care of your immediate environment.
Start with the fundamentals:
Make Your Bed
This is the number one thing when cleaning your room. Yes, I know you’re going to sleep in a few hours again, but think of it that way. Your day begins and ends, and you need to have that same basic logic in mind. Be ready to start your day by waking up early and making your bed right away, so you know it’s time to do all the things you have planned for. Then, at the end of the day, you’ll be ready to rest in a neat, nice bed. Not only that, ensure that the bed of everyone in your home is kept clean and maintained. In case you have a person at home with limited mobility, keeping their bed clean is even more important. If a normal bed is posing challenges, you can consider switching it to a comfortable hospital bed for home use. This is important because keeping the bed clean is the first step in maintaining a healthy home and lifestyle.
Clean Up Your Clothes
You may have a mountain of clean clothes, and another pile that’s half-dirty. And honestly, I don’t know which one is worse. Make sure to grab all your dirty clothes and clean them thoroughly. However, before you wash all your clothes together, ensure that you do not put an elastane material with cupro. They are two different fabrics, and washing them together might just damage both of them. Instead, try and understand the needs of each of your fabrics. For instance, you can learn a bit about the fabric–cupro. See if machine washing is preferable. Search for detergents that can help retain the quality of the fabric. Once you are done with all these, then take up the task of washing clothes.
Also, do not ignore your recently-cleaned clothes. If possible, take your clean clothes and fold or hang them in your closet. When you finish, you’ll probably feel relieved and relaxed.
Clear The Clutter
Remember that by cleaning your room you’re also clearing your mind. Maybe you’ve been accumulating stuff without realizing it. If there are things that have been in the same place for ages, take them away or even move them to a storage unit for a specific time period (click here to learn more). Also, don’t forget to wipe the surfaces clean. In some cases, you might notice that you don’t even need much of the stuff that has been cluttering up your room for so long. You may not need to store these at all, which means you can either sell them, donate them, or if they are too old, throw them away. De-cluttering makes you realize how many things you have been hoarding, and that it’s finally time to get rid of a lot of those things. Consider getting in touch with a waste management service to come take what you don’t need.
Vacuum/Sweep and Mop
This is the final step. Once you’ve cleaned the mess around you, it’s time to really leave your room spotless. Reach as far under the bed as possible, don’t be lazy!
Get Motivated; Turn On Your Favorite Music
Make sure to have a good time while doing these chores. Music can inspire you and maybe you won’t just end with cleaning your room; perhaps you’ll start rearranging things from one place to another or have an easier time getting rid of things you don’t use anymore.
Keep It Beautiful
You need to be happy where you are. Your room is your starting point every day, so why not wake up in your perfect happy place? Use your creativity. Think about adding scented candles, placing flowers in your window, or putting houseplants around the room. You name it.
If you can learn the basics of how to keep your room in order, your mind will be clearer for new ideas, and then you can probably start making more significant changes in your life.
A-1 Cleaning Service, LLC for the second year in the row took first place for Carpet Cleaning in the Eureka Times-Standard Readers Choice Opinion Poll. The competition was stiff this year, but A-1 Cleaning excellent reputation for superior customer service helped them again to achieve this honor. A-1 Cleaning Service, LLC aka A-1 Carpet Cleaning is also celebrating 25 years in business this year, which is quite an accomplishment these days. A-1 Carpet Cleaning is a family-owned business that also provides commercial office cleaning, residential maid services, and window washing.
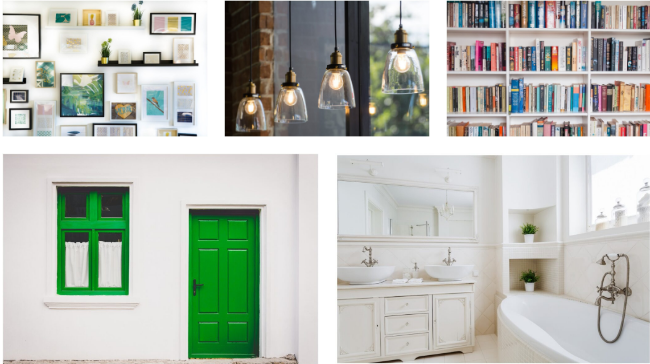
Is spending so much time inside making you go stir-crazy? Well with life outside seemingly on hold, this may be the perfect opportunity to make a few easy home improvements to transform your house into a nicer and more refreshed place to spend your days. From adding a pop of color to your front door to cleaning out your closet, here are 20 DIY home projects you can tackle to spruce up your space while you’re hunkered down.
Put leftover paint to use
Many of us probably have an extra can or two of paint lying around. So why not use it to add some pizzazz and depth to your rooms with these DIY home projects.
1. Give your cabinets a makeover
Painting kitchen cabinets a fresh new color is a fantastic way to completely transform your kitchen. If you tend to be more adventurous when it comes to color, your cabinets are a great place to have some fun. If you already have a lot of color in the room or if space doesn’t have much light, it’s best to go with white or neutral cabinets. Painting alone will not always suffice.
In such circumstances, cabinet refacing could be an option. This could be a fantastic way to give your kitchen a fresh, new look.
2. Make your mailbox the star of your front yard
Your mailbox is one of the first things people see when they pull into your driveway, so why not give your visitors a great first impression. Whether you live in a ranch-style house in Phoenix, AZ or you just bought a craftsman style home in Portland, OR, you can instantly boost your curb appeal by adding a fresh, vivid coat of paint to your mailbox.
3. Add a pop of color to your front door
Changing out your front door can be expensive, so painting your exterior door is an easy way to give the front of your home a makeover and also save some money in the process. Painting the inside of your front door is also a fun way to add a bold pop of color and some character into your home.
4. Give new life to old furniture
If the paint is chipped or wear and tear has gotten the best of some of your older furniture, a quick paint job can give it a new life. Transform a dated (but functional) dresser, nightstand, or bookshelf with this fun DIY project for a fraction of the cost it takes to replace it.
Clear the clutter
Getting organized can feel like a major undertaking, which is probably why a lot of us tend to put it off, and then put it off again and again. But since you can’t go anywhere, you might as well spend a morning or afternoon tackling the clutter you typically ignore.
5. Maximize the utility of unused corners with shelving
Running out of storage space? It’s time to finally make use of the corners in your rooms. Installing floating shelves is one of many DIY home projects you can try to create more space. You can get a melamine chipboard or whatever material you wish made to custom sizes and styles that fit the space and match the room. It’s a simple way to spruce up your wall decor while adding more storage in your home.
6. Clean closets
Chances are, you’ve opened up your closet and grabbed one of the same few items since spending most of your time indoors lately. Now’s the time to carefully clean out your closet and decide what you really need from those you haven’t touched in a few years. Start by taking every item out, setting aside the items you don’t need, and cleaning the inside of the closet. If you’re organizing a closet full of clothes, sort clothes into piles by season. Put clothes that you’re not currently using in the back of the closet, like that holiday sweater. Keep frequently used items in the front for easy access.
7. Organize photos
In a digital age, it’s likely that most of us have our photos stored online. But for those that still have hundreds of photos stored away in boxes, now’s the time to organize them. Start by grouping photos by date or event. Use leftover flashcards or cut up pieces of printer paper as an easy way to separate groups of photos in boxes. If you already keep your photos organized, think about digitizing them. You can use Google’s PhotoScan app to scan old prints and upload them. Organize your photos online into albums to better keep track of them and finally find that picture of your puppy when someone asks.
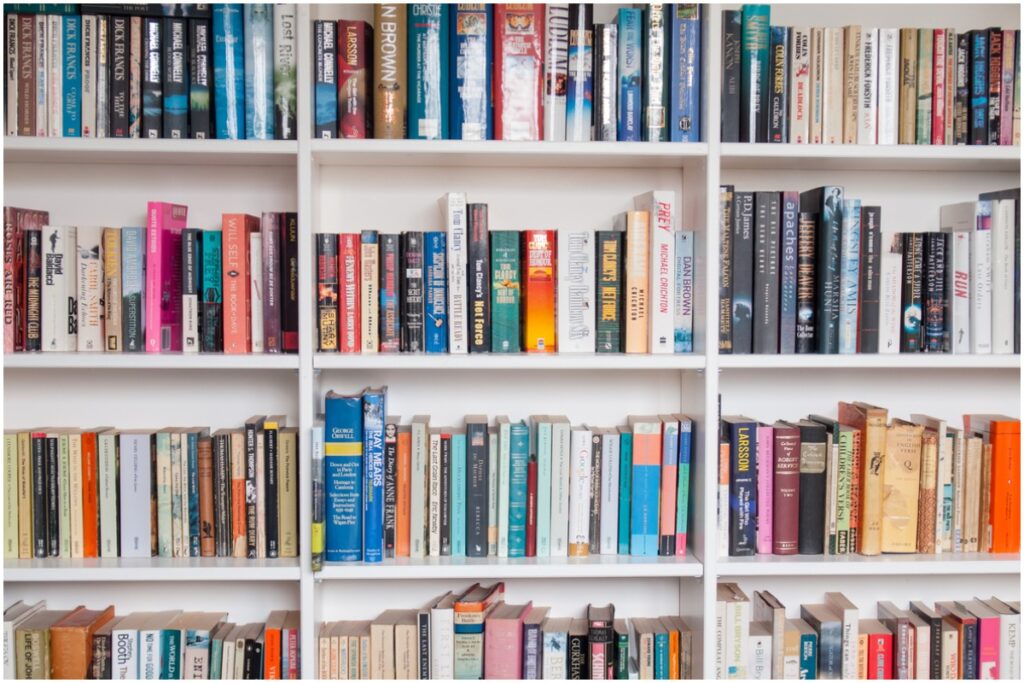
8. Rearrange bookshelves
Bookshelves may not initially come to mind when organizing, but they can easily make a space feel brand new. Think about taking some of the books you’ve got hiding away in a back closet and swap them with the current selection on your bookshelf. Wondering what to do with that collectible mug? Add it to your bookshelf for a fresh take on your decor. Best of all, it’s a free way to change up your space.
9. Tackle under-sink storage
The last place you probably think to organize is under your sink. From the bathroom to the kitchen, it’s likely filled with near-empty cleaners, dishwashing soap, or even makeup wipes. Set aside 10 minutes to toss out those old household supplies, instantly freeing up space to make way for all that hand-soap and disinfectant you just bought.
10. Organize your pantry
You may or may not have months’ worth of groceries in your kitchen right now. Before things get too cluttered, take this time to reorganize your pantry – move things around to maximize space, group like items together, and throw away expired items. You may want to break down the work into smaller parts to avoid being overwhelmed. For example, instead of cleaning out the entire pantry, just do one shelf or area at a time. It will be so refreshing to see the pantry all neat and tidy with everything in its place.
Transform your space with lighting
Nothing can change the look and feel of a room quite like choosing the right lighting. The perfect lighting can lift your spirits and make your home a more comfortable place to spend time.
11. Replace your lightbulbs
If you have a few extra light bulbs lying around, go from room-to-room and replace any that are burned out. You can also completely change the ambiance in your home simply by replacing any harsh white bulbs with calming yellow ones.
12. Switch up lamp shades
Lamps are commonly overlooked in the design of a home, but they add a lot of character and style to a room. So take a look at the shades on each of your lamps. If you have a similar size lamp in another room, swap the shades to give your space a new feel. You can also update a boring old lampshade with a few DIY home projects such as adding fun print or pattern, or a coat of paint.
Tackle those forgotten about cleaning projects
Since you’re spending so much time inside, you’re probably noticing all of the overlooked cleaning projects around the house. If you tackle them now, you’ll be rewarded with a living space that feels brighter and refreshed.
13. Restore rugs and carpets
By now, you’ve probably noticed that your carpets and rugs might not be in the same state they were when you moved in or had them replaced. Maybe you don’t even remember the last time they were properly cleaned. Even if you can’t hire a professional to clean your carpets, you can likely rent a carpet cleaner from your local hardware store or carpet cleaning company.
14. Clean under your bed
When was the last time you looked, let alone cleaned under your bed? This is one of those DIY home projects that everyone needs to tackle. The space under your bed is a breeding ground for everything from dust to forgotten items. If you use the space under your bed for storage, like seasonal clothes or extra bedding, make sure you’ve stored those items in vacuum-sealed bags to prevent moisture and mold buildup. Bed skirts also collect dust so throw those in the wash while you’re busy vacuuming underneath.
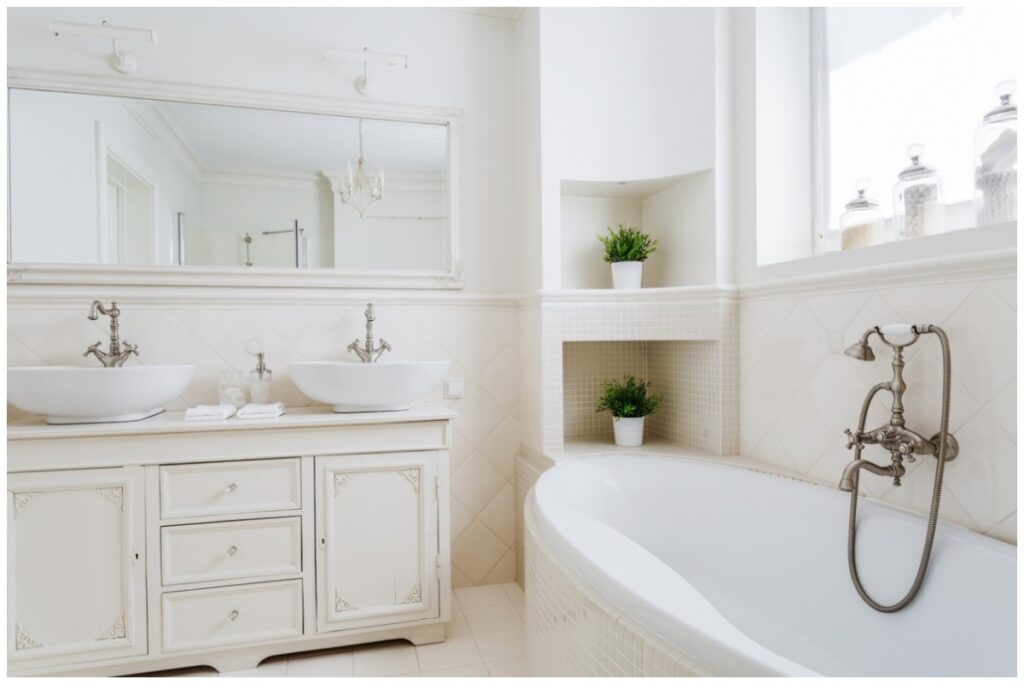
15. Refresh tile grout
Refresh your entire bathroom by cleaning and brightening your tile grout. Cleaning grout requires two things: a grout brush or sponge and a suitable cleaner. While there are plenty of store-bought grout cleaners available, it is just as easy to do this with ingredients you already have on hand, such as vinegar and baking soda.
16. Pressure wash your home’s exterior
Get some fresh air and restore your home to its former beauty by pressure washing the exterior of your house and hardscape areas. You can even bring back to life patio furniture and cushions. Plus, if areas like your Stamped concrete patio look great, you’ll be even more enthusiastic to welcome back people into your home when it’s safe to do so, knowing that it looks smart on the outside. If your exterior is looking a little worn, a pressure washer may not be the answer to restoring it to its former glory, it may be wise to look into having the outside re-done with stucco contractors in Colorado Springs (or wherever you are) taking a look at it and seeing how they can upgrade your exterior.
17. Deep clean the refrigerator
With the extra groceries you’ve probably bought lately, it’s time for a refrigerator clean. First things first, throw out any leftover takeout or expired items. When cleaning your refrigerator, use a surface-safe all-purpose cleaner for the exterior and warmer soapy water for the interior. Be sure to wipe down surfaces before putting your items back inside. Keeping similar items grouped together when refilling your fridge will make finding your favorite condiment or coffee creamer easier to find.
Rethink your wall design
Redoing your wall design is a fast way to transform the look of your living room, bedroom, or really any space in your house.
18. Rearrange or hang up a gallery wall
If you’ve always wanted to try to create the perfect gallery wall, this is the time to go for it. If you already have one, change it up to revive the space. Try pieces here and there: a new mix-up might surprise you and showcase your photos and art in an entirely new light.
19. Use empty frames
Go through the house, pull out any empty frames and put them to good use. Dust off those old photographs and display them proudly or find some printable art online. Hang your frames throughout your home or place them on tables, dressers, and desks.
20. Put old fabric swatches to use
When we think of fabric, we usually think of curtains, linens, or pillows, but there are plenty of DIY home projects you can do to turn a basic piece of fabric into a statement piece of wall art. So dig up any fabric swatches that you have laying around the house and put them to use. You can wrap the fabric around a canvas, hang it in a frame, and much more, letting your creativity soar.
A rug is one of the
staple decorations that can be found inside a house. That’s not surprising
since it adds depth, style, and warmth if placed properly in a given room.
It’s also quite durable.
Inexpensive ones would usually last around one to five years, while the highest
quality rugs have a lifespan of up to 25 years. That is, of course, if the
owner takes care of the rug.
Although rug maintenance can be simple, a lot of people usually forgo it due to misconceptions
surrounding the practice. More often than not, it only takes avoiding these
seven common habits that are detrimental to your rugs:
1. Using Water to Clean Stains
When you spill something
on your rug, do not attempt to clean it with water right away as it may worsen
the existing problem. A stain like an oil-based ink or nail polish will
permanently set on the fibers if you apply water on it.
Instead of applying
water, try to dab the stain with a clean white towel to dry it as this will
prevent further damage. Moreover, do not rub at the spot as you’ll only spread
the stain.
In some cases, you can
opt to use seltzer water to keep the area moist until
professional help arrives. An expert rug cleaning service will solve your
problem quickly while ensuring that the quality of your rug remains in top
condition.
2. Failing to Conduct Proper
Research
With the internet on our
fingertips, people would often turn to the web to look for tips on how to clean
their rugs. But some of the tips advised may do more harm than good.
To avoid this, try to
verify the information on credible sites to see if the solution works well with
the material of the rug. Cleaning companies would usually use a variety of
cleaning solutions to clean a stain depending on the fiber of a rug. Using
vinegar, ammonia, dish soap, or hydrogen peroxide is an option depending on
your predicament. But again, do your research first before applying anything.
3. Too Long Between Cleaning
Similar to all areas in
your house, your rug should be regularly cleaned as dirt and debris will
accumulate on it due to foot traffic and other factors. Generally speaking, you
should vacuum your rug at least once a week. If you’re too busy or lazy to handle it yourself, Rug Cleaning Melbourne or other local services may be able to assist you.
Due to the significant contribution that fur makes to rug debris, pet owners should increase that frequency to two or three times per week. In areas with high traffic, vacuum both vertically and horizontally, going over the entire surface at least four times and at least twice. As a stopgap, pet owners can look for memory foam beds for dogsthat would likely tempt their dogs to sit on their own bed rather than relaxing on the rug, eventually reducing the amount of fur that accumulates on the carpet.
(Image
4. Addressing Spills Late
When something gets
spilled on your rug, try to blot it out immediately with a paper towel to avoid
it from spreading and setting in. This is doubly true when the stain is pet
urine.
Don’t rub or scrub at
it. Instead, dab the urine out until the area is no longer moist. You can then use an enzyme-based solution that’s
specifically designed for this type of stain and one that is suitable for your
rug’s material. Alternatively, you can mist on an ammonia solution followed by
a mix of detergent and warm water.
5. Using Colored Cloth
Do not attempt to clean
a stain with a colored cloth as the dye might bleed onto your rug, further
complicating the problem. Always use a white towel or paper towel to blot out
the stain.
6. Too Much Solution
When applying a chosen
solution, do not over-moisten the rug as it may cause rug discoloration. Simply
mist the area and blot it out with a colorless cloth.
Repeat the process until
the stain is removed. Also, make sure that no moisture is left on the rug once
you’re done.
7. Too Much Exposure to UV Light
Placing your rug on
areas that are constantly baked by the sun will cause discoloration and will turn the fibers brittle. To avoid this, try to be mindful of where UV light is streaming into your house and the pattern it follows when the season changes. Adding blinds and curtains to your windows and glass sliding doors would also do wonders when it comes to protecting your rugs. You can even look for custom curtains that can match your interior theme, wall color, and furniture. Moreover, there could be various options available in the market, including Motorized Blinds, wooden shades, shutters, solar shades, and more. So, you can do your research before opting for one that can help you manage the amount of sunlight that enters indoors.
Discipline and Basic Knowledge
Taking care of your rugs isn’t a complicated process, although it does involve a bit of basic knowledge and discipline on your end. Now, you can acquire the basic knowledge by asking around or reading up on blog posts (using your earthlink internet plans). But discipline is something that you yourself have to inculcate in your habit. For instance, you can learn from the Web that you should remove your shoes before entering your abode as it will ensure that minimal dirt gets in. But extending this practice when guests come over needs discipline.
Training your pets is
also another way to ensure that they don’t have an accident involving your
carpet. And if they did, don’t let the stain sit for too long.
And of course, having a
professional clean your rugs from time to time will ensure that they last long.
Diligent research is also needed on this front, especially if there’s a lot of
competition in your local area. Try to find a company that friends and family
can vouch for so you can ensure the quality of their output.
Windows are an integral part of the design of any residential building, as well as commercial offices. The primary purpose of windows is to allow the bright daylight to enter indoors and instantly freshen up your day. It is important to maintain the windows to ensure their optimum utilization. Dirty windows are not a pleasant sight and they have an adverse effect. Keeping the windows clean is highly beneficial; besides the aesthetic value, it also adds to the hygiene factor. This article lists several tips that will help you to perform window cleaning in a more precise manner and the benefits of considering the alternative of leaving the hard task of cleaning windows to professional cleaning in Virginia.
The key to cleaning your windows like a professional is first to make sure you have the right equipment. Making some effort to prepare to start with can be highly beneficial. Once you do have the right equipment, it is a good idea to assess the dangers of cleaning the windows, depending on where it is. This is of more importance if the windows are located in a high-rise building.
Finding out different types of windows present in your city and understanding their design could help you in taking the best tools for cleaning along with you. A list of buildings can be made based on their windows’ type, like double pane, single pane, and Secondary Glazing Listed Buildings (you might need consent for working in listed buildings). After making the list, it might be important to know how to start the cleaning process. As an example, you can start by cleaning the space beneath the windows to make sure nothing is in the way and that no damage can come to the surface or anything below the window. The equipment you select to clean the window should be down with some thought and after considering all factors like the height of the window, the method in which you will access it, etc. It is a good practice to remove the dust with the help of a vacuum before washing it with water. It is best to take a big bottle of liquid that is easy to spray and wipe. One should be prepared for unexpected obstacles. There are many types of cleaning challenges; for example, for droppings by birds and insects, it will be necessary to make some effort to wipe it once the dropping is cleared. It is necessary to be careful when removing tough stains since it can easily scratch the glass
Why is it best to opt for professional cleaning services?
A lot of people try washing windows on their own. It is quite strenuous and can take its toll on the muscles, not to mention the fact that it can leave one mentally drained. It may seem like a straight forward task. However, it is, in fact, a long, difficult task that leaves one in sweat and dirt once done. Besides having to make a lot of effort, there is also some level of risk involved when cleaning windows or other parts of house exterior, especially when it is at a great height. To top it all, this type of cleaning will be necessary regularly for it to be effective. Not just windows, cleaning other parts of the house like a deck, roof, stone walls, etc., can be dangerous as well. Therefore, hiring a licensed professional for power washing apex (or in other locations) can be a beneficial service. Power washing can easily wash away dust, grime, algae, and molds through high-pressure water blasting without causing any damage to the house.
A professional window cleaner (such as those who specialize in office window cleaning london, for example) knows the ins and outs of the cleaning process, and they are experts at doing it. Keeping the windows clean is an excellent preventive measure against damage; it protects air quality and also helps maintain the energy efficiency of your home. Leaving this task to the professionals would mean you can save a lot of time and spend it on many other productive tasks. At the same time, hiring professionals for power washing in Northern Virginia means you can be sure they are 100% clean.